You can use checkra1n tethered jailbreak for iOS 13+
If you wanna read the guide in English, just click on the selector right up here
Introduzione
Ecco una guida completa su come eseguire il jailbreak da iOS 11 fino a 12.4. Tutte le versioni intermedie sono compatibili, tranne 12.3.x ed alcune configurazioni. Questo perché l’exploit sock_puppet di Ned Williamson - precedentemente patchato da Apple su 12.3 e 12.3.1 - è stranamente tornato funzionante su 12.4 senza alcuna spiegazione. Questa guida è specifica a queste versioni di iOS. Tutte le versioni precedenti sono jailbreakable, ma le versioni successive devono ancora essere exploitate. Al momento, i device con Apple A12 (iPhone XS, XS Max, XR and iPad Pro 2018) sono parzialmente exploitabili a causa di alcune protezioni di sicurezza di Apple come la PAC, o Pointer Autenthication. Se vuoi saperne di più, probabilmente scriverò un post più specifico in futuro. Ma se sei qui per questa guida, probabilmente rimarrai qui.
Requisiti
Per eseguire il jailbreak hai bisogno di pochi ma importanti requisiti:
- Un Apple iPhone (5S o successivo), iPad (Air/Mini 2 o successivo) or iPod (6 generazione o seguente)
- Una versione di iOS successiva a 11, ma inferiore a 12.4 che non sia 12.3.x - è fondamentale
- Accesso a internet
- Tempo, pazienza e conoscenze informatiche basilari
Preparazione
- Prima di tutto ricorda che (nonostante sia davvero stabile) questa è una versione beta, usala con cautela o aspetta per la versione finale se sei troppo inesperto
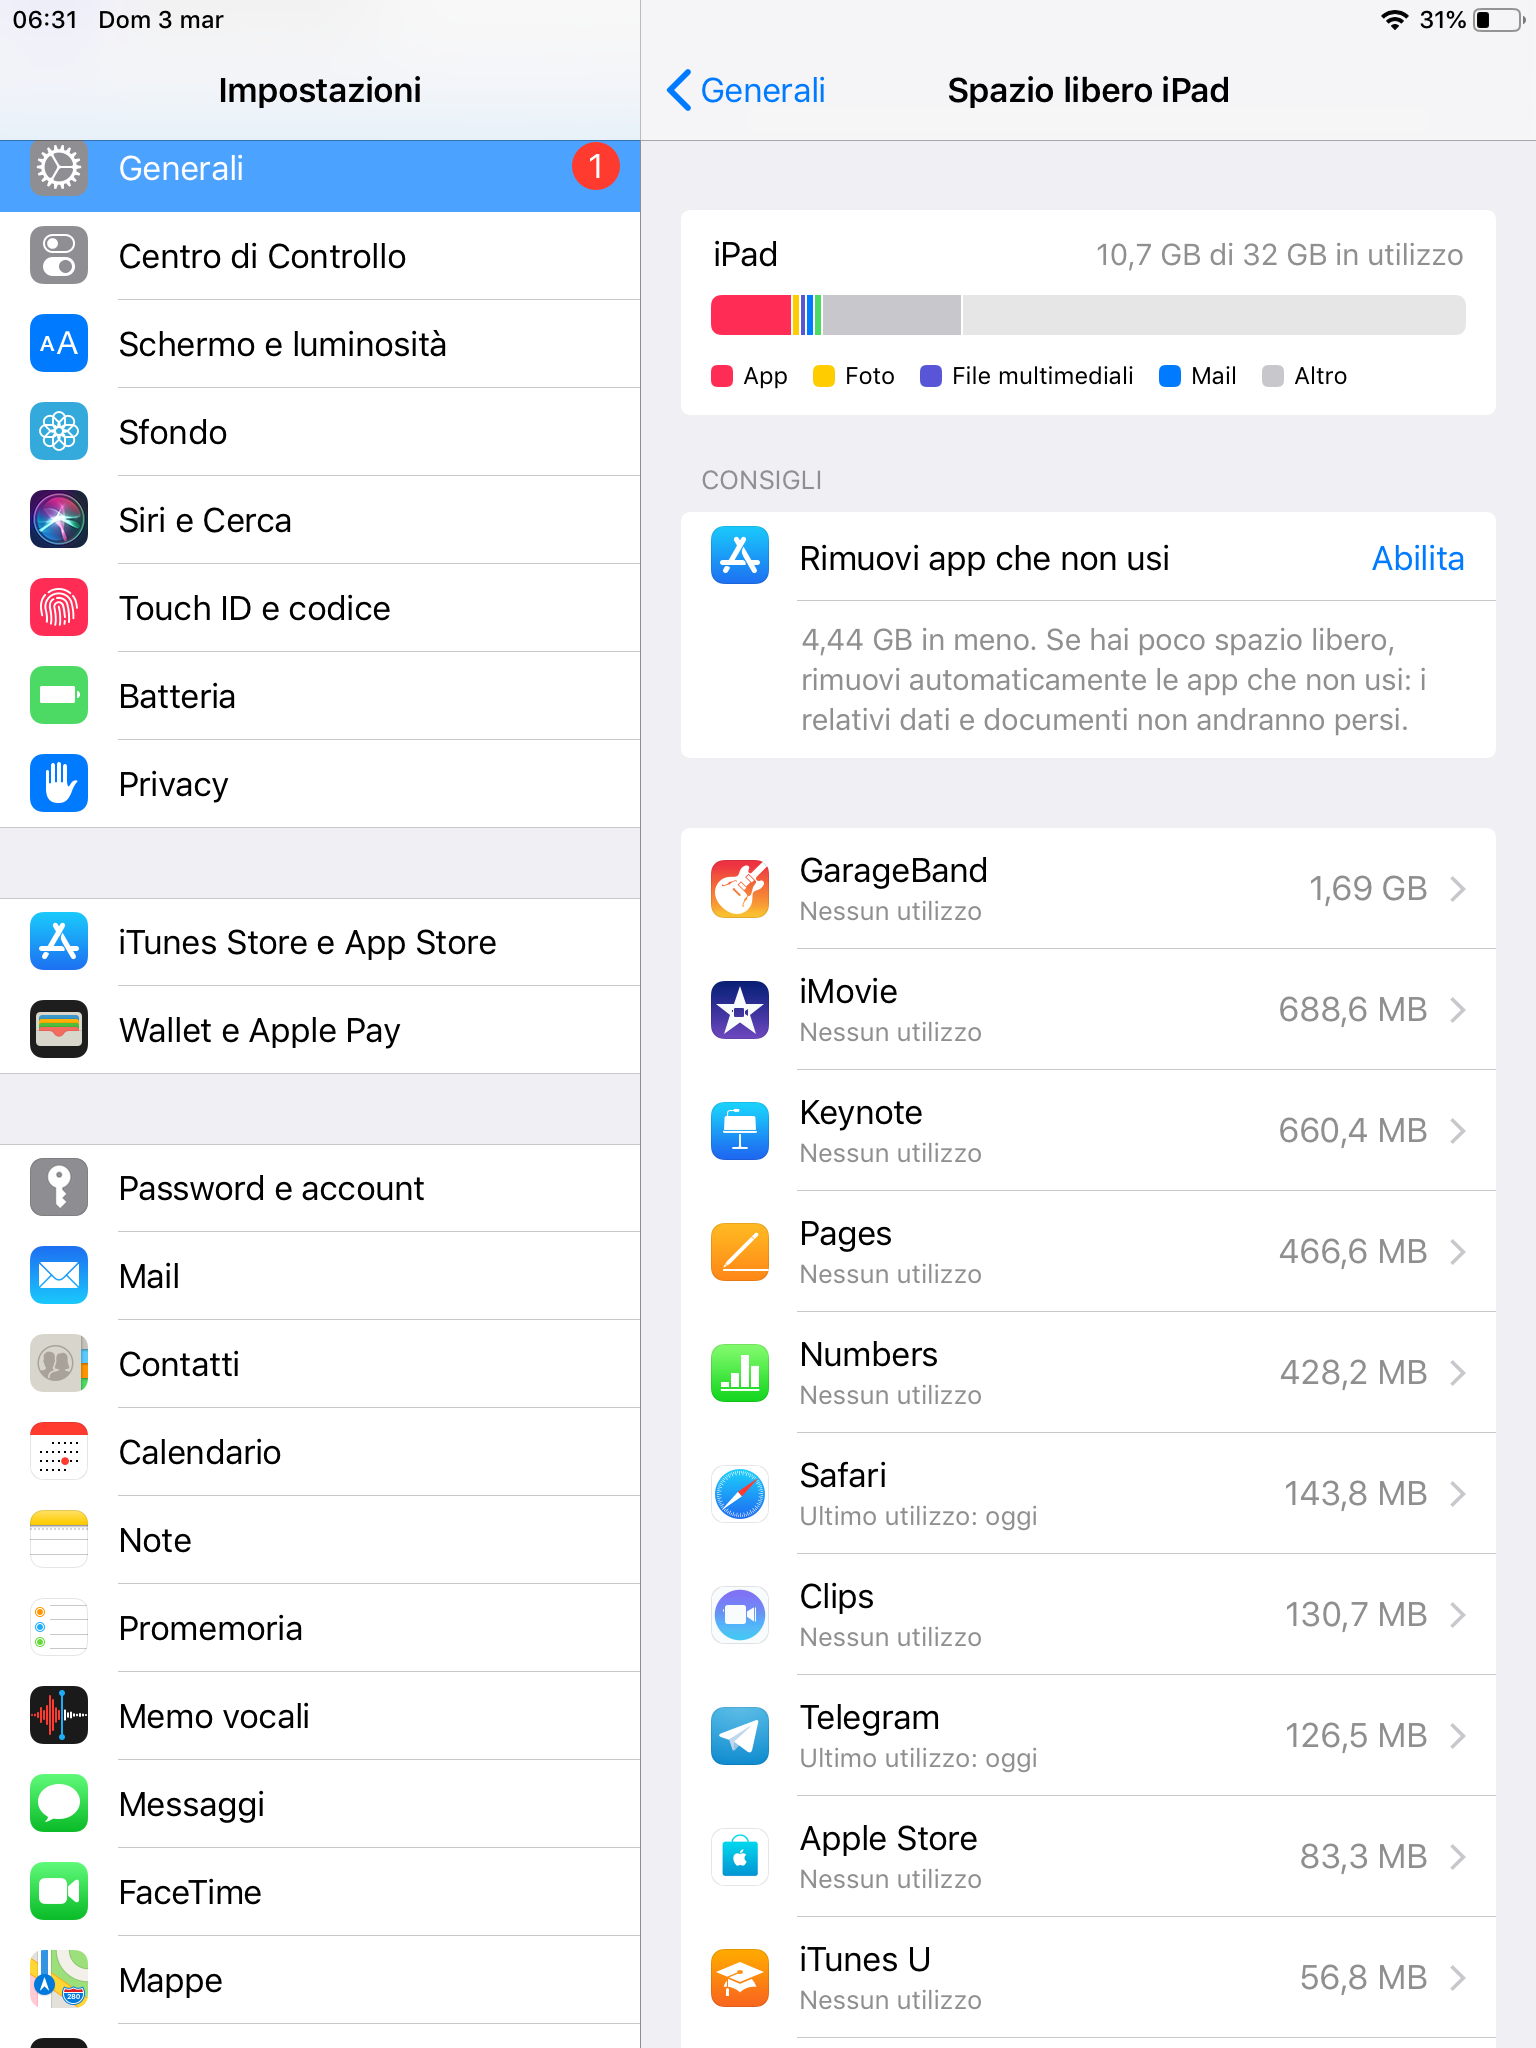
- Assicurati che su Impostazioni → Generali → Spazio Libero non ci sia alcun aggiornamento OTA (apparirà come iOS 12.x): in caso ce ne sia uno, eliminalo prima di inizia il processo di jailbreaking
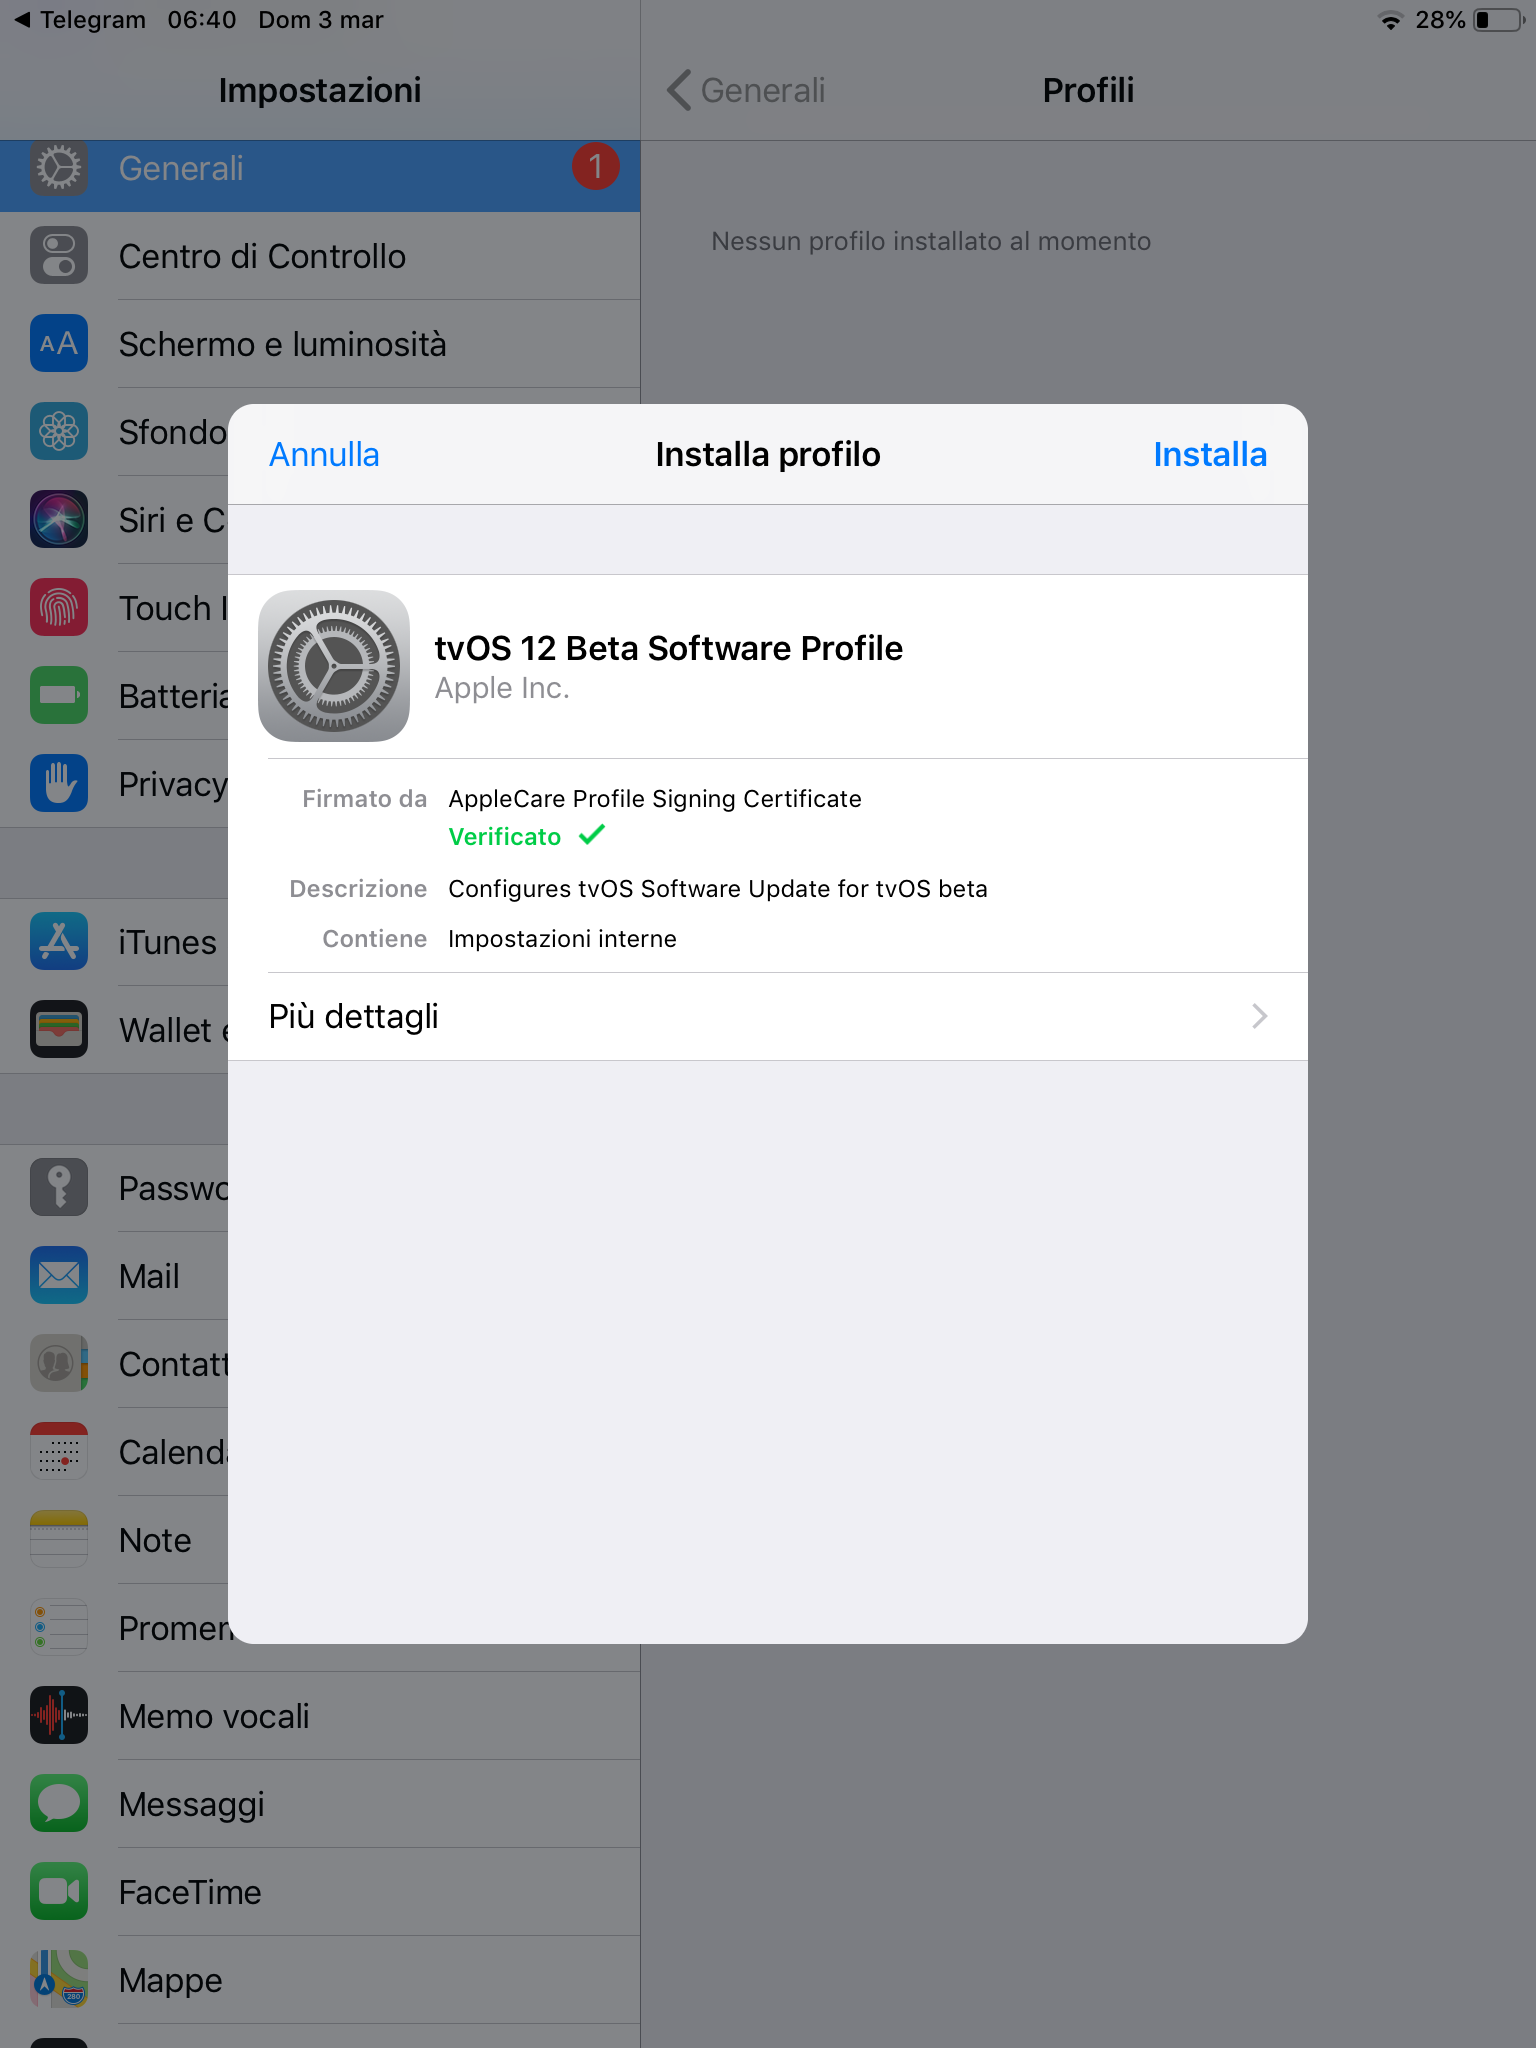
- In modo da bloccare definitivamente gli aggiornamenti OTA installa il profilo tvOS cliccando. Il tuo dispositivo richiederà il tuo codice di sblocco ed in seguito si riavvierà. Appena hai riavviato, gli aggiornamenti spariranno fin quando non rimuoverai il profilo. Nella schermata “aggiornamenti di sistema” otterrai infatti questo errore
- Se hai già usato rootlessJB su iOS 12, disinstallalo cliccando sul tasto “Uninstall” all’interno del tool
Download
Ci sono due modi per installare unc0ver. Puoi installarlo sia da PC tramite un tool chiamato Cydia Impatctor, sia tramite store di terze parti. In questa guida però, illustrerò un metodo ancora più semplice per gli utenti italiani.
@JailbreakItalia
Il gruppo Telegram di Jailbreak Italia offre (oltre ad un incredibile supporto utenti) un bot che permette tramite pochi semplici passi di installare l’ultima versione di unc0ver in maniera completamente gratuita, rapida ed intuitiva.
Scaricate (se non lo avete già fatto - e sarebbe un errore) Telegram. Per i pochi che non dovessero conoscerlo, è l’alternativa open-source, sicura, versatile e leggera a WhatsApp. Telegram permette però - oltre a tantissime altre funzioni davvero innovative - di accedere a gruppi, supergruppi e canali. La community italiana ha infatti scelto il supergruppo Jailbreak Italia come centro di ritrovo e di supporto per gli appassionati del Jailbreak.
Per entrare nel gruppo, basta cliccare qui.
Una volta visionate le regole - ed eventualmente salutare :P - basta scrivere “!uncoverdl” (senza virgolette) ed inviare il messaggio. Un bot vi risponderà automaticamente chiedendo quale versione volete installare. Selezionate unc0ver Beta, visionate le avvertenze e all’apparizione di un popup di conferma per l’installazione, date il consenso.
Prima di aprire l’app avrete bisogno di un’ultima cosa: recatevi su Impostazioni → Generali → Profili, aprite il profilo aziendale che apparirà (usato per firmare l’app) e cliccate su Verifica.
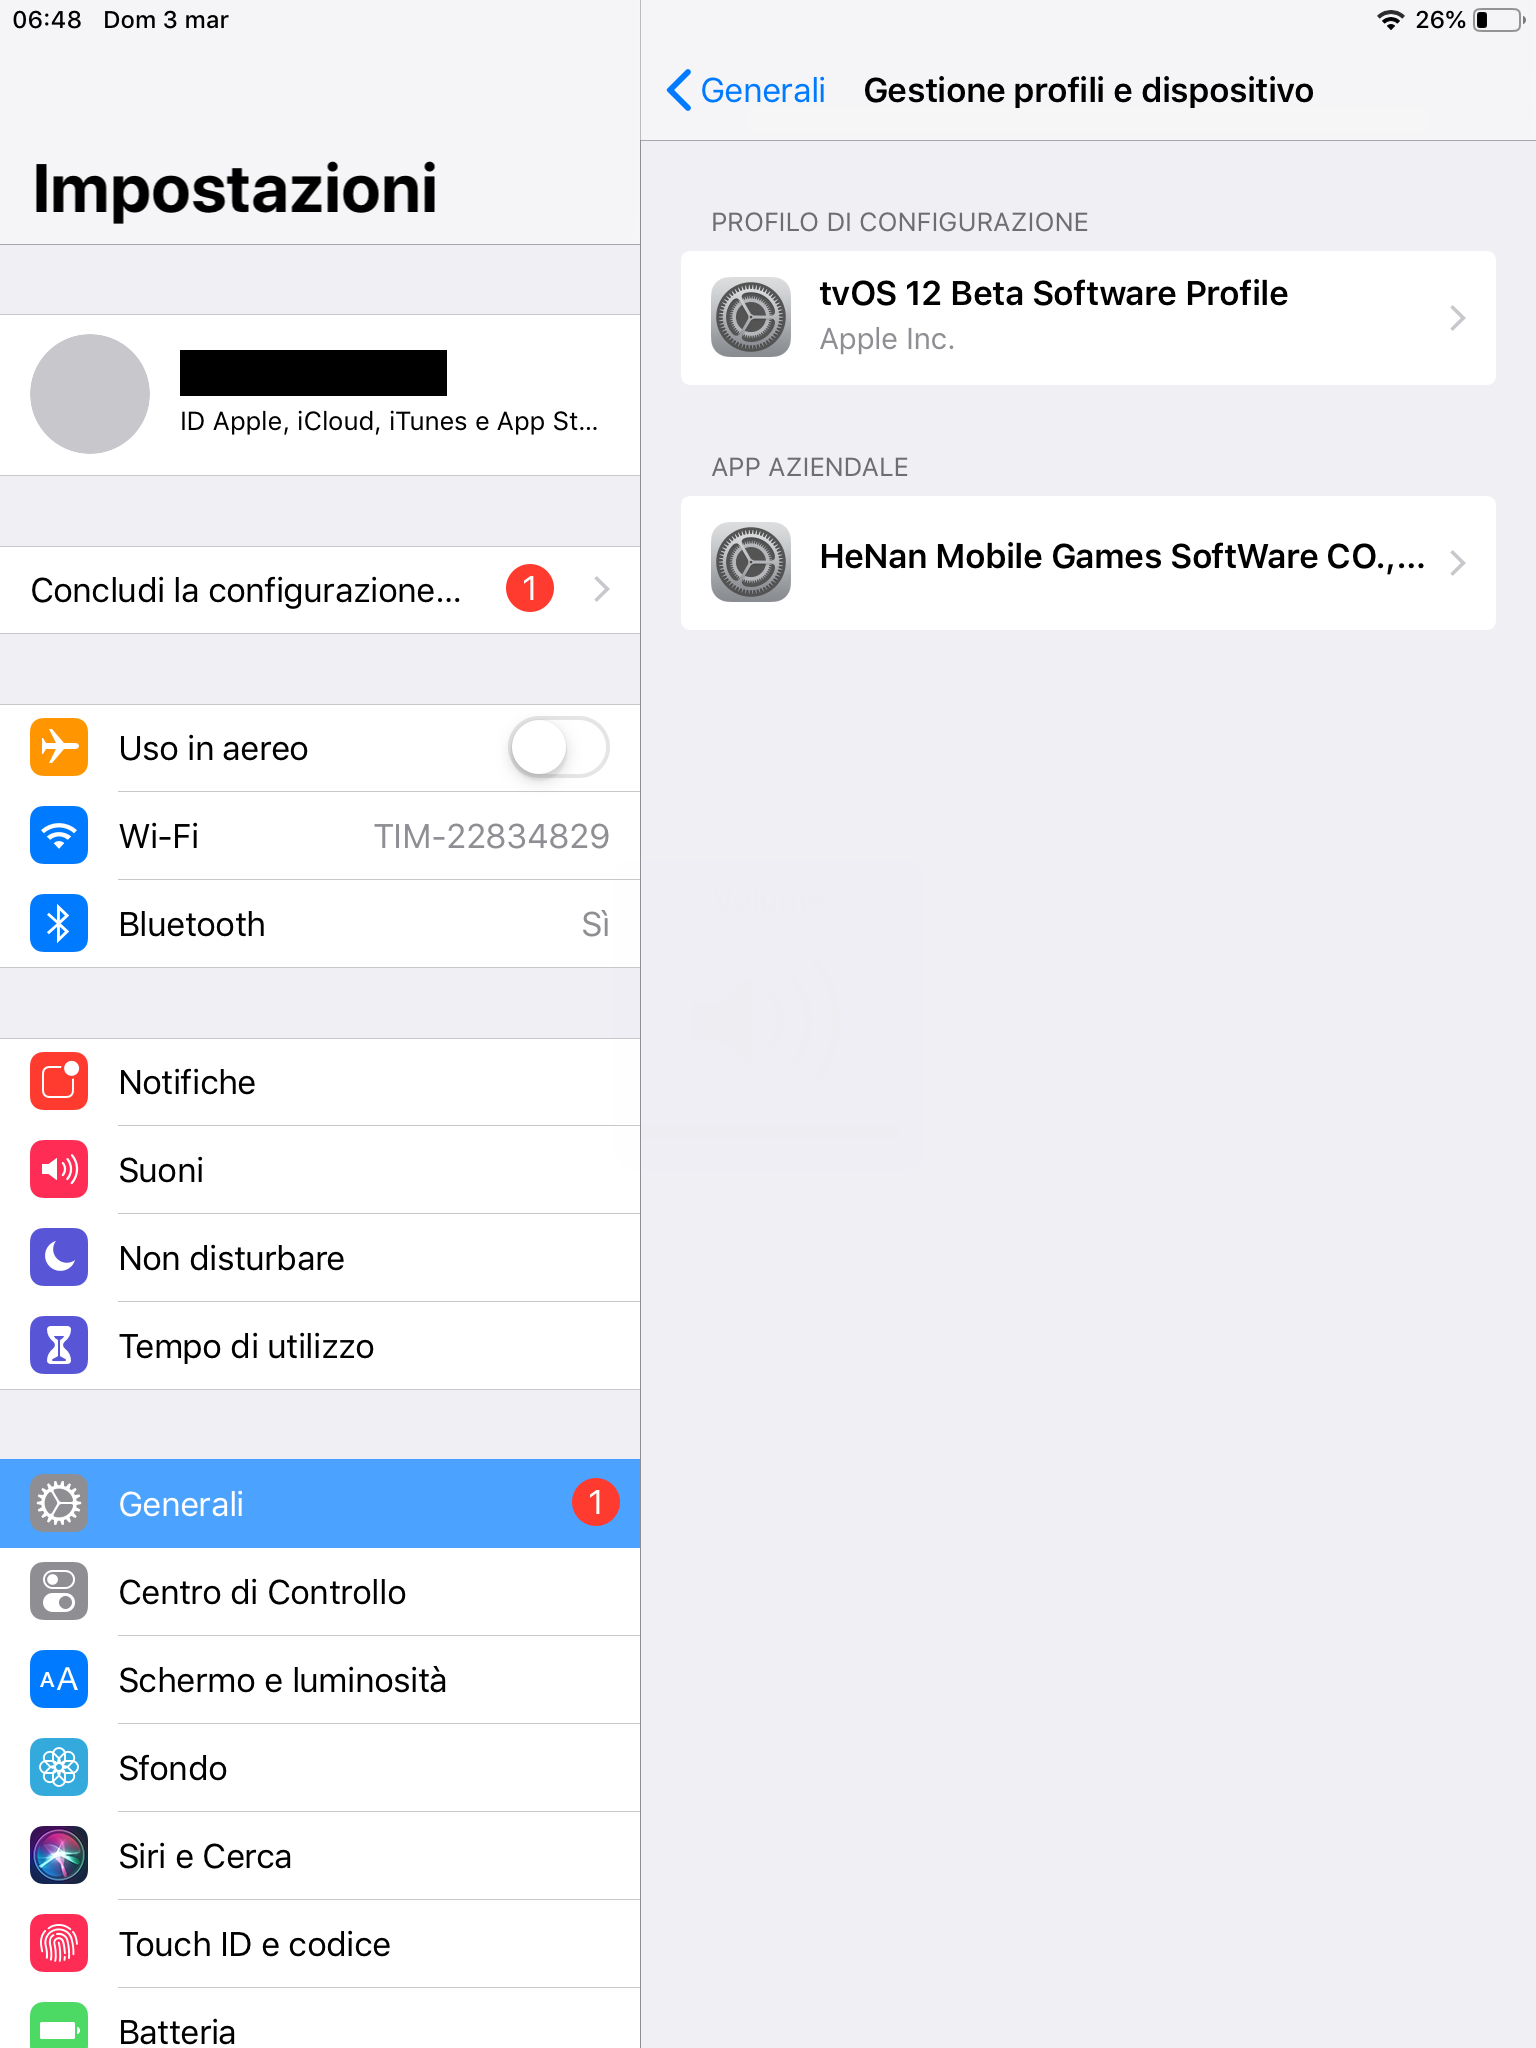
L’app sarà ormai verificata e potrai aprirla.
![]()
Jailbreaking
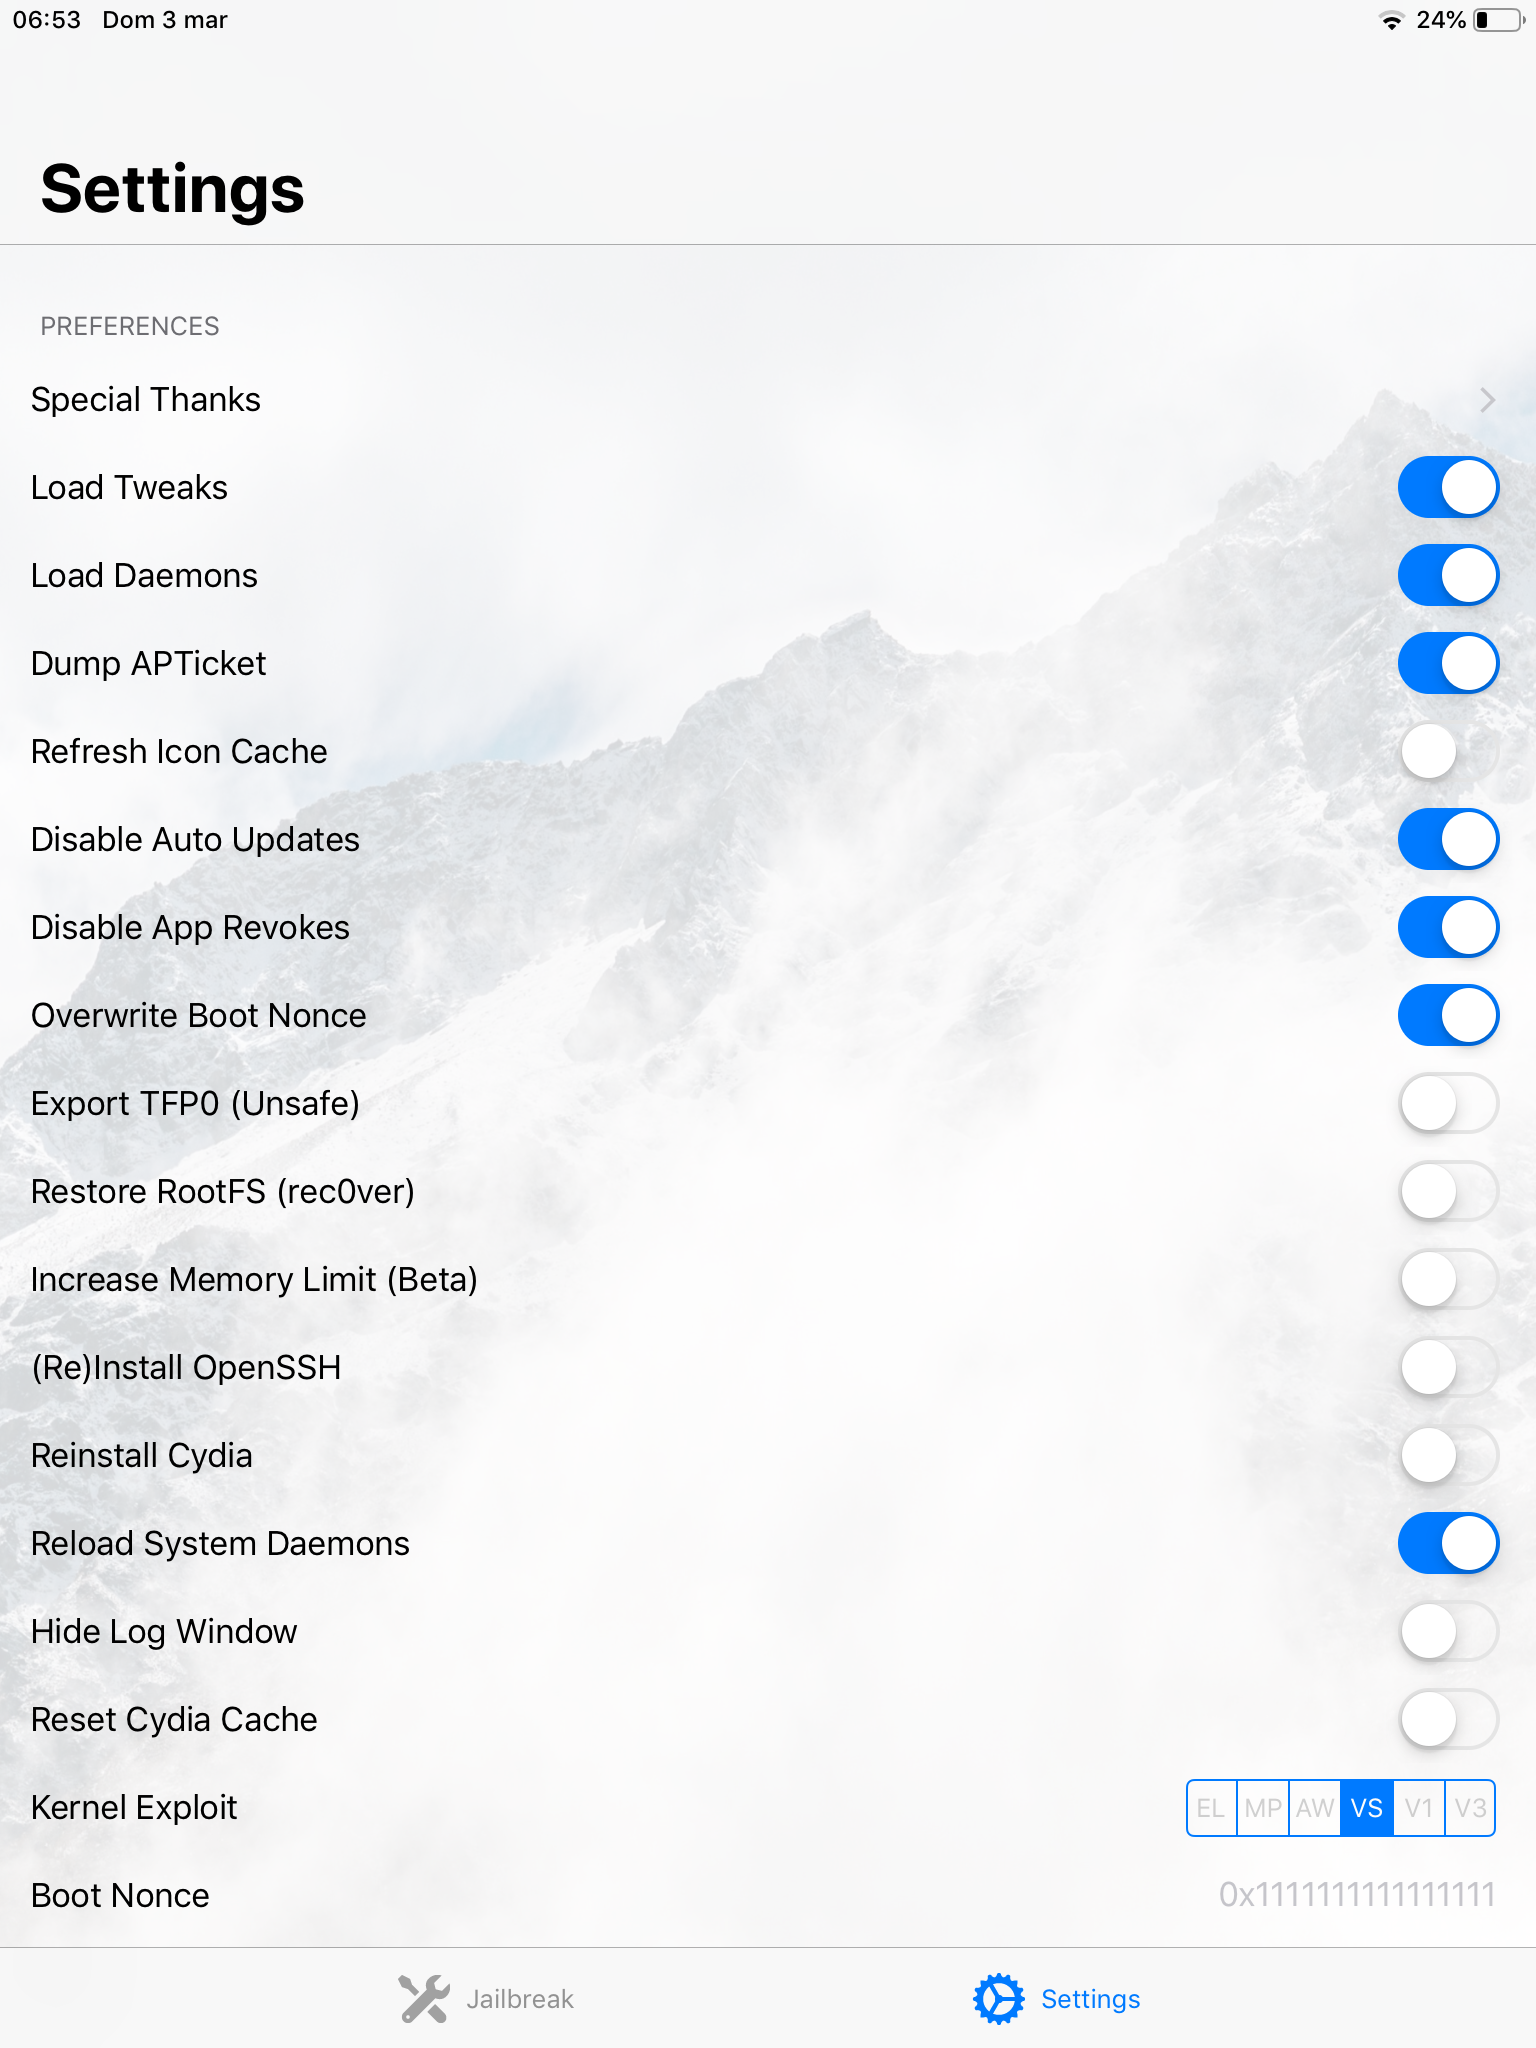
Una volta aperto unc0ver vai nella tab Settings ed assicurati di avere le configurazioni di default. Nel momento in cui sto scrivendo il post, sono queste.
Ok, ora torna alla home screen di unc0ver. Vedrai un grande bottone con su scritto Jailbreak. Quando sei pronto, cliccaci su. Ogni volta che lo farai, il processo terminerà con un riavvio o un respring: ne parlerò in seguito.
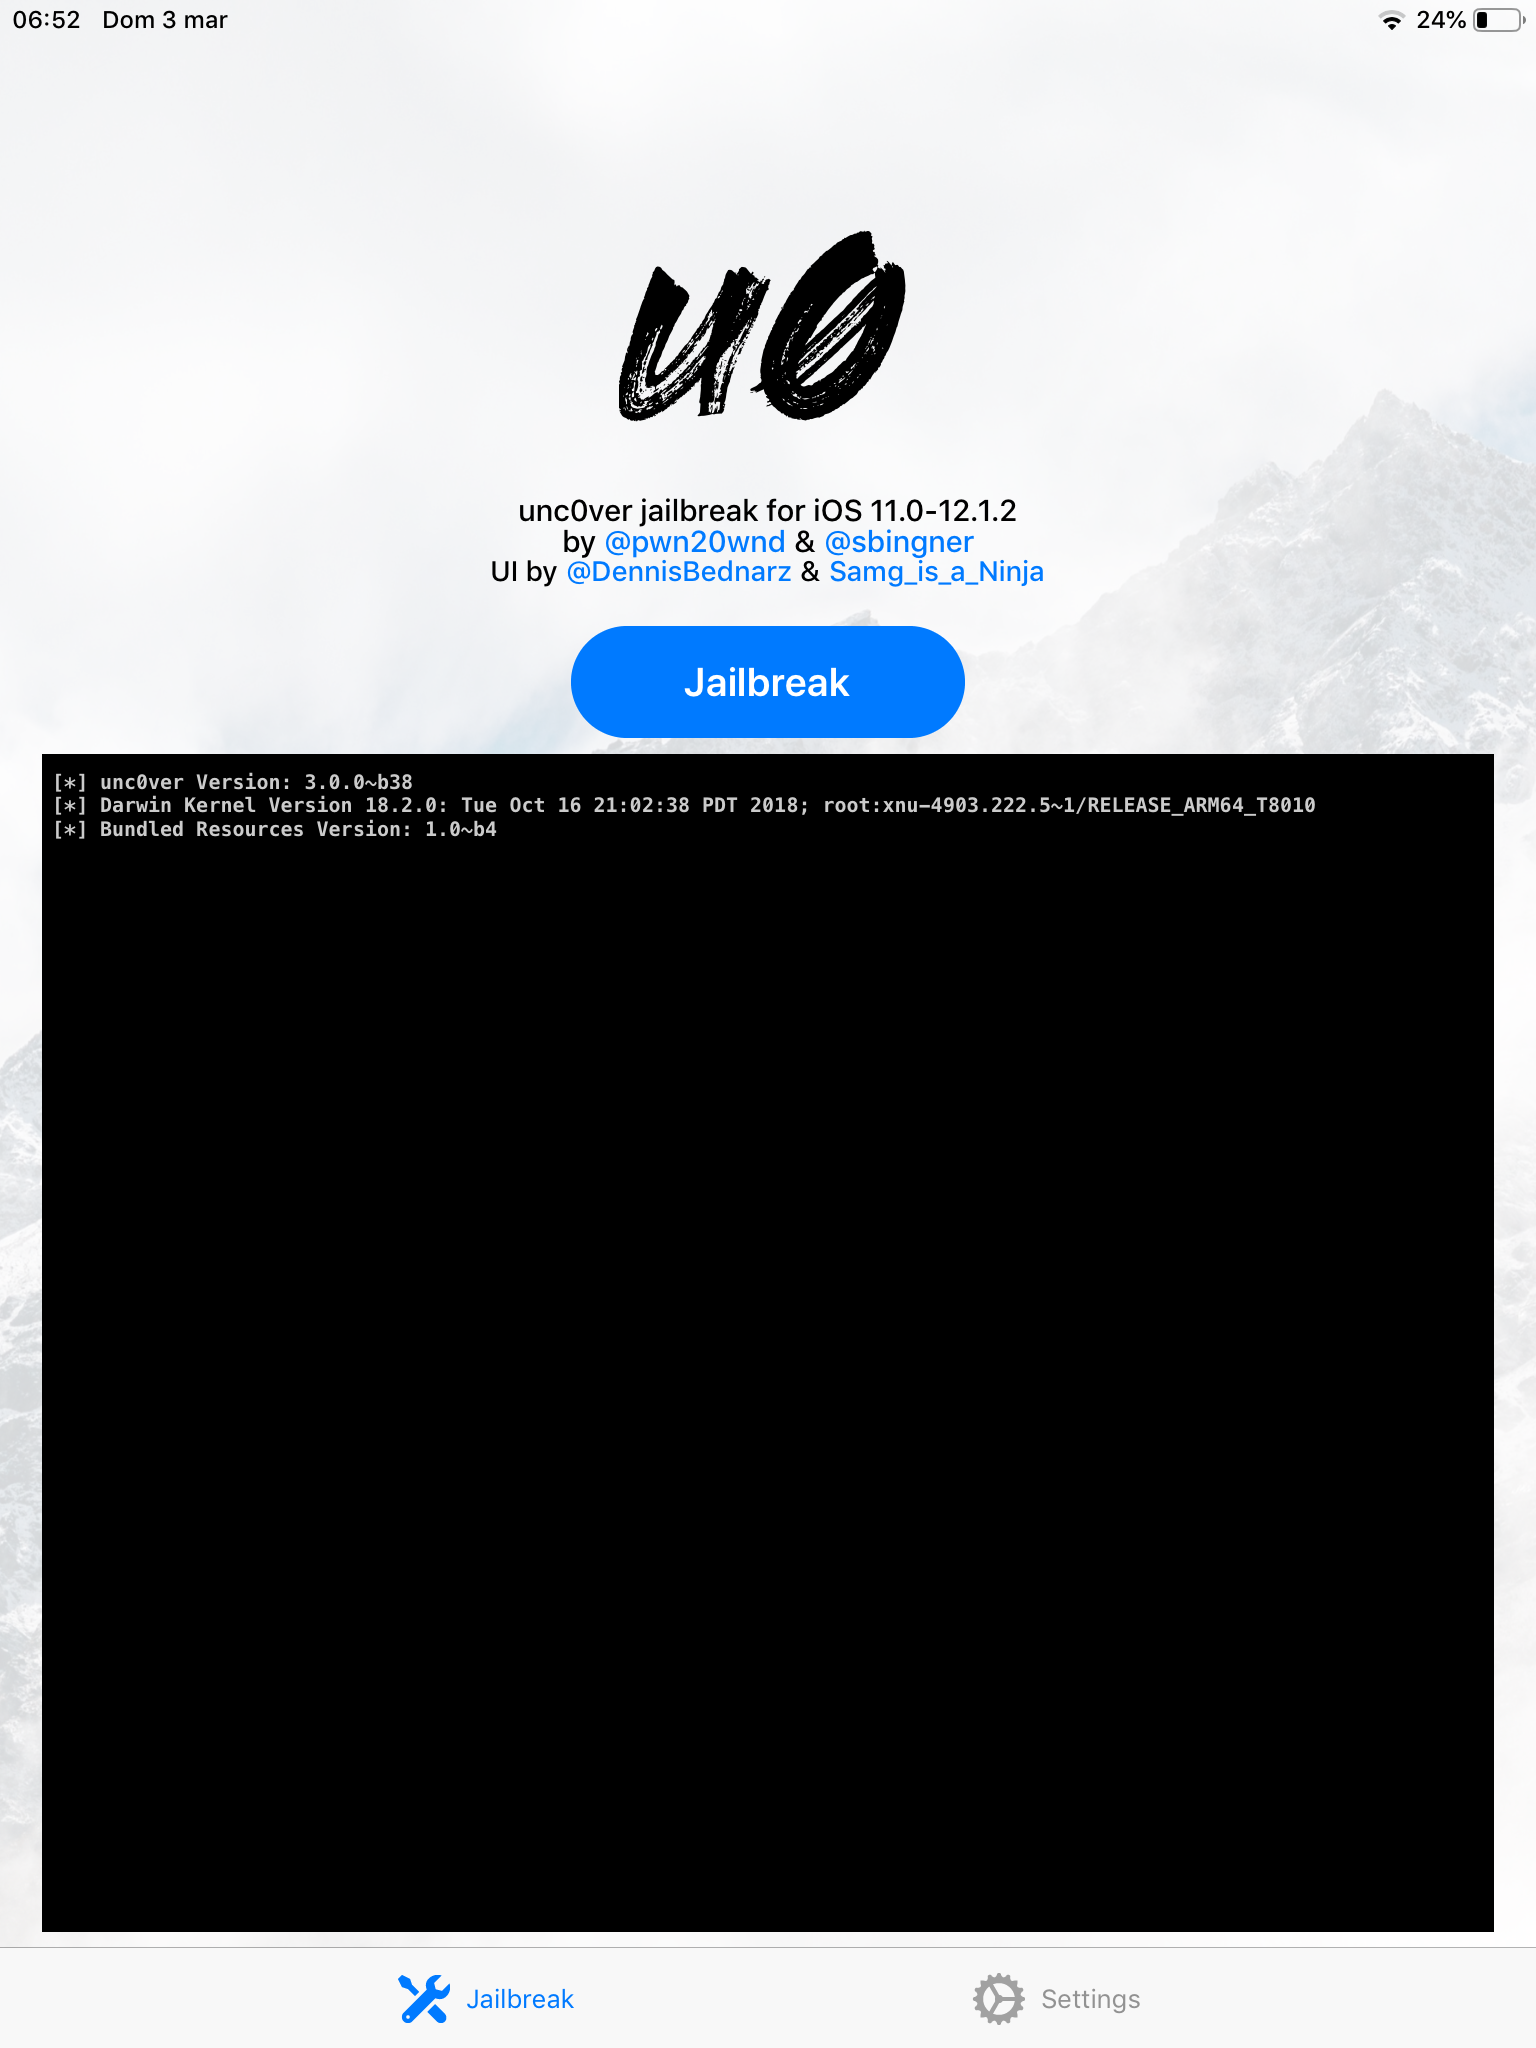
Adesso, cliccalo. Il dispositivo eseguirà l’exploit e se questo andrà a buon fine avrai raggiunto il primo di tre passaggi, lo “snapshot renaming”. Premi OK ed il dispositivo si riavvierà.
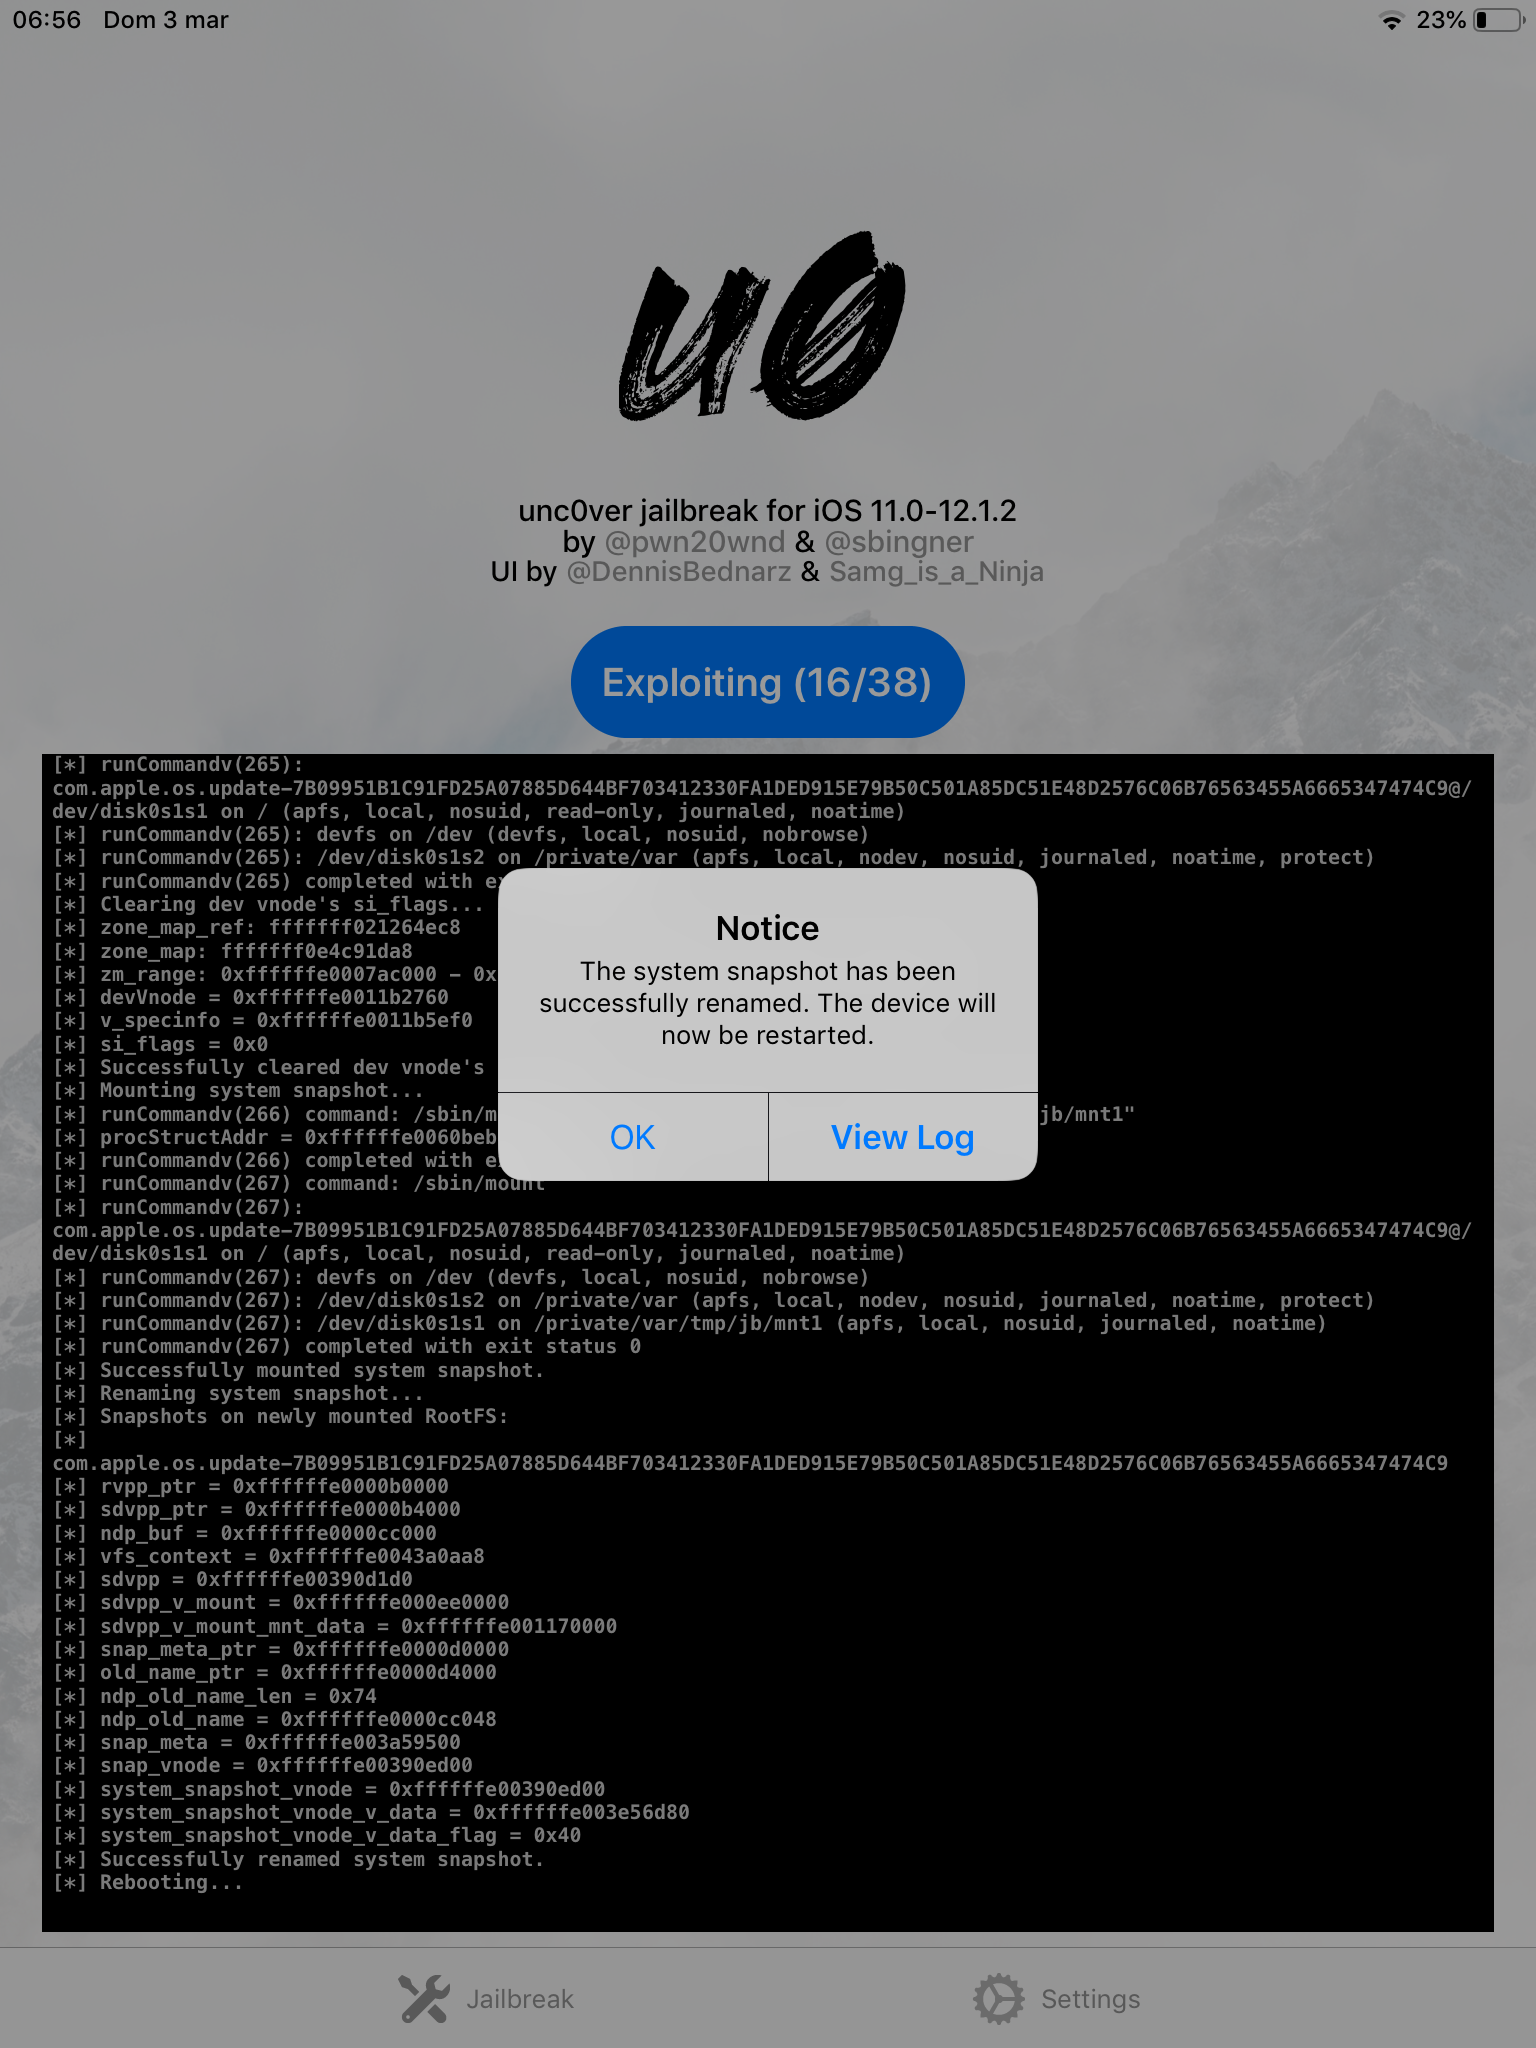
Potrebbe succedere che allo step 2/38 il dispositivo potrebbe andare in panic poiché l’exploit potrebbe fallire ed il dispositivo si riavvierà automaticamente. Non ti preoccupare, può succedere, aspetta che il dispositivo si riavvii, quindi riprova.
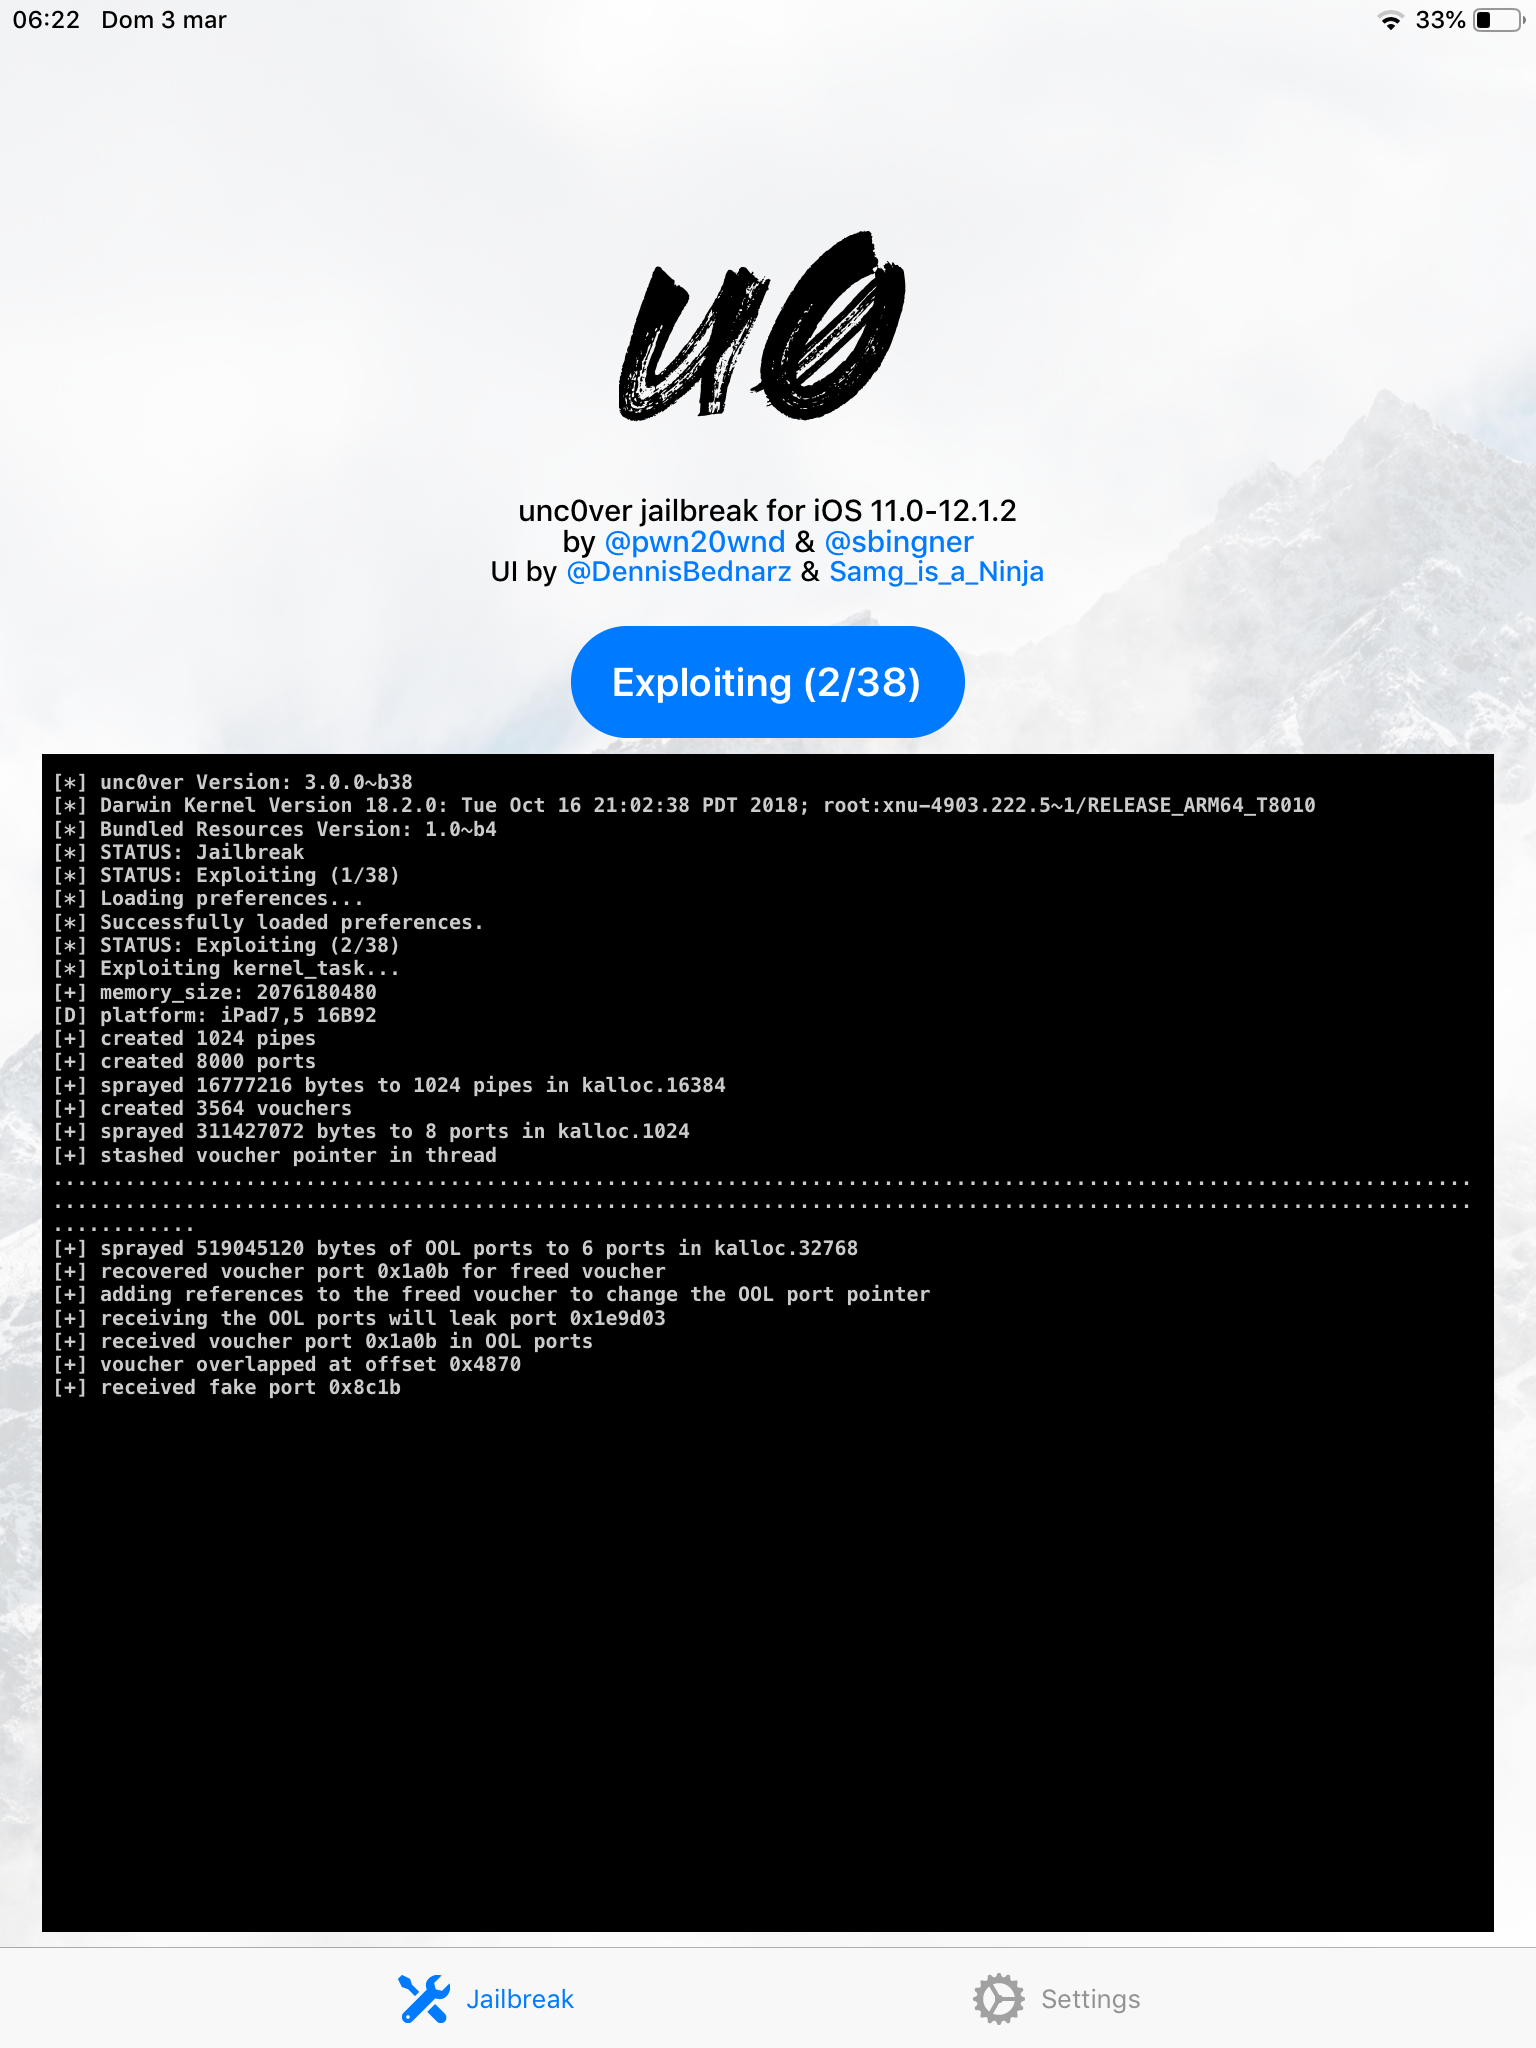
Di nuovo, apri unc0ver e clicca il pulsante Jailbreak. Se tutto va bene, eseguirai la “bootstrap extraction”. Premi OK ed attendi il riavvio.
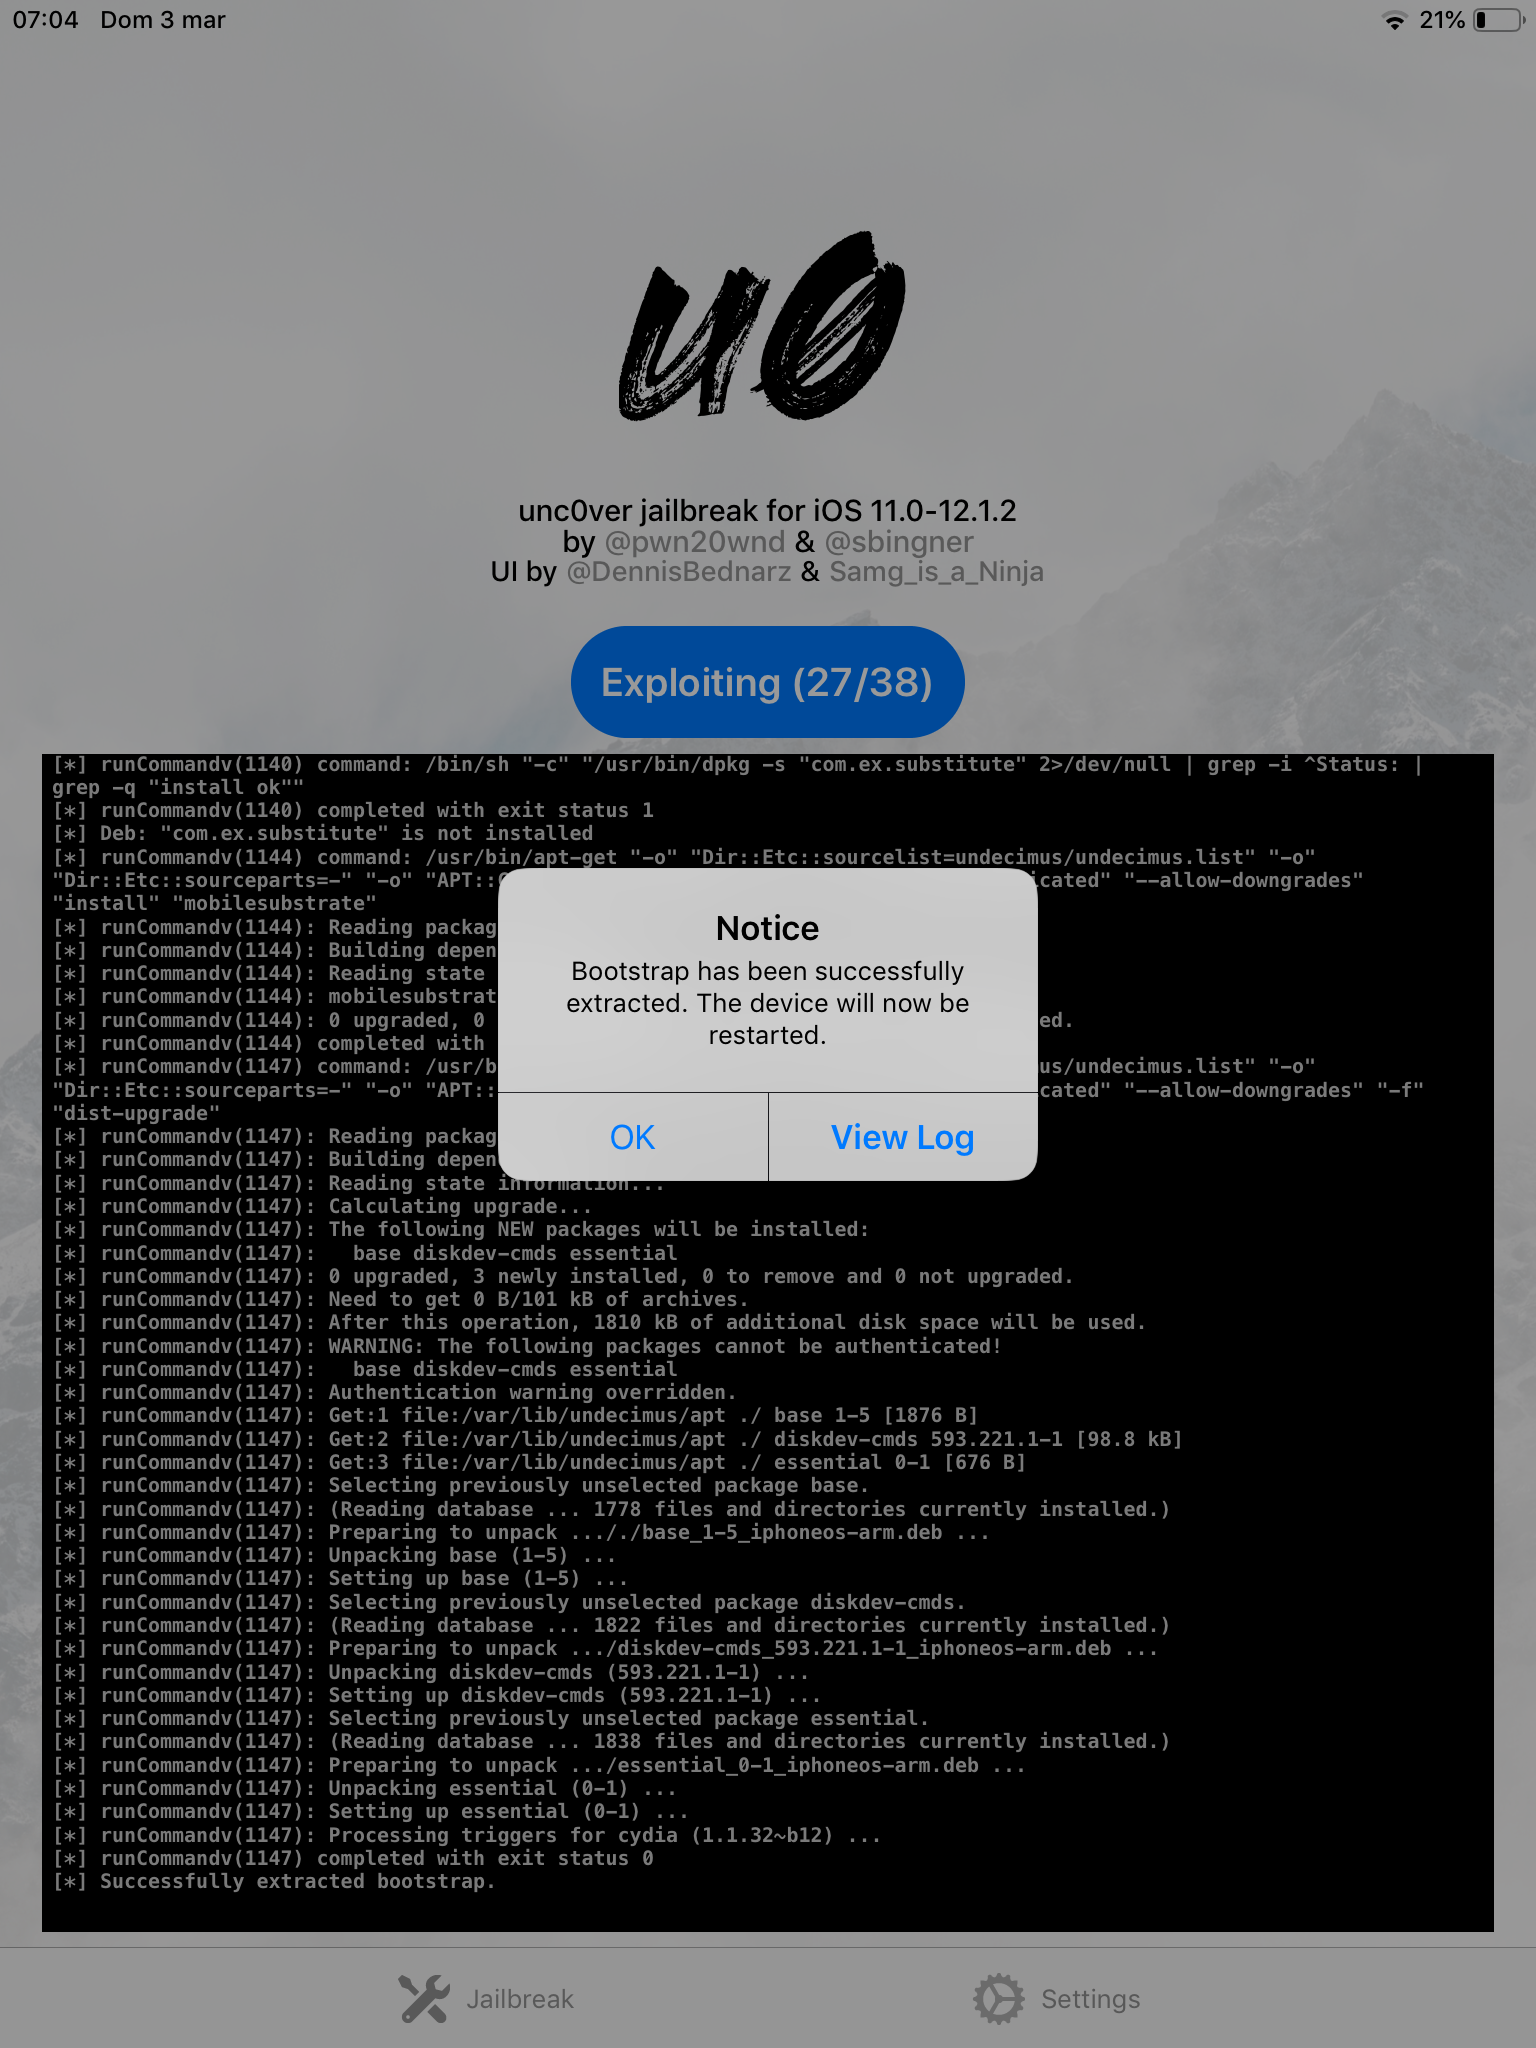
Ora dovrebbe essere l’ultima volta: premi il pulsante Jailbreak. Ad un certo punto il device eseguirà un respring: lo schermo diventerà nero e diminuirà la luminosità, al centro dello schermo apparirà una rotella che gira (come quando il dispositivo si spegne). Attendi che finisca e potrai finalmente vedere installata Cydia!
![]()
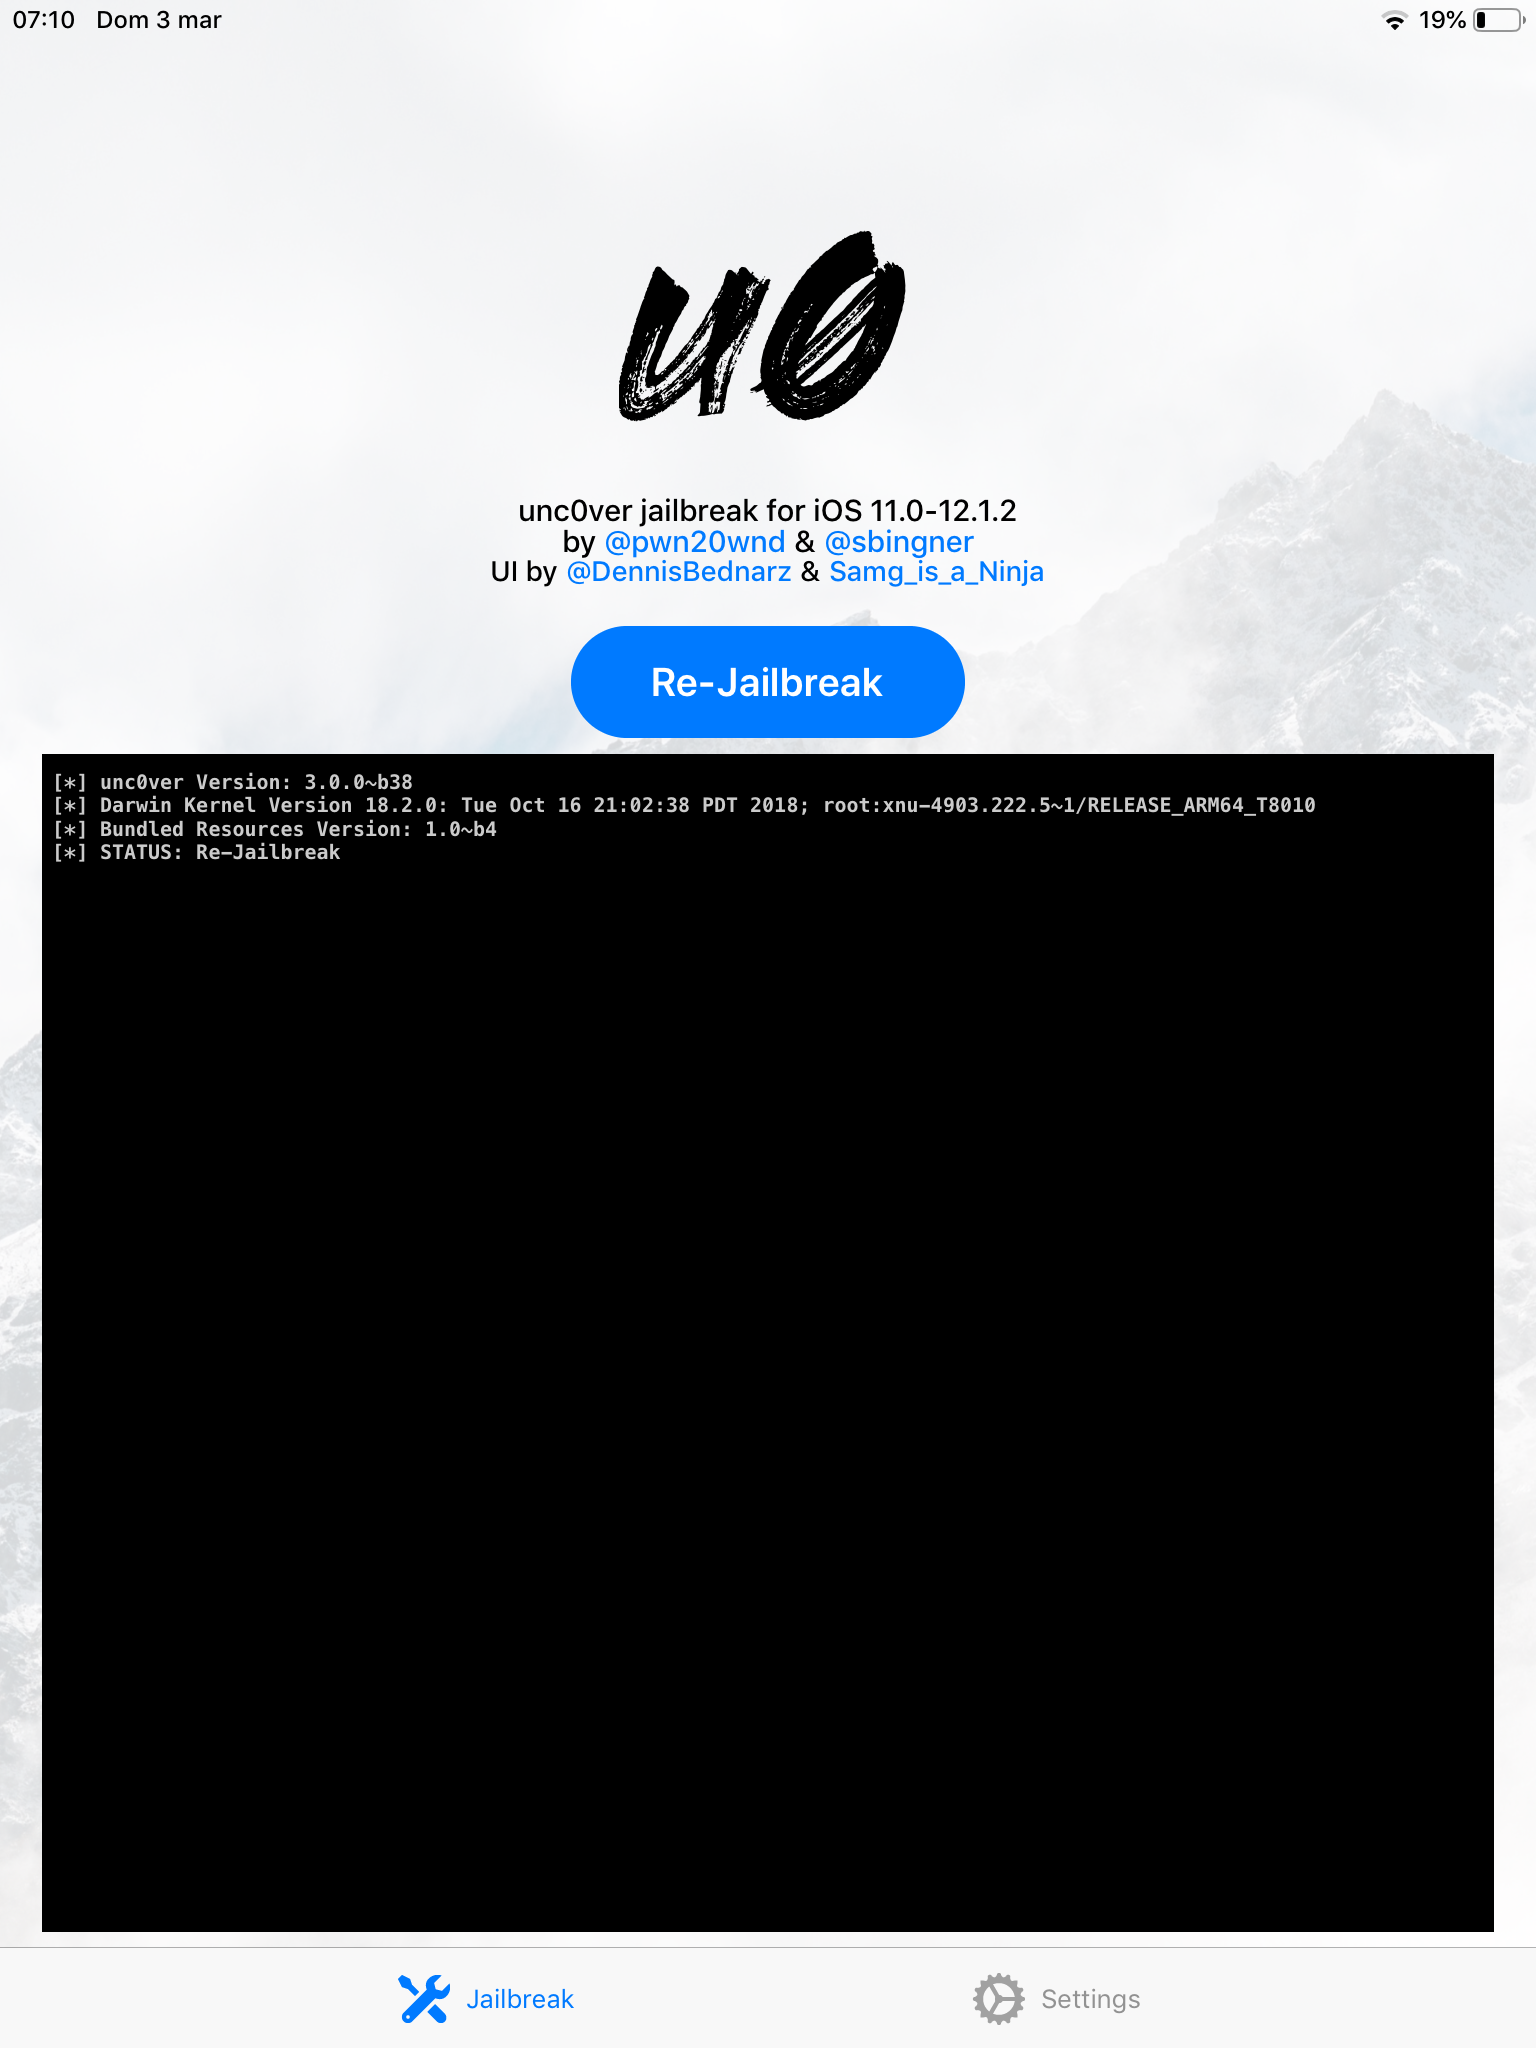
Ora il jailbreak è attivato, ma ricorda che questo è jailbreak è semi-unthetered. Ciò significa che ogni qualvolta riavvierai il device, questo tornerà in modalità jailed. Ma non è un grosso problema: apri unc0ver, premi il pulsante Jailbreak e dopo un respring il dispositivo si riavvierà nuovamente.
Ricorda di aggiornare l’app di unc0ver dal gruppo Telegram ogni tanto, in modo da avere l’esperienza più stabile possibile! Quando avrai aggiornato l’app, premi il pulsante Re-Jailbreak.
Configurare Cydia
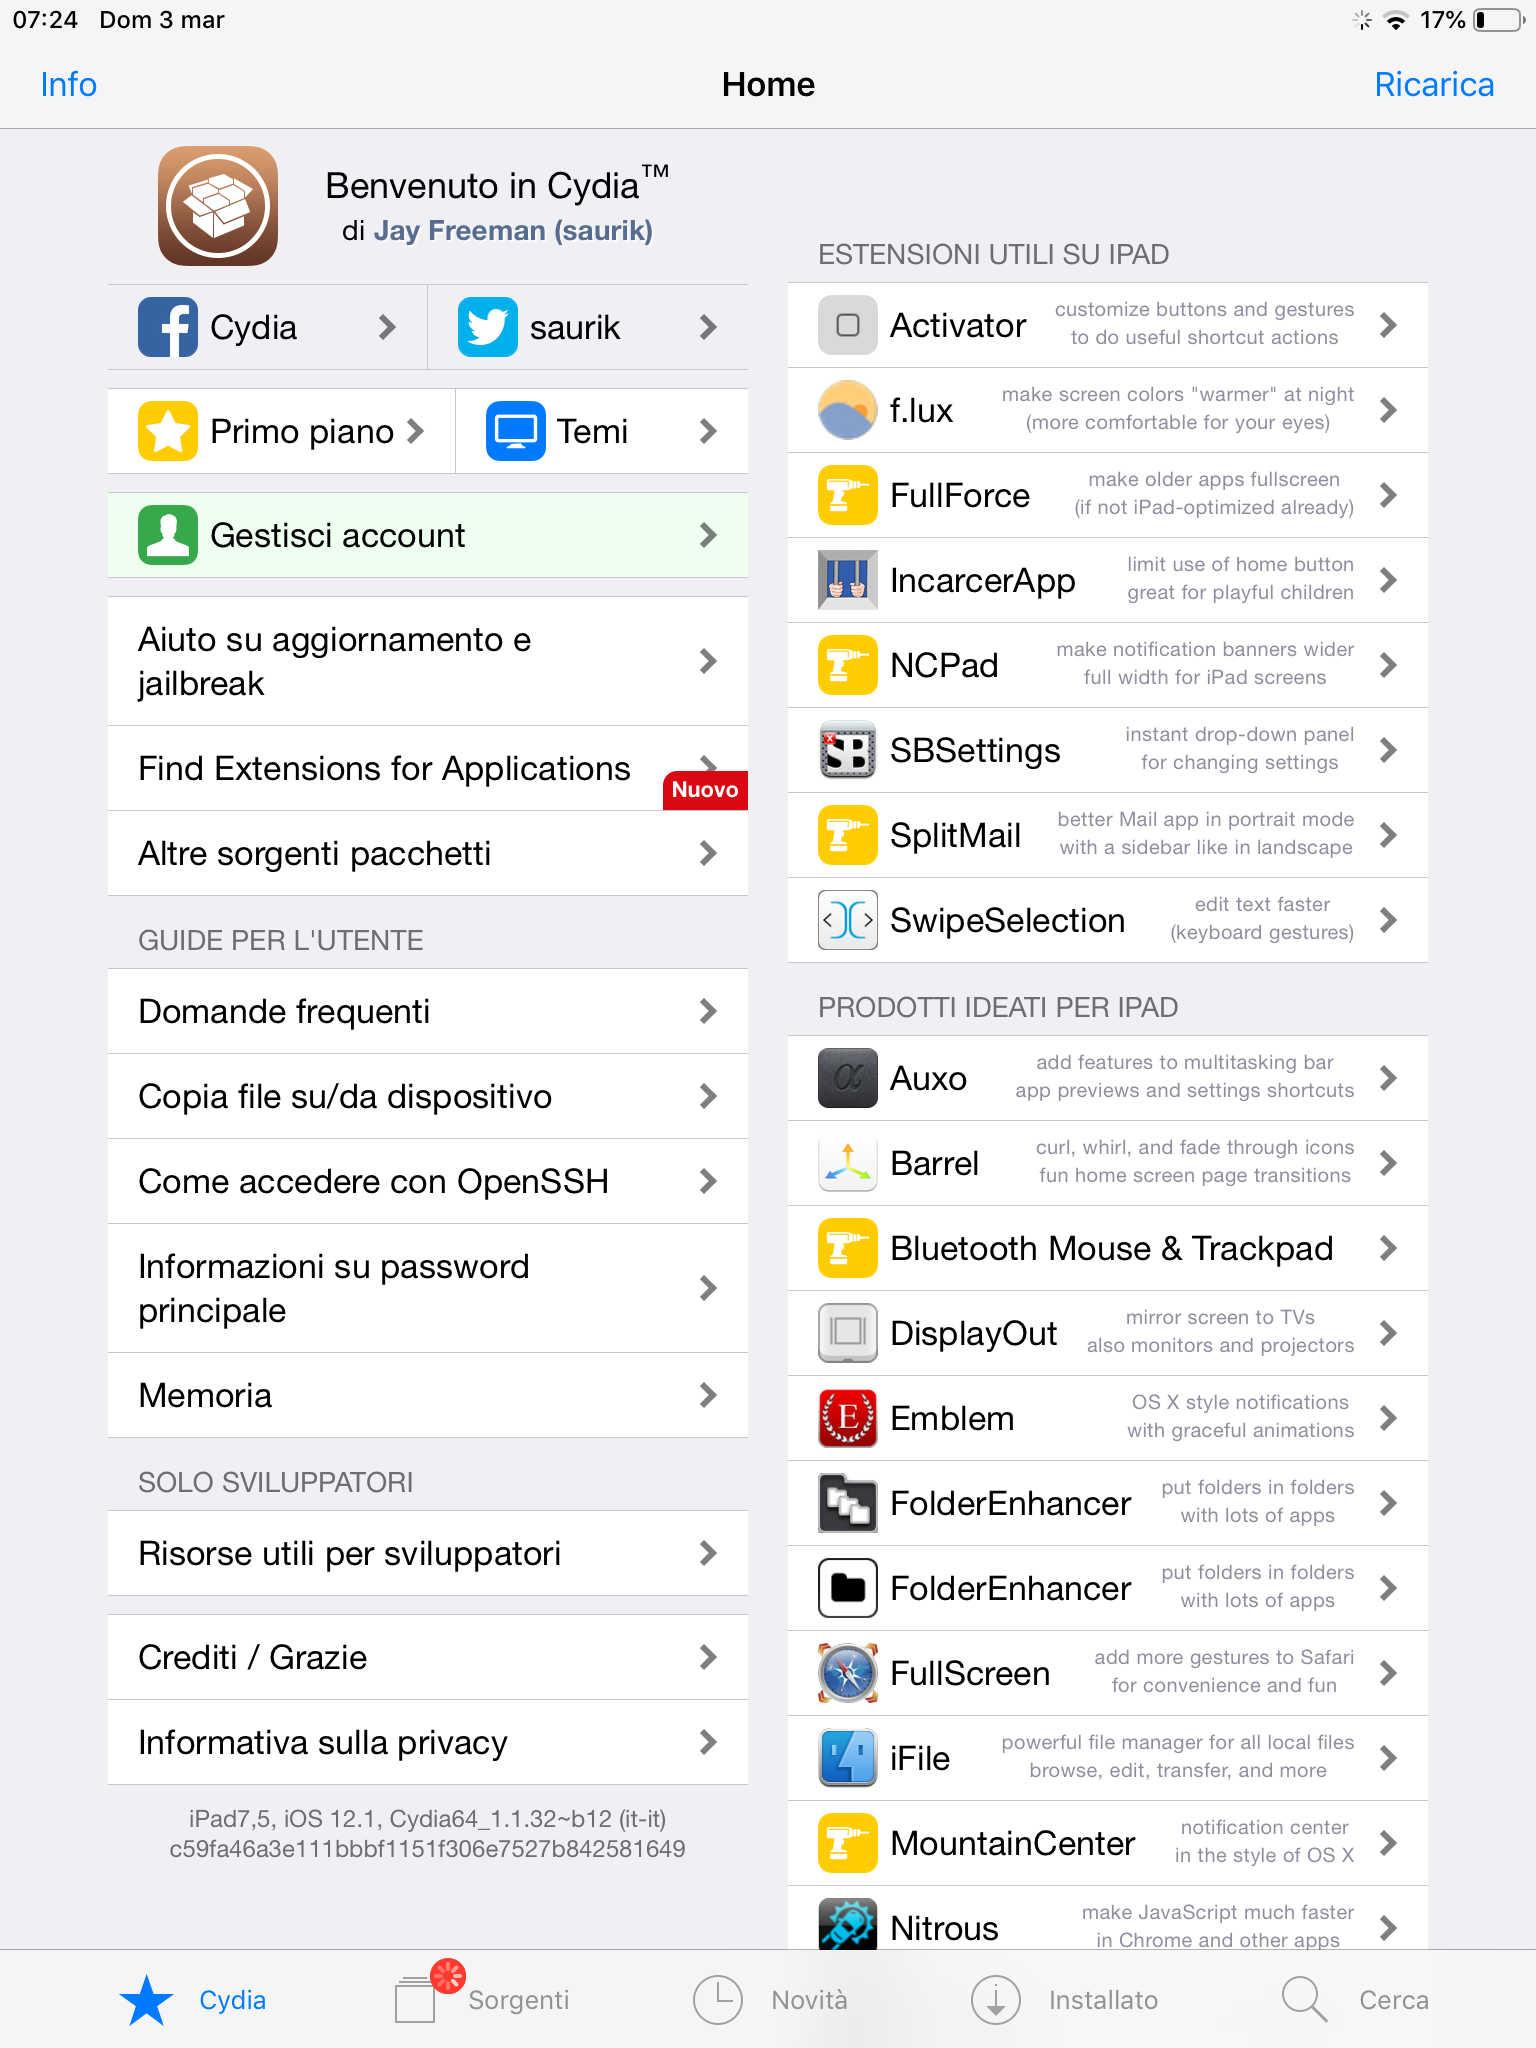
Ora è tempo di configurare Cydia. Prima di tutto aprila e verrai accolto dalla schermata di benvenuto.
vai nella sezione Sorgenti in basso, e vedrai questa schermata.
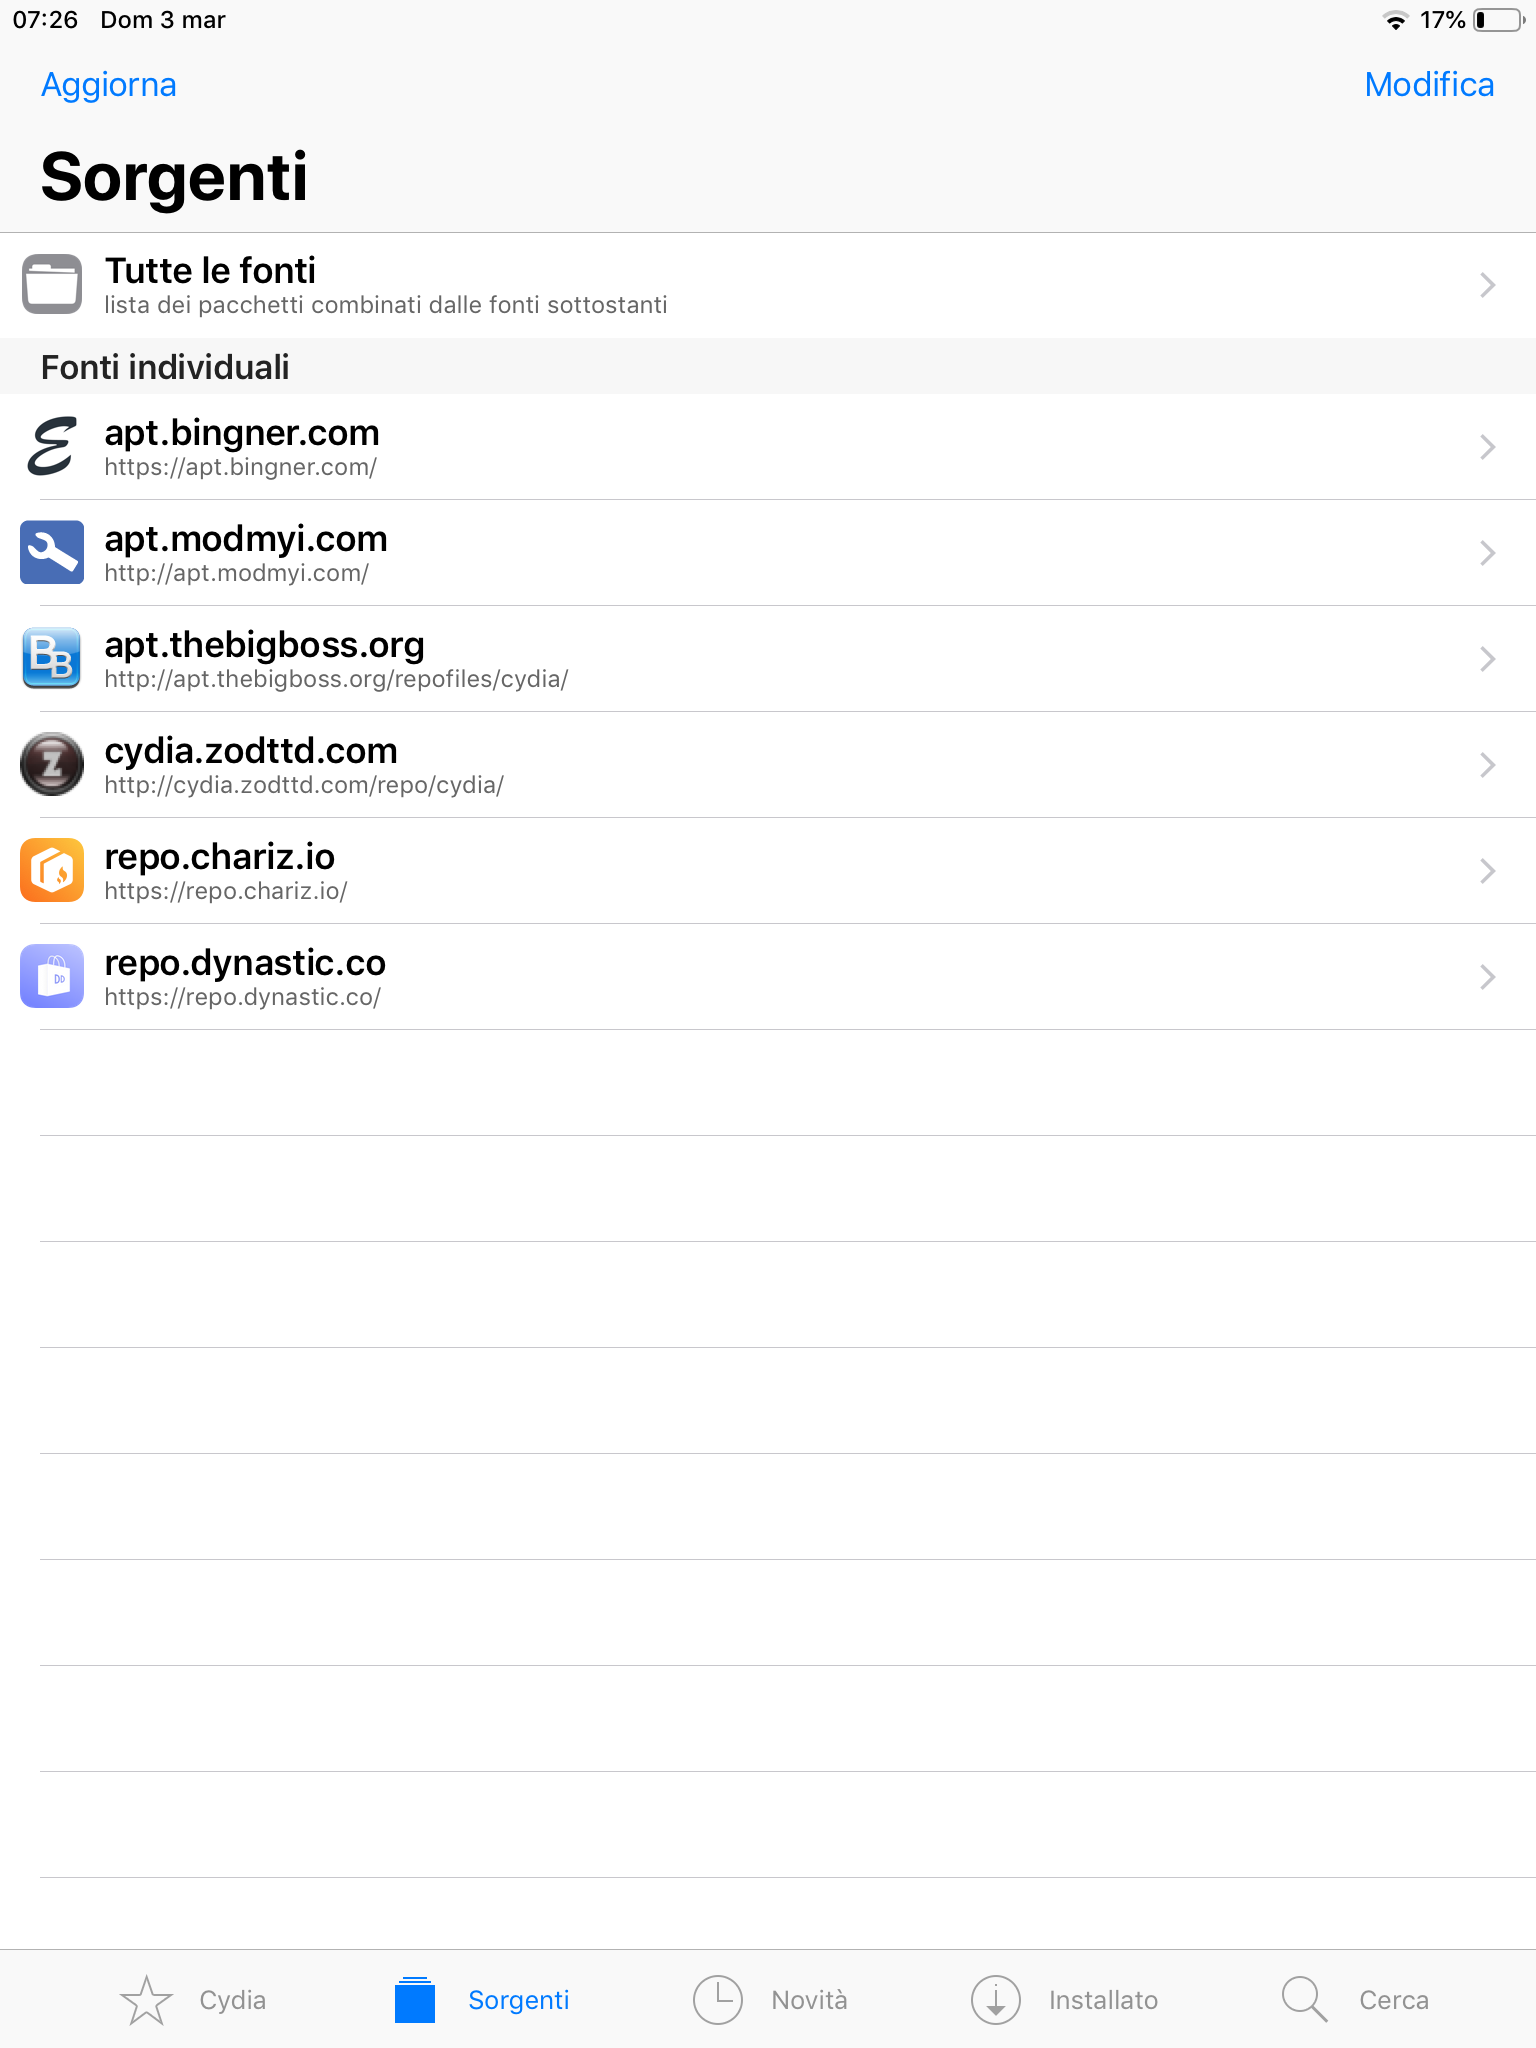
Quelle che vedi sono le repositories, dove tutti i tweaks sono contenuti e da dove vengono distribuiti. La maggior parte dei tweaks sono gratuiti, ma alcuni sono a pagamento. NON PIRATARLI, per diverse ragioni. Prima di tutto, perché gli sviluppatori impiegano molto del loro tempo per offrirci questi ottimi lavori, che probabilmente non avremmo mai senza supportarli ripagandoli almeno del tempo impiegato nello scriverli. Secondo, perché i tweak piratati possono in alcuni casi portare a bootloops, forzandovi a ripristinare il vostro dispositivo, perdendo così sia il jailbreak che tutti i vostri dati. Scaricali sempre i tweak dalle loro repo ufficiali (solitamente sono BigBoss, Chariz o Dynastic). Se non sei certo della repo del tweak che stai cercando, cerca su Google “nome del tweak qui repo”. La troverai sicuramente.
Ogni qualvolta premerai Aggiorna le sorgenti si aggiorneranno ed un pallino rosso apparirà. Facendo così aggiornerai l’indice delle sorgenti e nel caso in cui ci siano aggiornamenti dei tweak disponibili, questi appariranno. Solitamente è meglio aggiornare i tuoi tweak in modo da migliorarne la stabilità. Se qualunque Aggiornamento indispensabile apparirà, performa un Aggiornamento completo. Questi pacchetti sono aggiornati dal maintainer del tuo jailbreak in modo da renderlo più stabile.
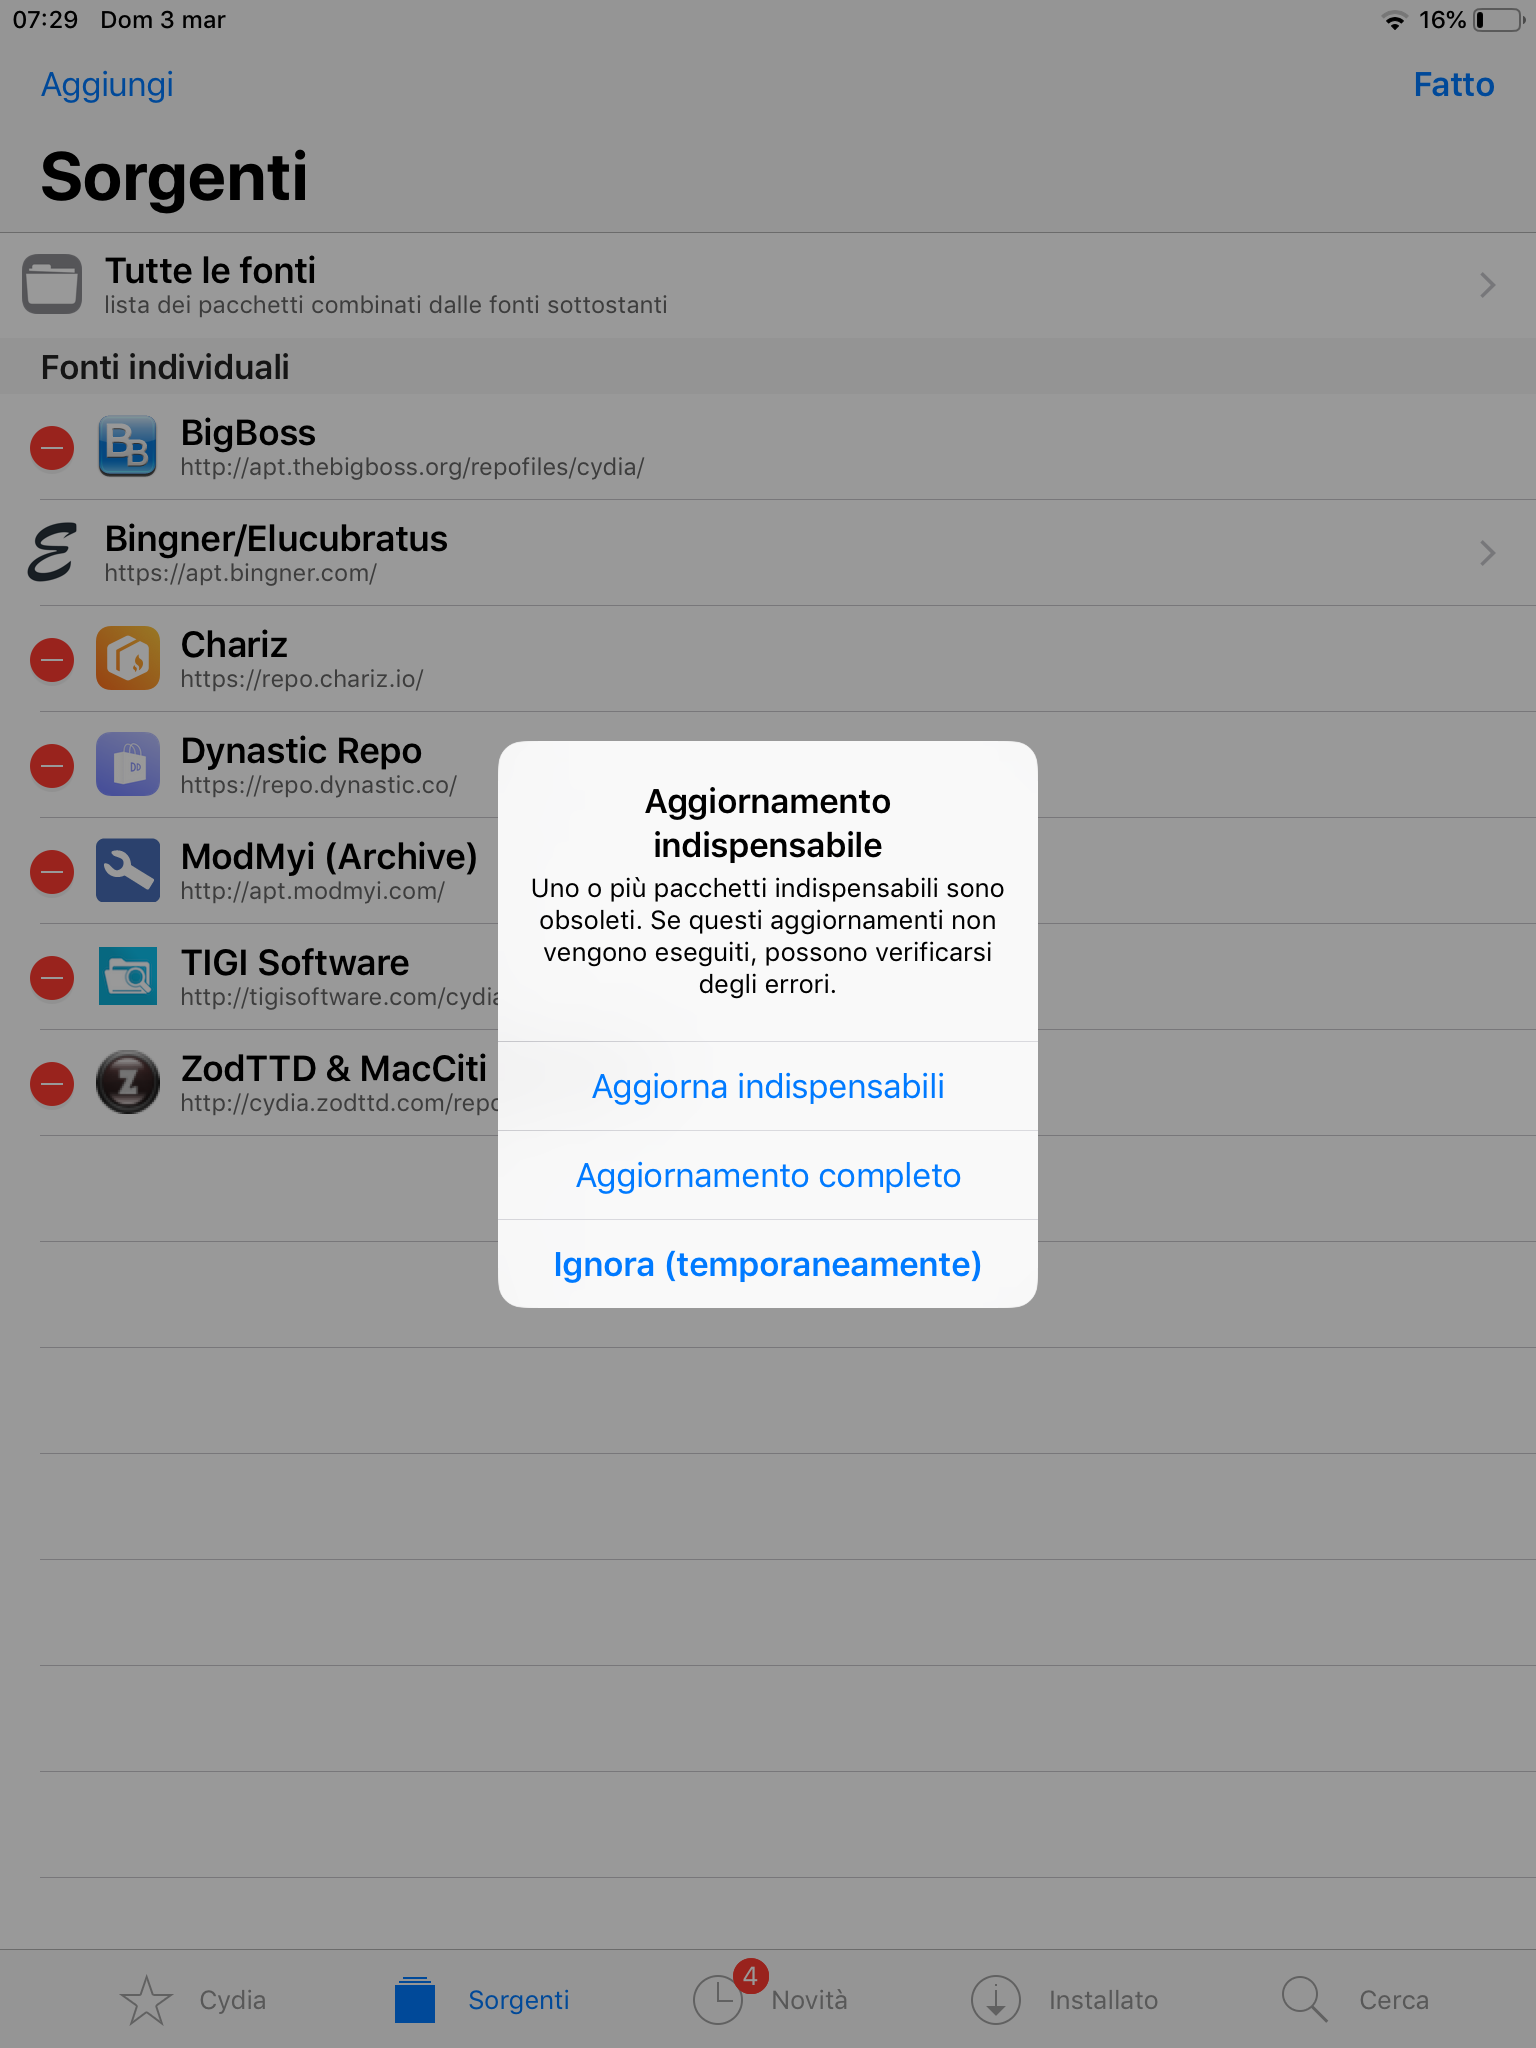
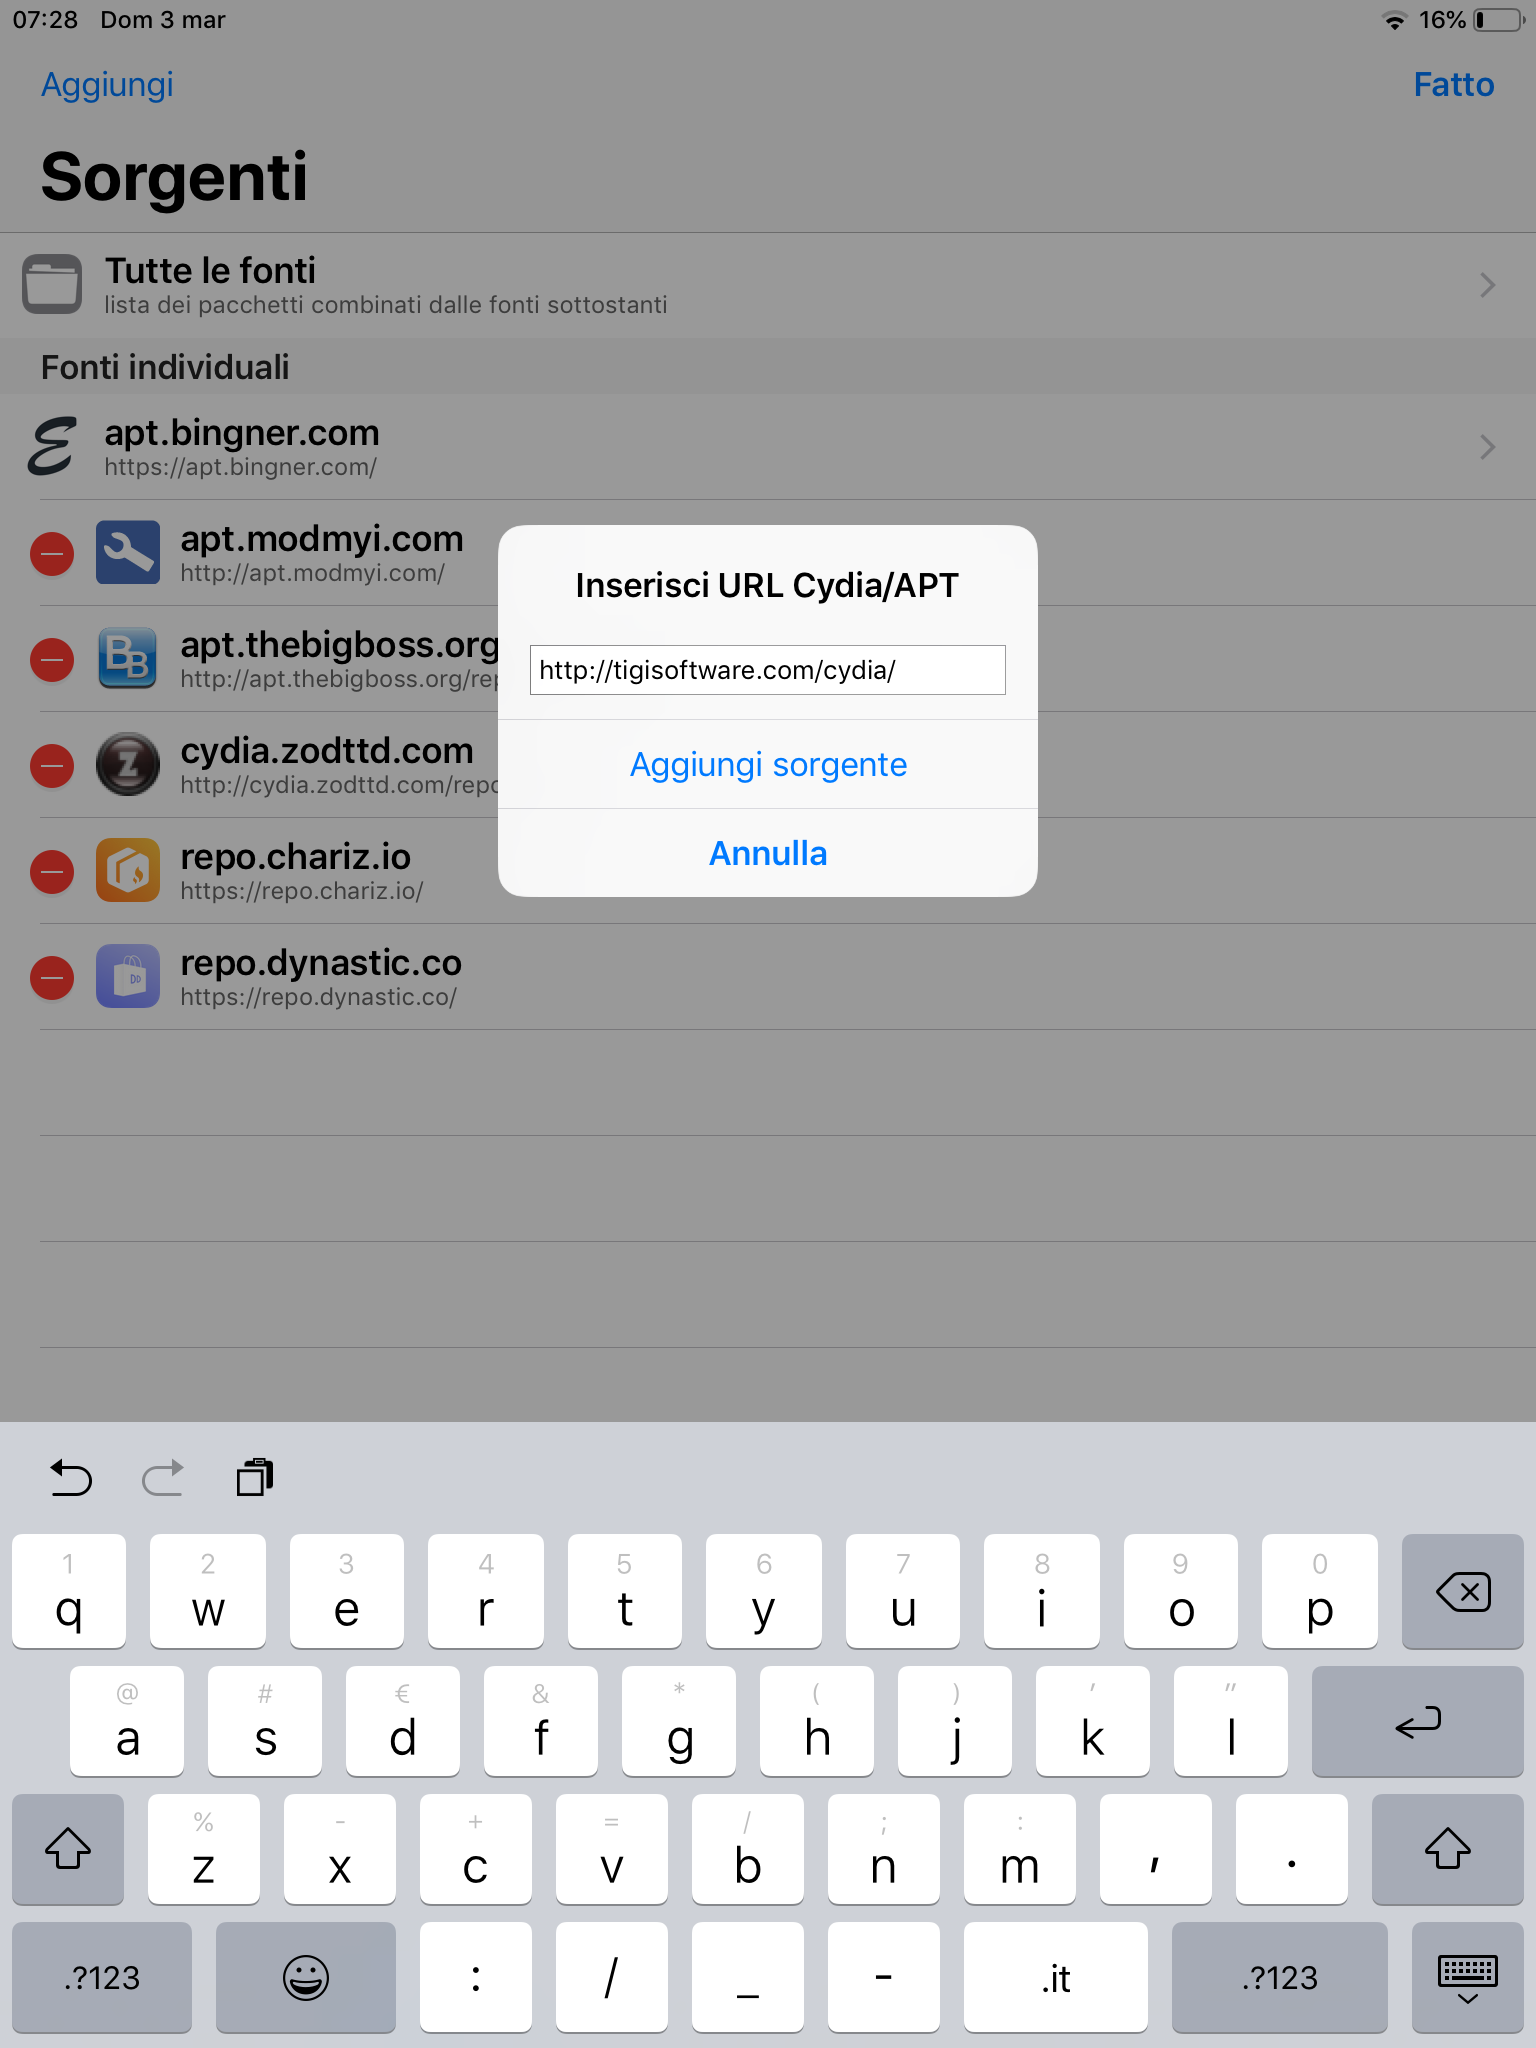
Ma come aggiungere una repo? È molto semplice. La maggior parte delle repo hanno un pulsante specifico nel loro sito web che apre una finestra per aggiungere automaticamente la repo, ma potrebbe succedere che tu debba aggiungerla manualmente. In quel caso premi il tasto Modifica in alto a destra, quindi Aggiungi e copia l’URL della repo, quindi Aggiungi sorgente. In questo caso aggiungerò http://tigisoftware.com/cydia, la repo di Filza. Ne parleremo in seguito.
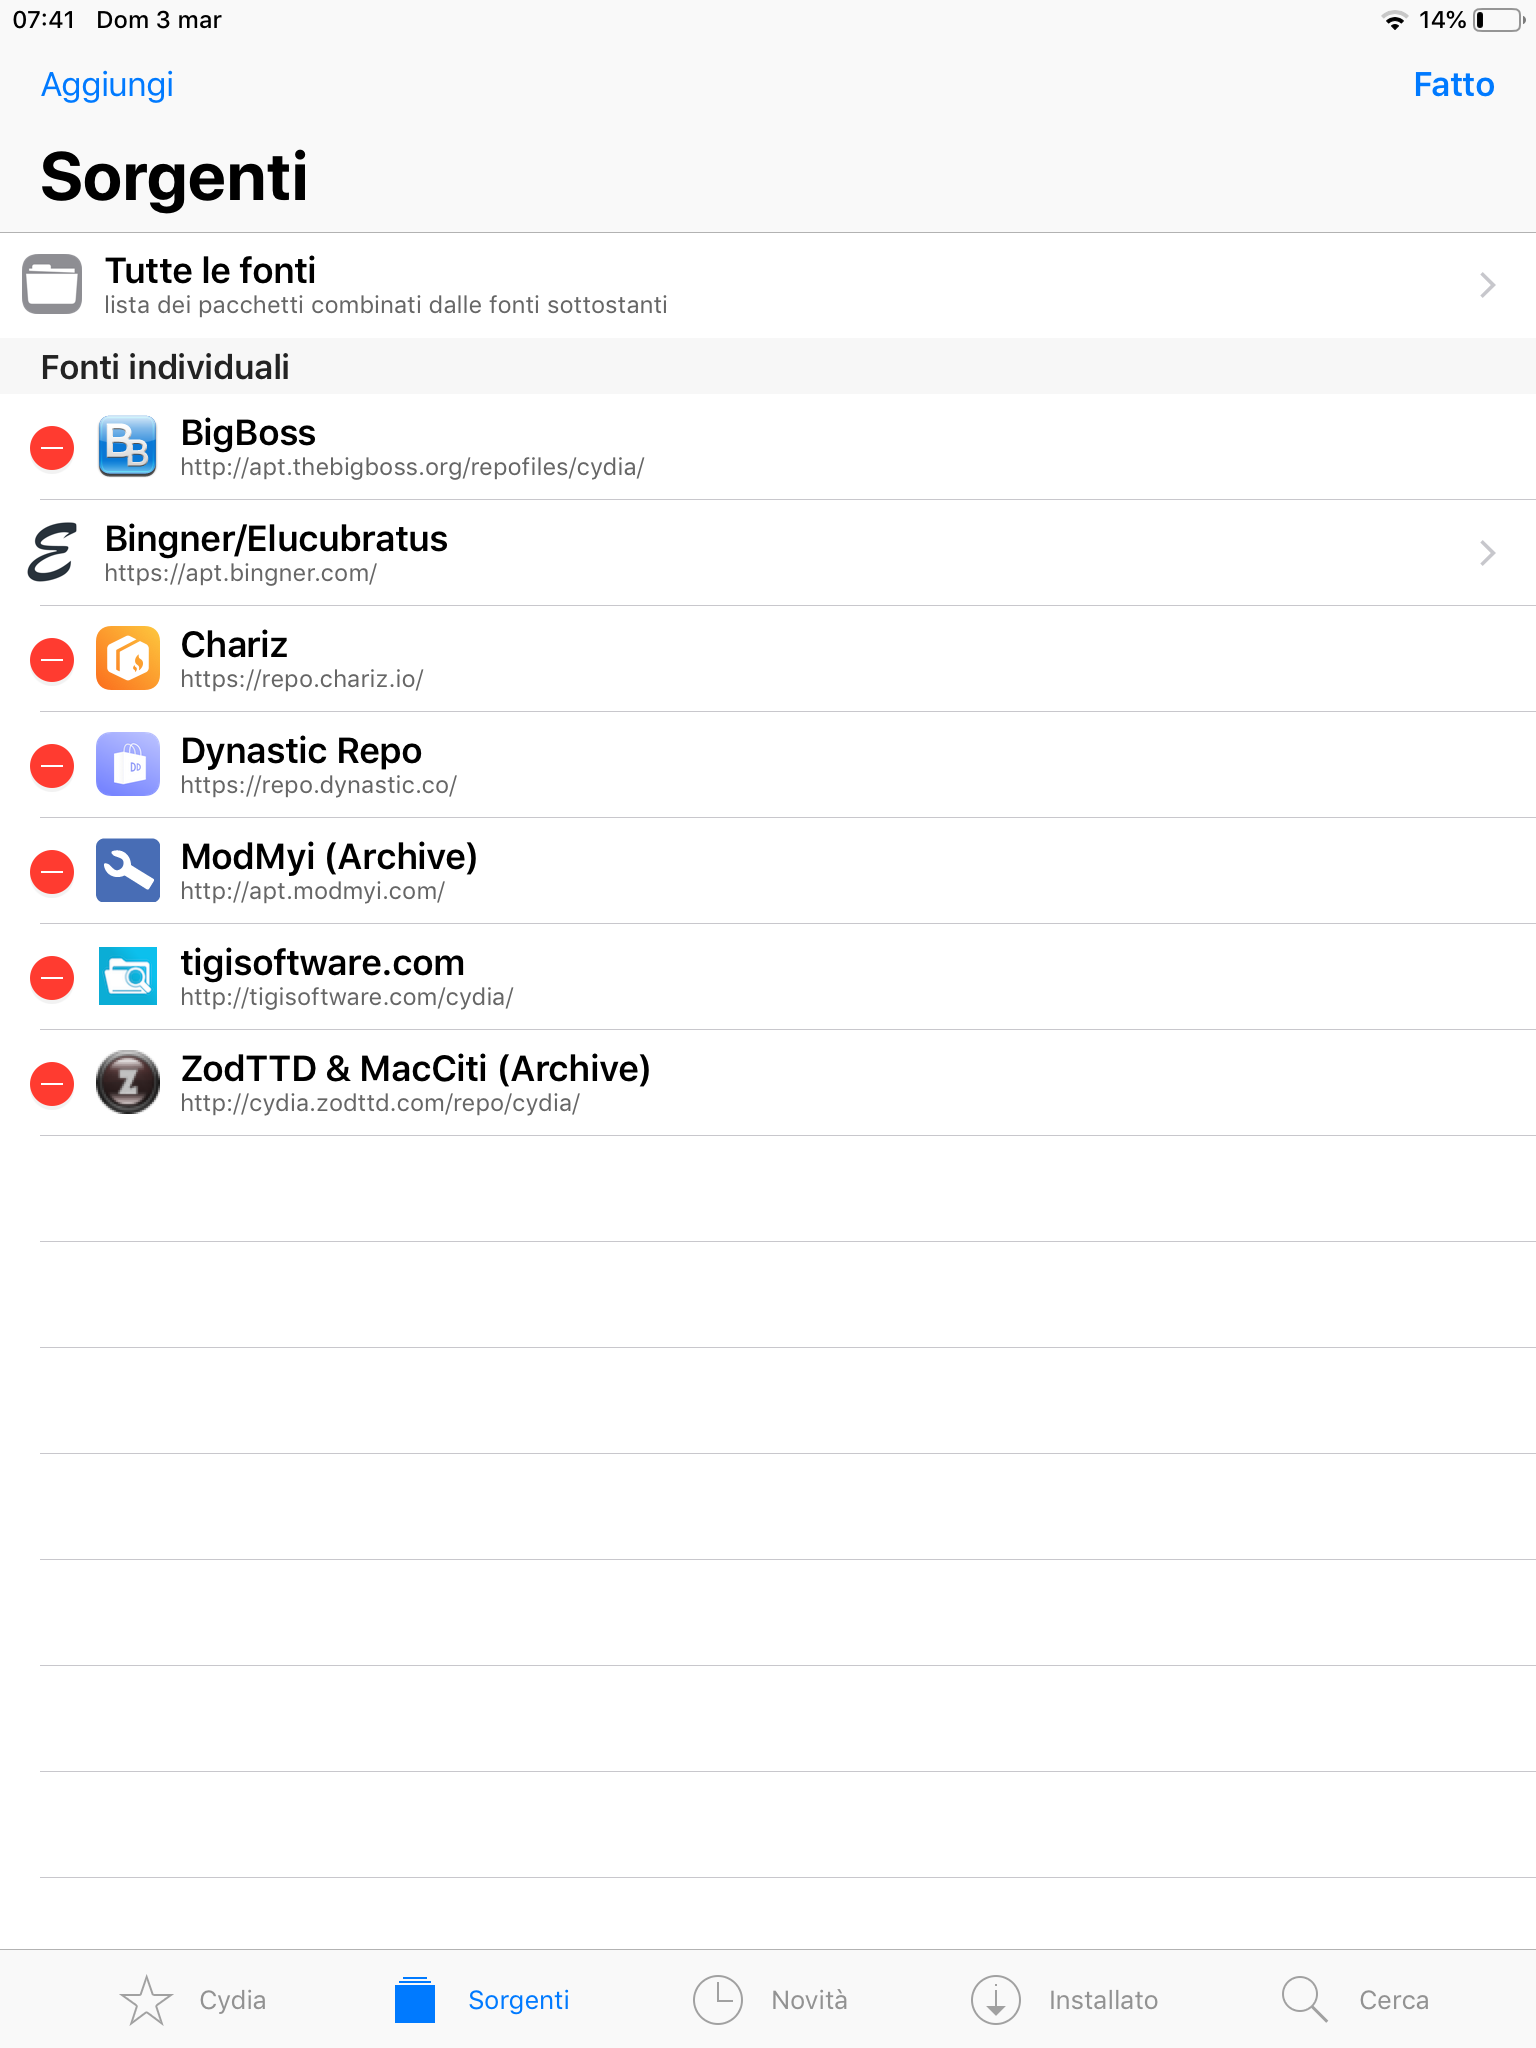
Se vuoi cancellare una repo, semplicemnte premi Modifica, quindi rimuovila con il tasto rosso al suo fianco.
Installare i tweaks
Ora arriva la parte divertente: installare i tweaks. I tweaks sono pacchetti che personalizzano il tuo sistema, aggiungendo funzioni o addirittura anche apps. In questo esempio installeremo una famosa app jailbroken chiamata Filza. È un gestore file con privilegi root. Se sei inesperto non usarla, ma è sempre meglio averla installata.
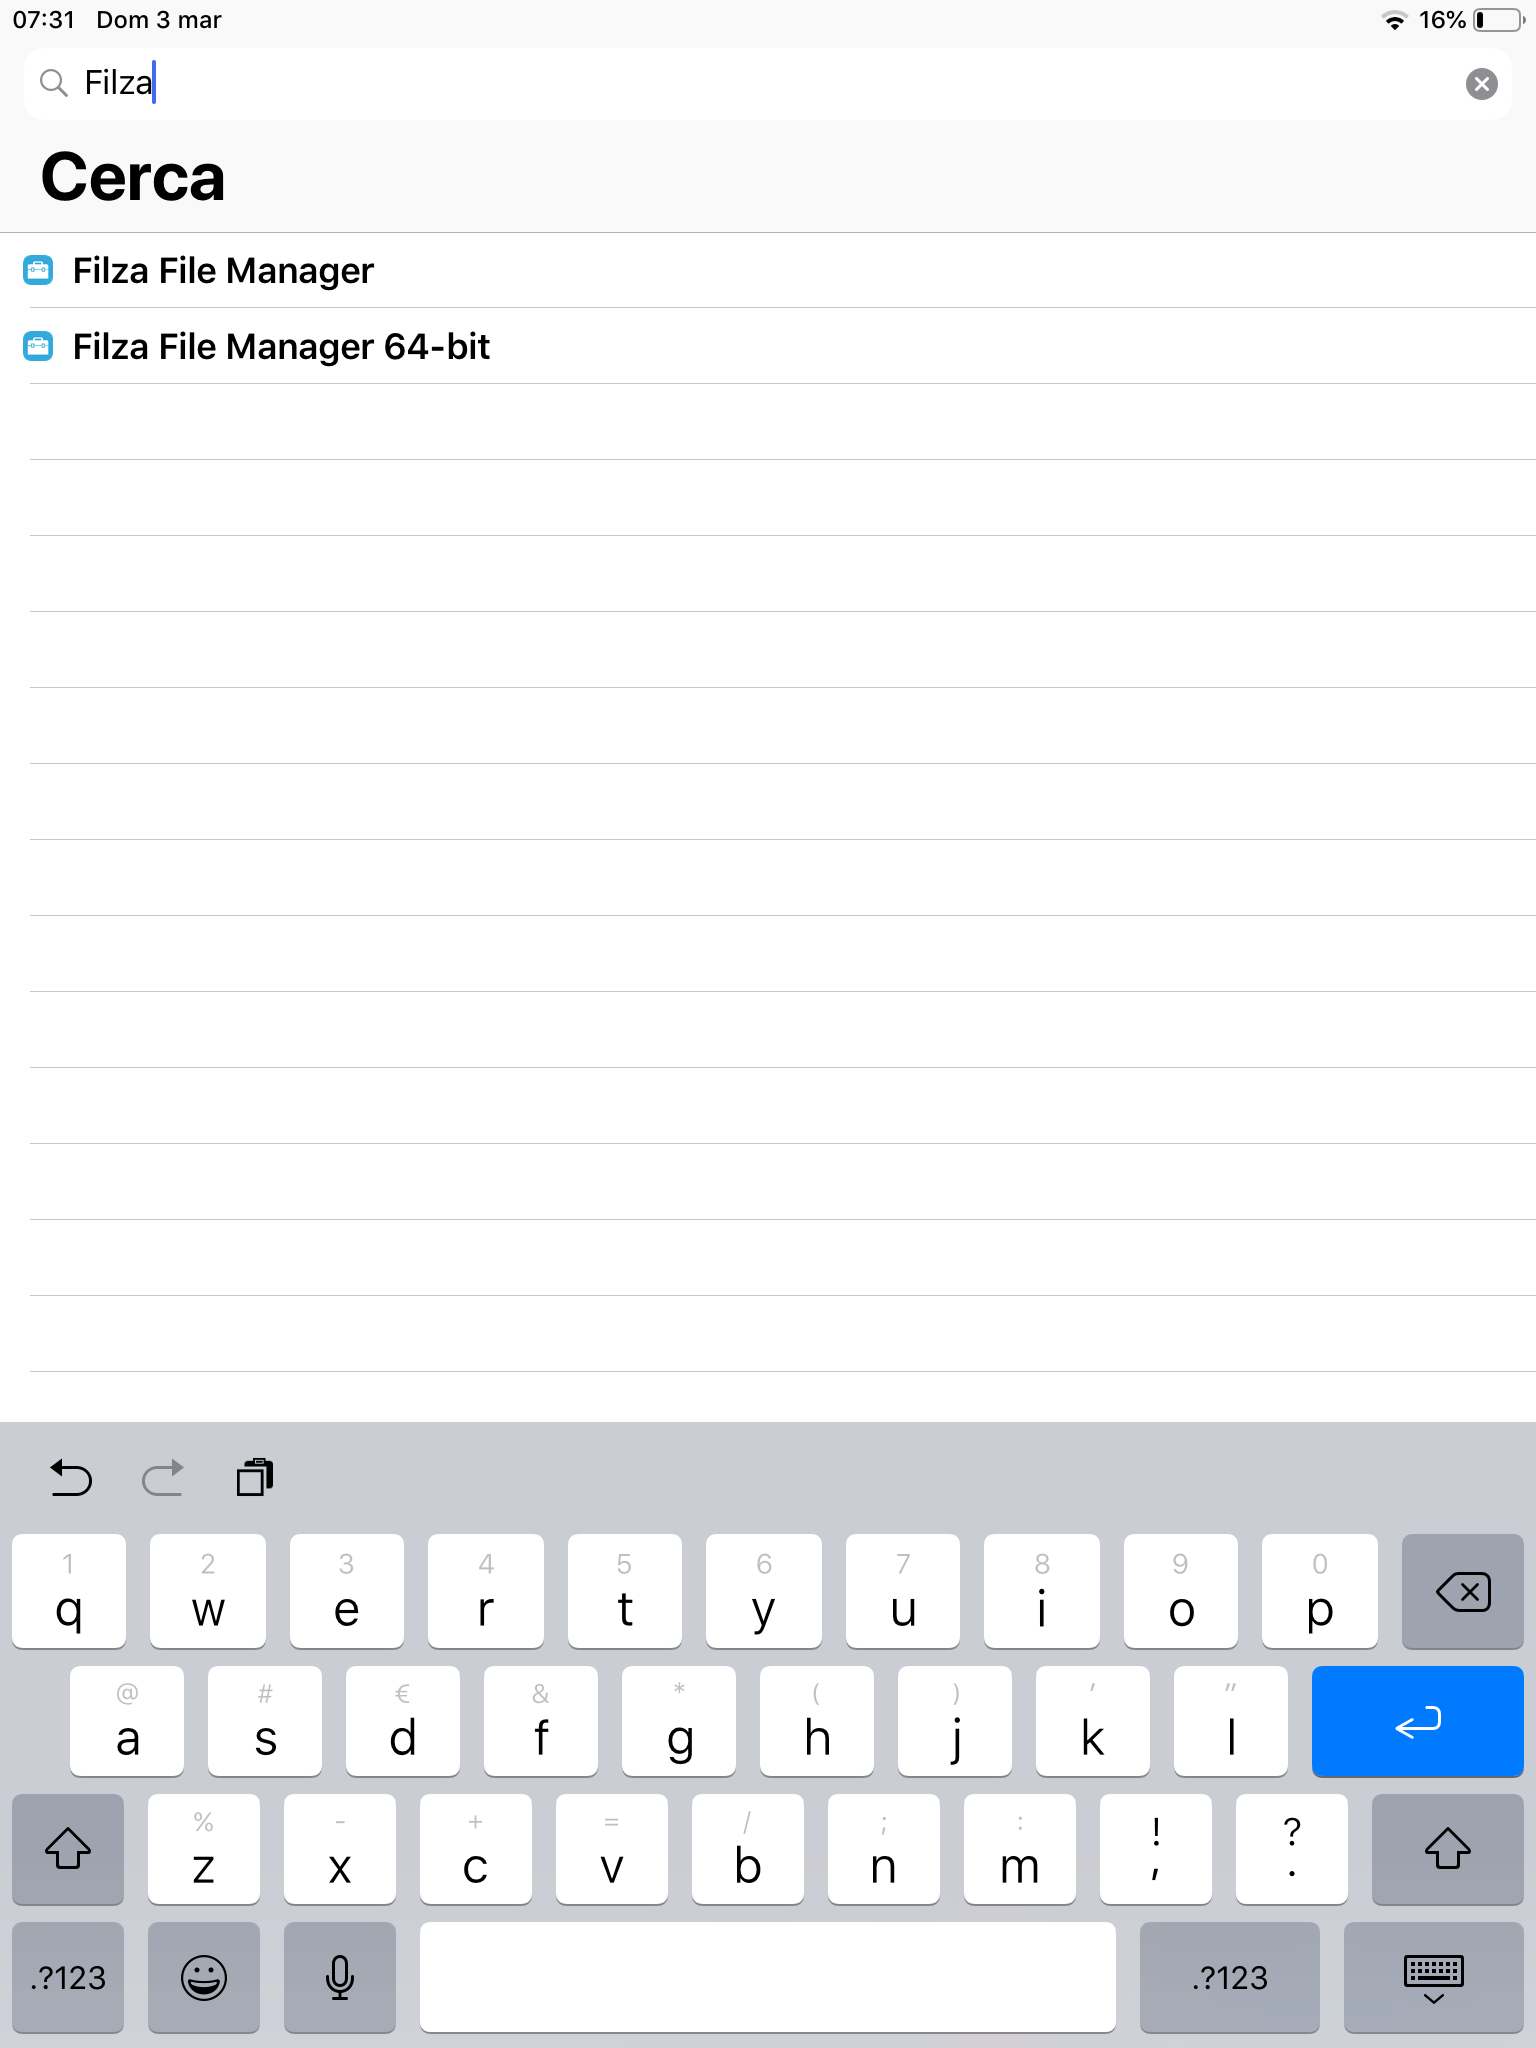
In Cydia, aggiorna le sorgenti, quindi vai su Cerca e digita il nome del pacchetto che ti interessa. Ci sarà più di un risultato, in questo caso seleziona la versione 64bit (considerato il fatto che stai usando unc0ver, il tuo hardware deve essere a 64bit).
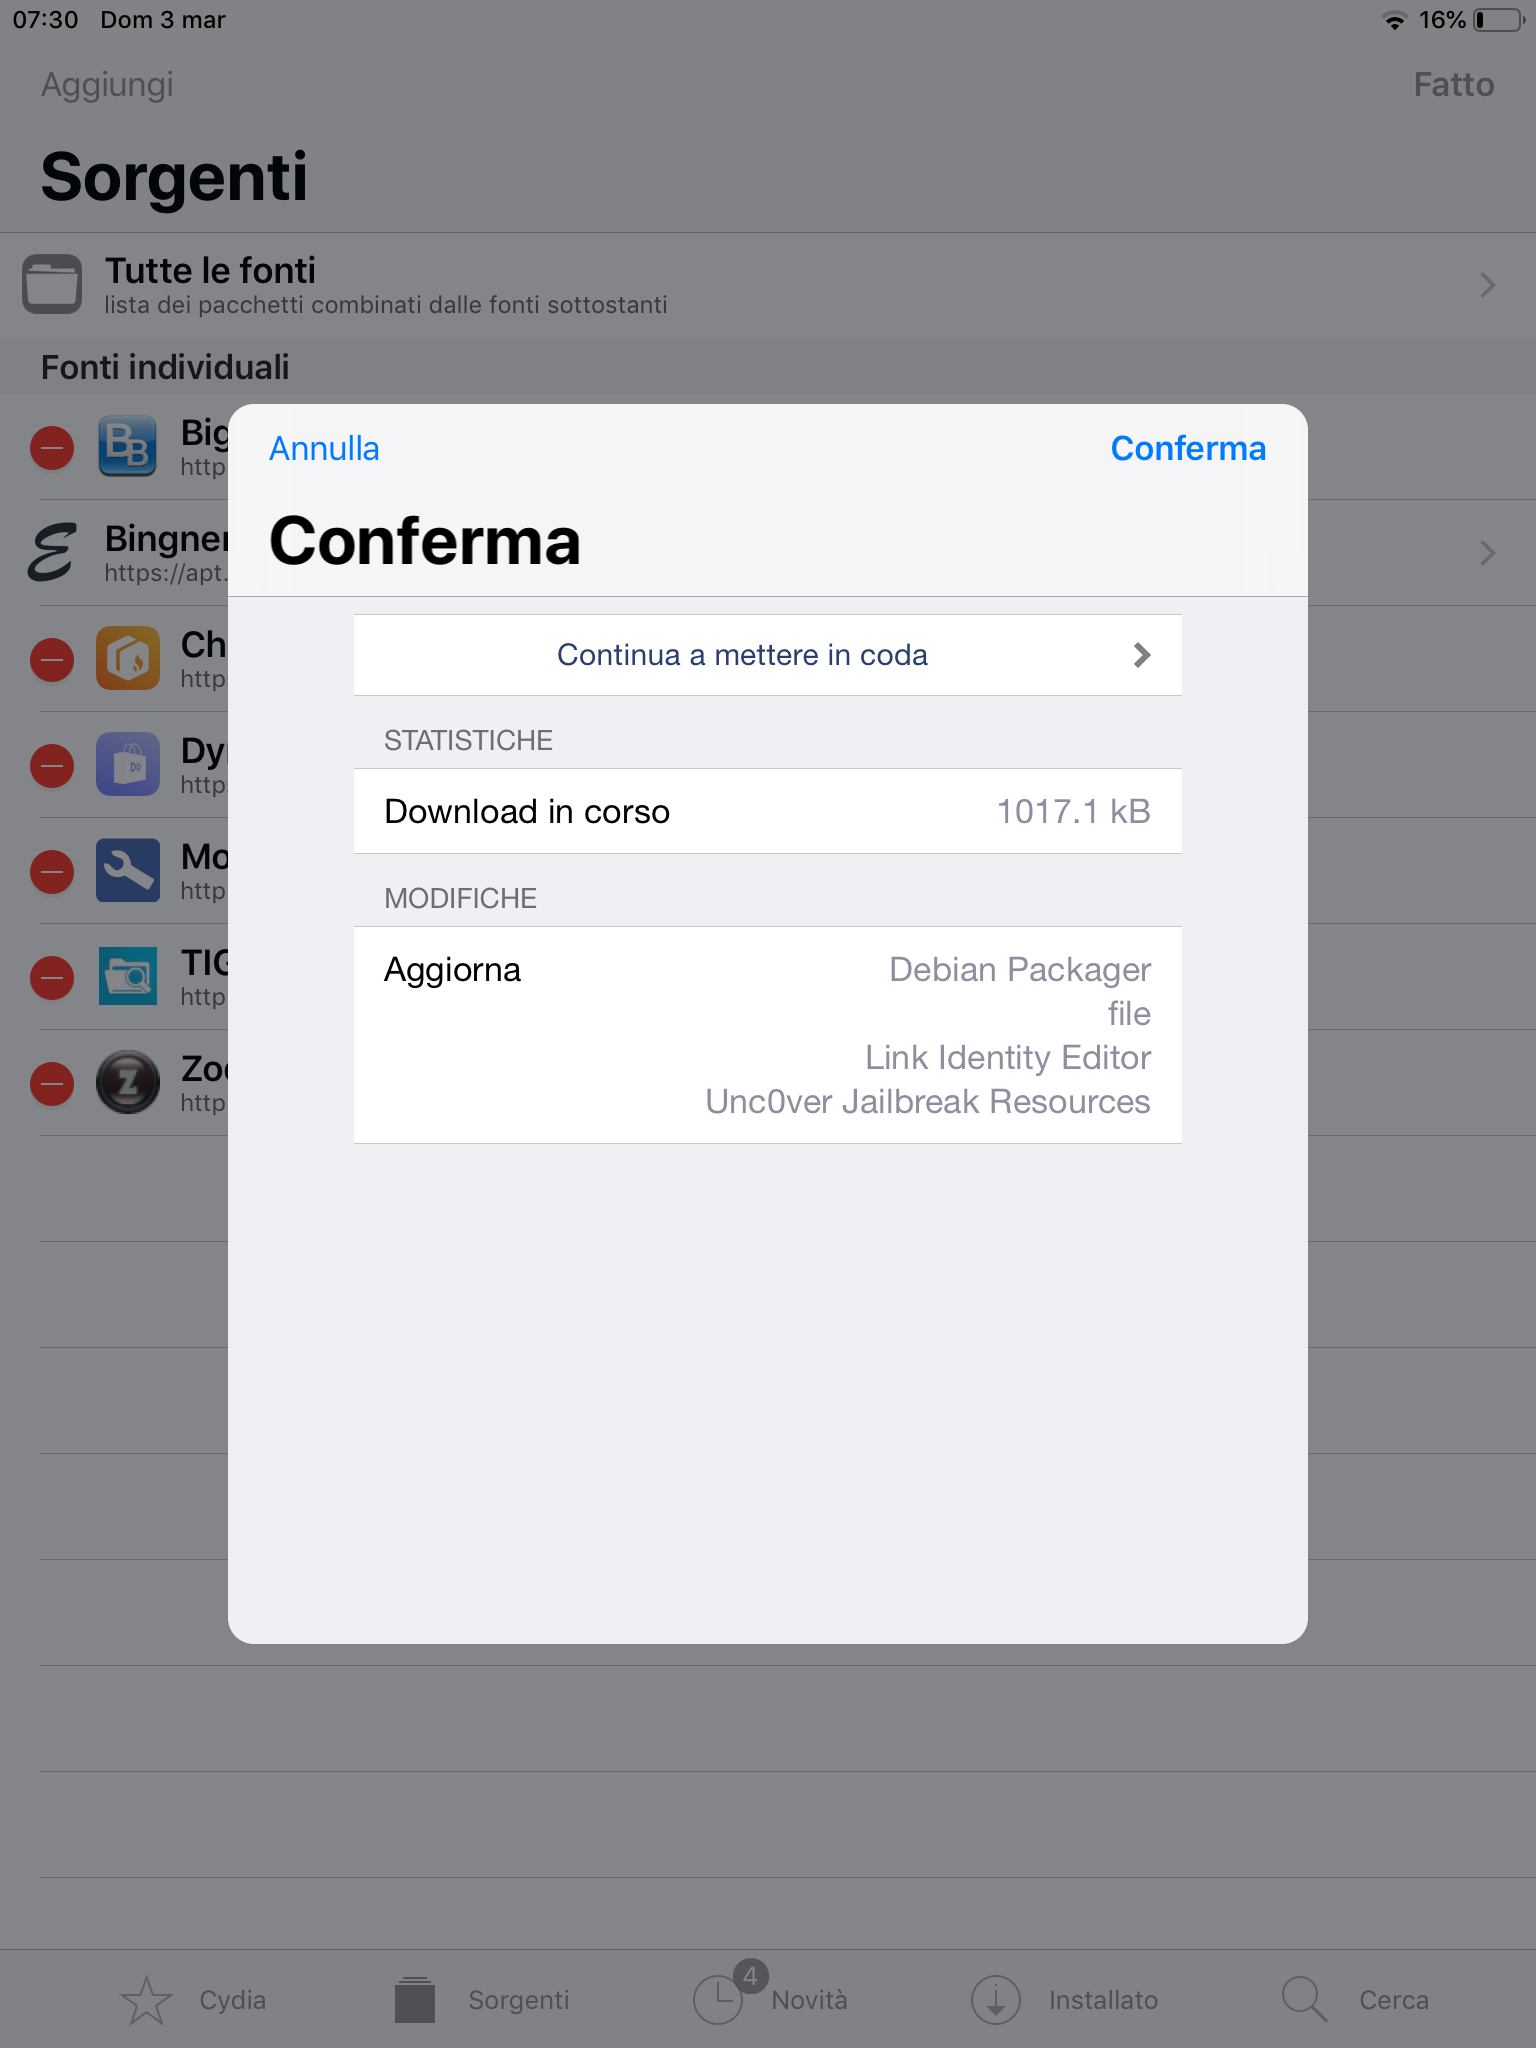
Una finestra popupsi aprirà. Se vuoi installare altro premi Continua a mettere in coda, altrimenti Conferma.
Vedrai un verbose output di quello che sta succedendo.
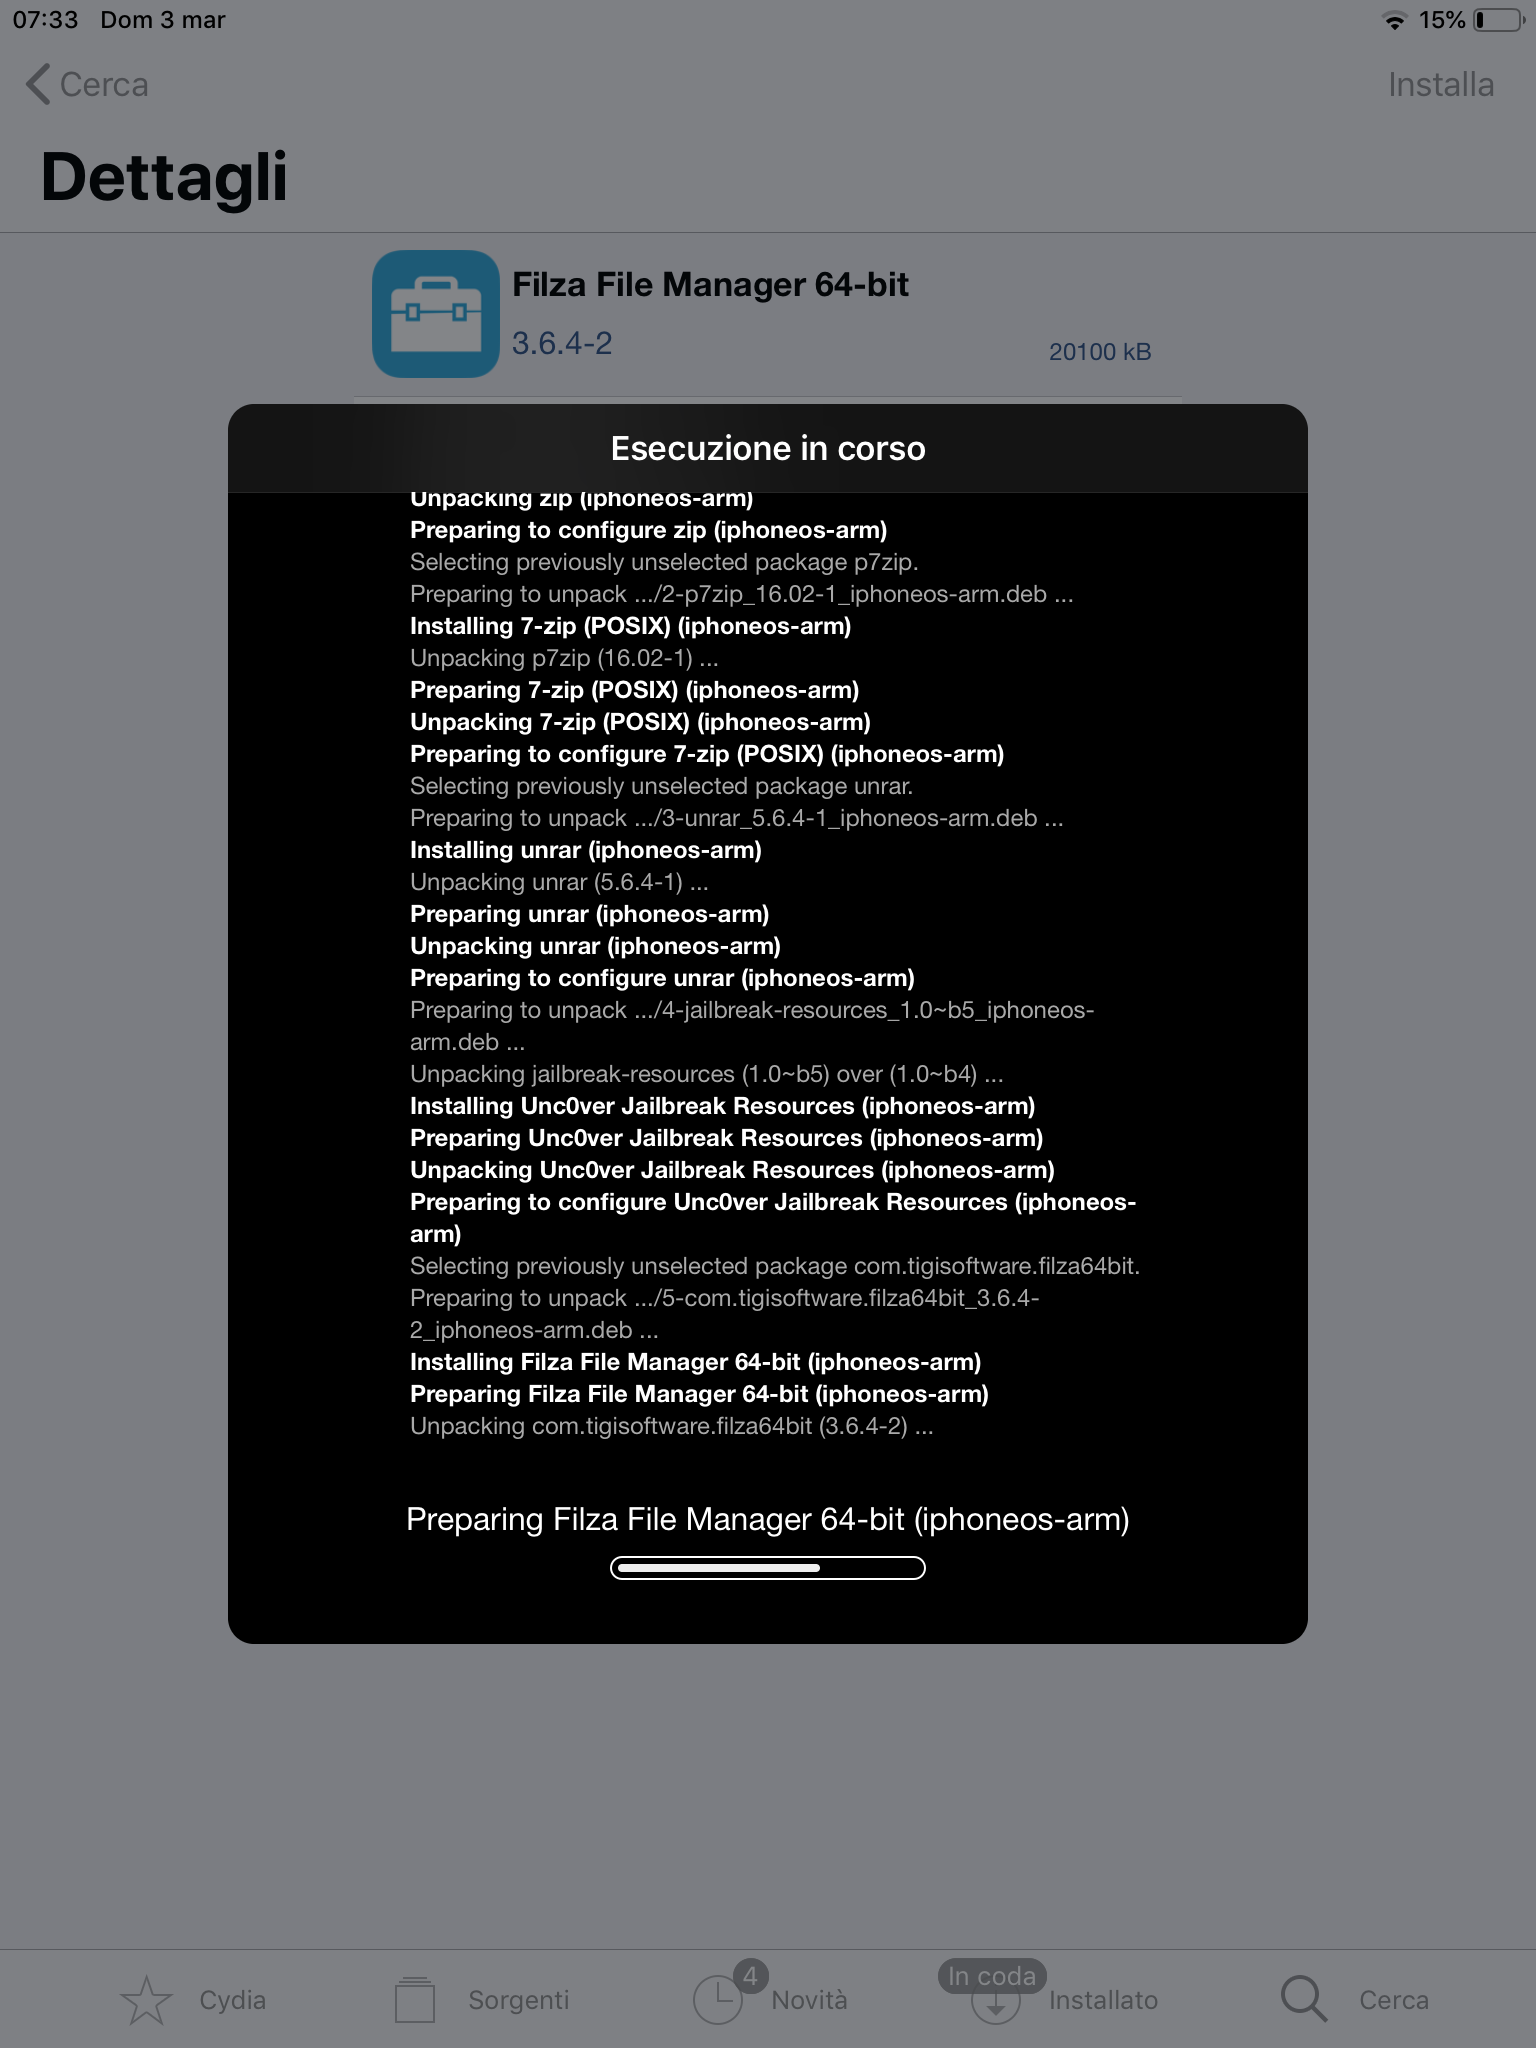
Quando leggerai Riavvia SpringBoard premilo. Dopo un respring vedrai in azione i tuoi nuovi tweak o le app!
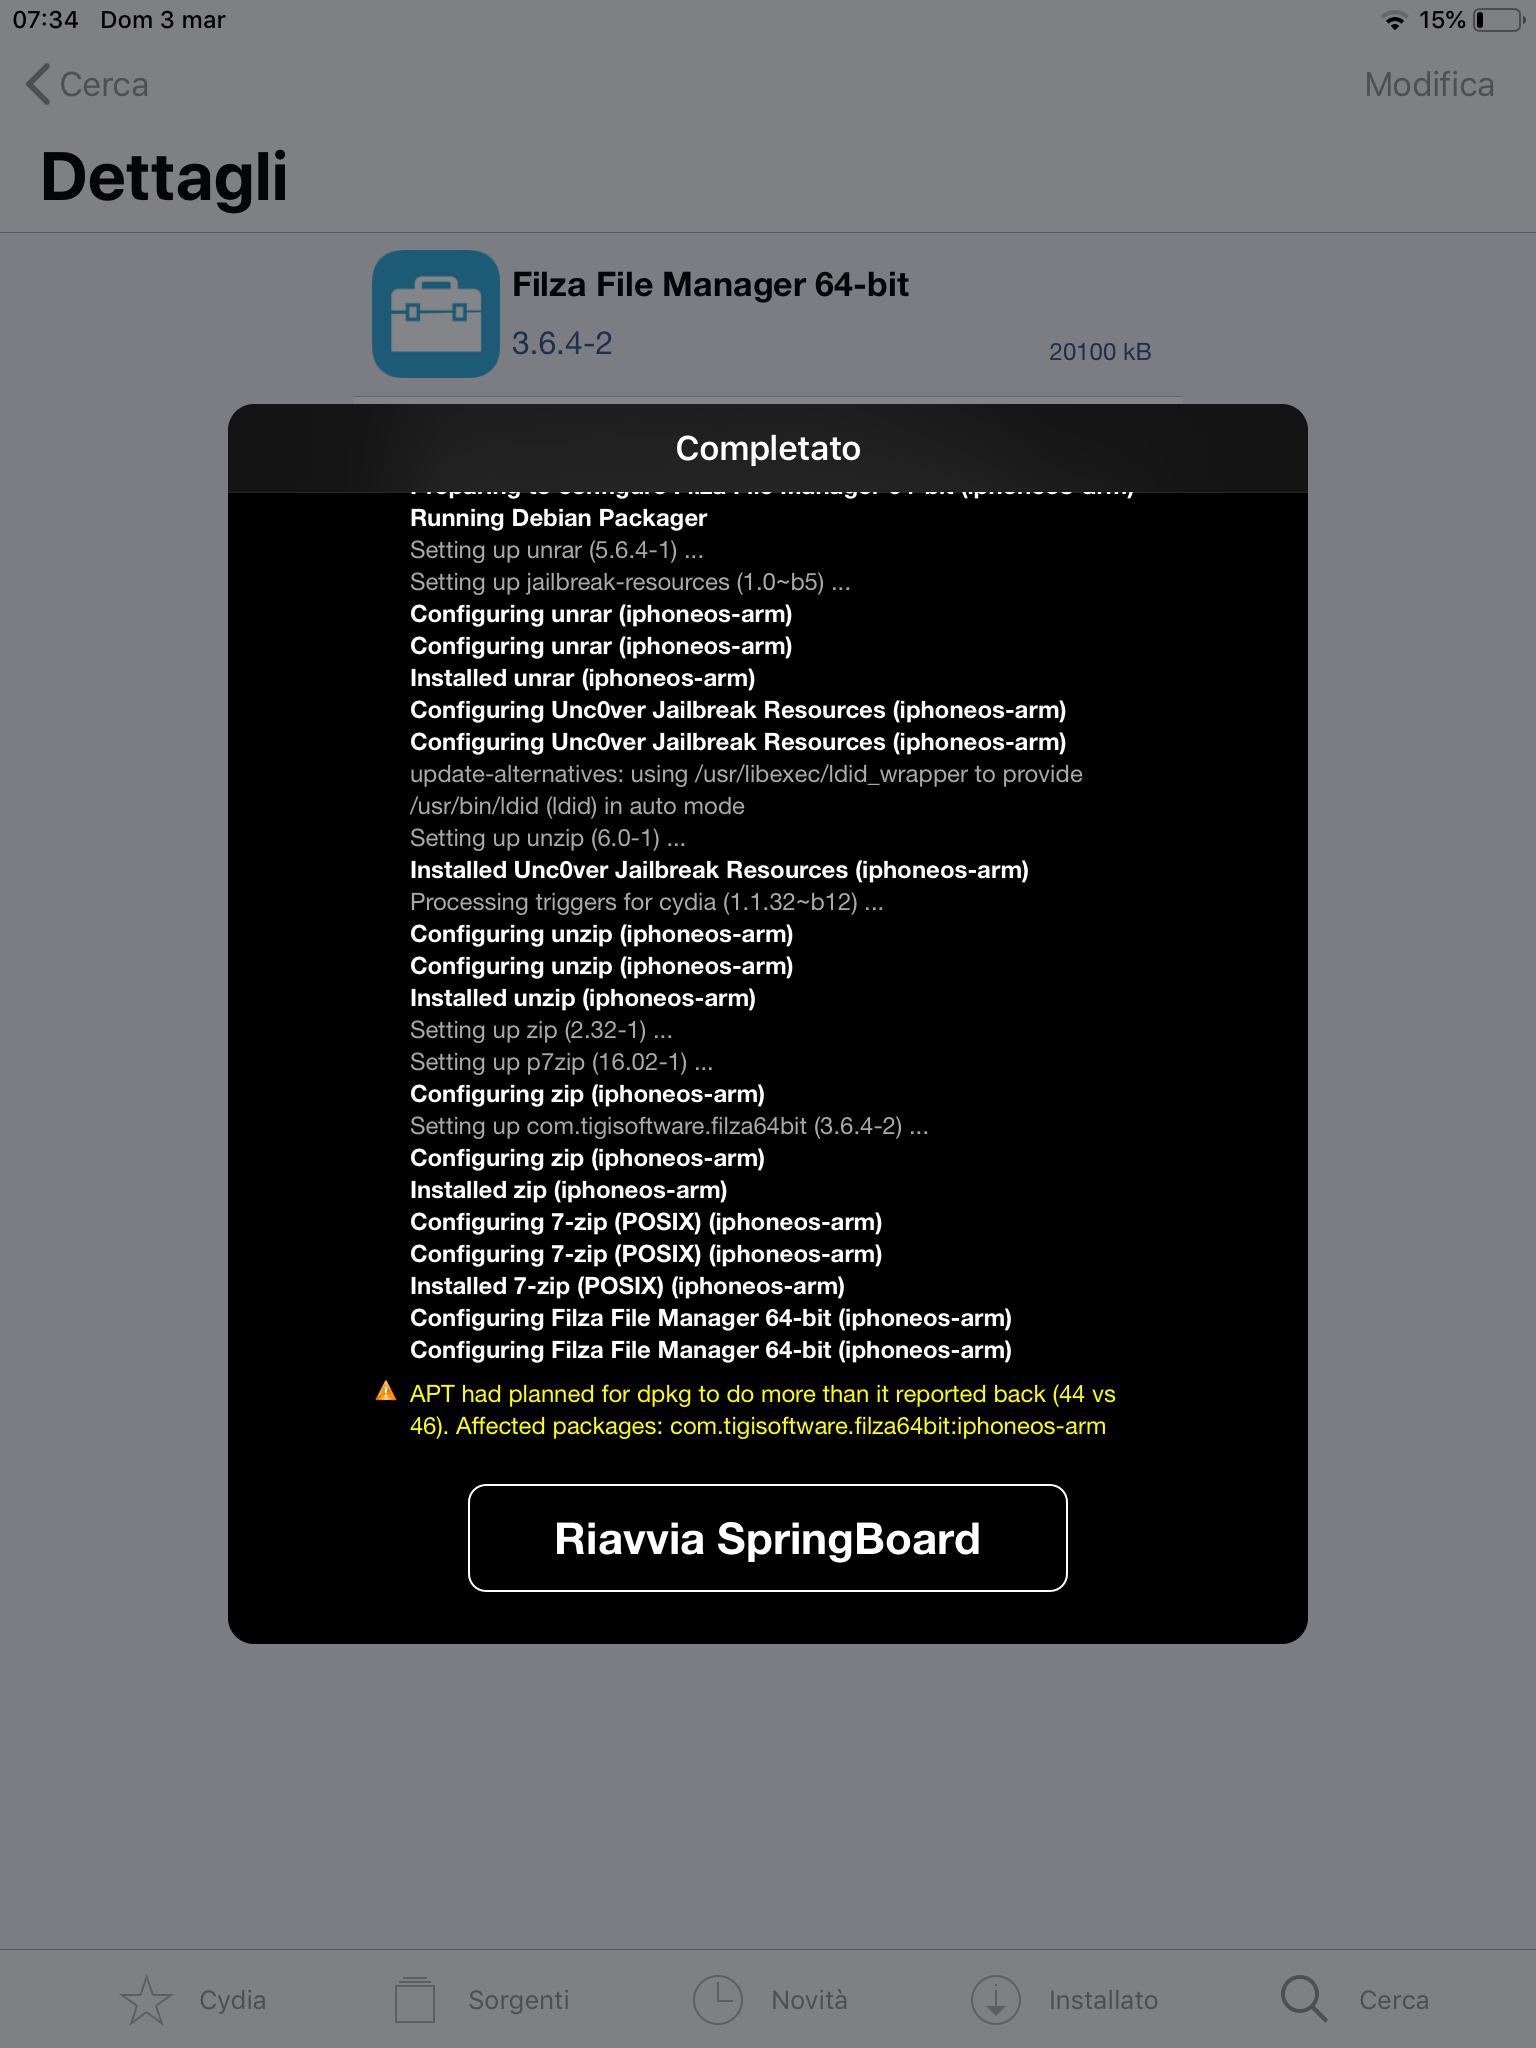
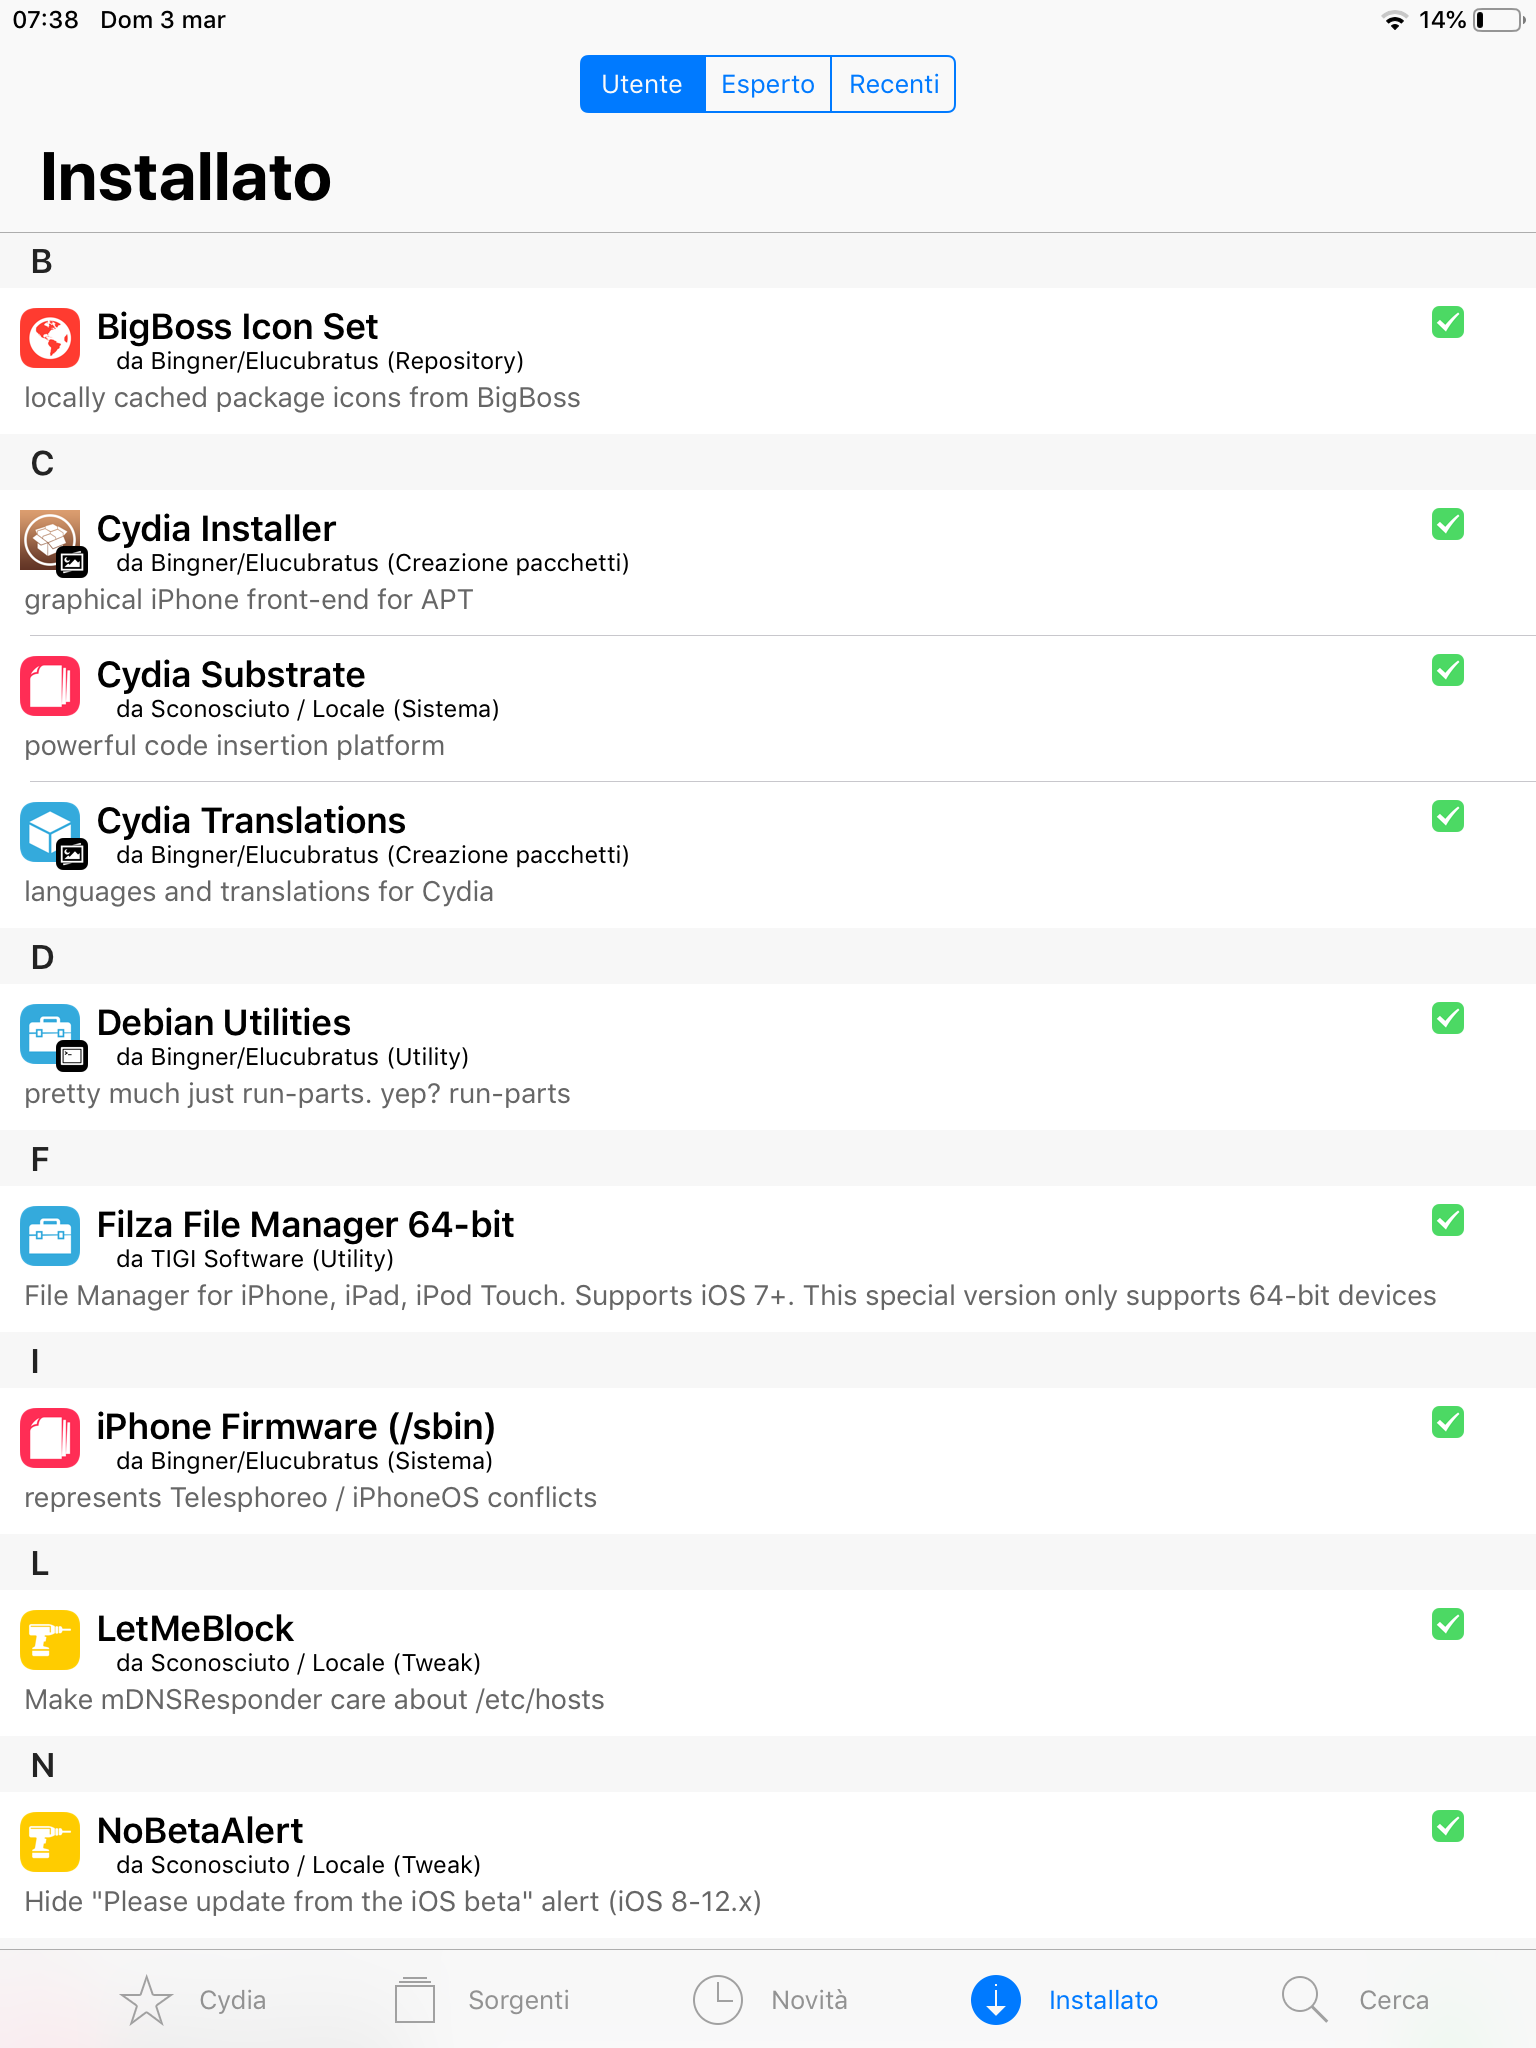
Ed ora infatti dovresti vedere Filza installato.
![]()
Se vuoi rimuovere un tweak che hai installato, vai nella sezione Installato, apri il tweak che vuoi rimuovere, clicca su Modifica e quindi Rimuovi. Anche in questo caso puoi mettere in coda altri processi.
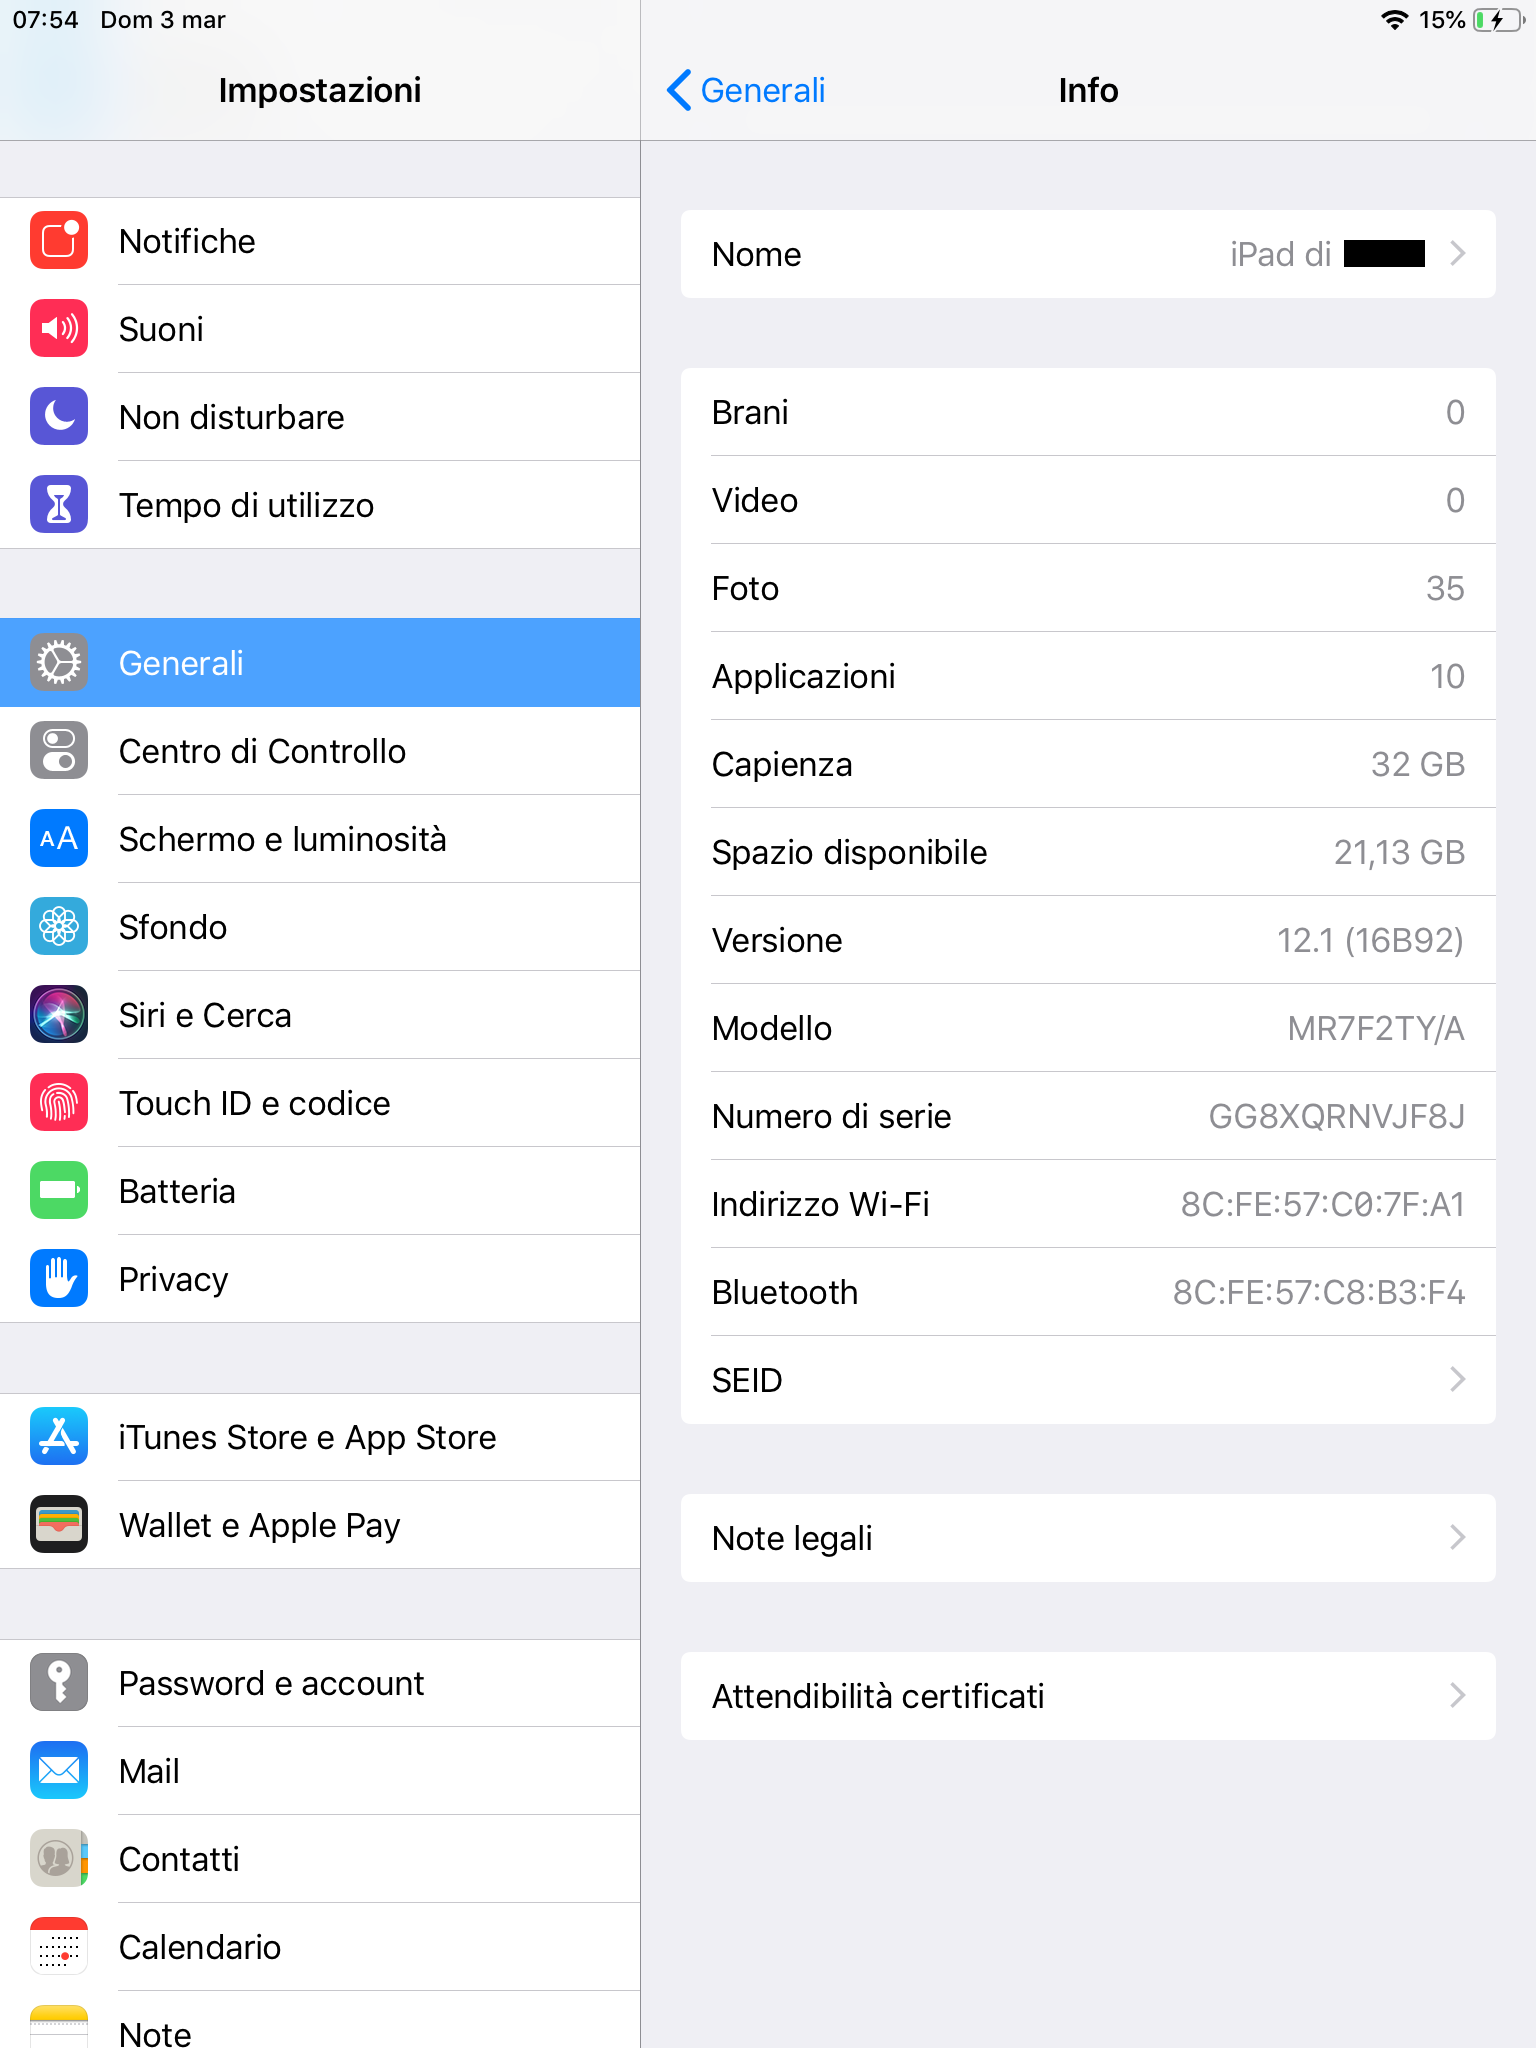
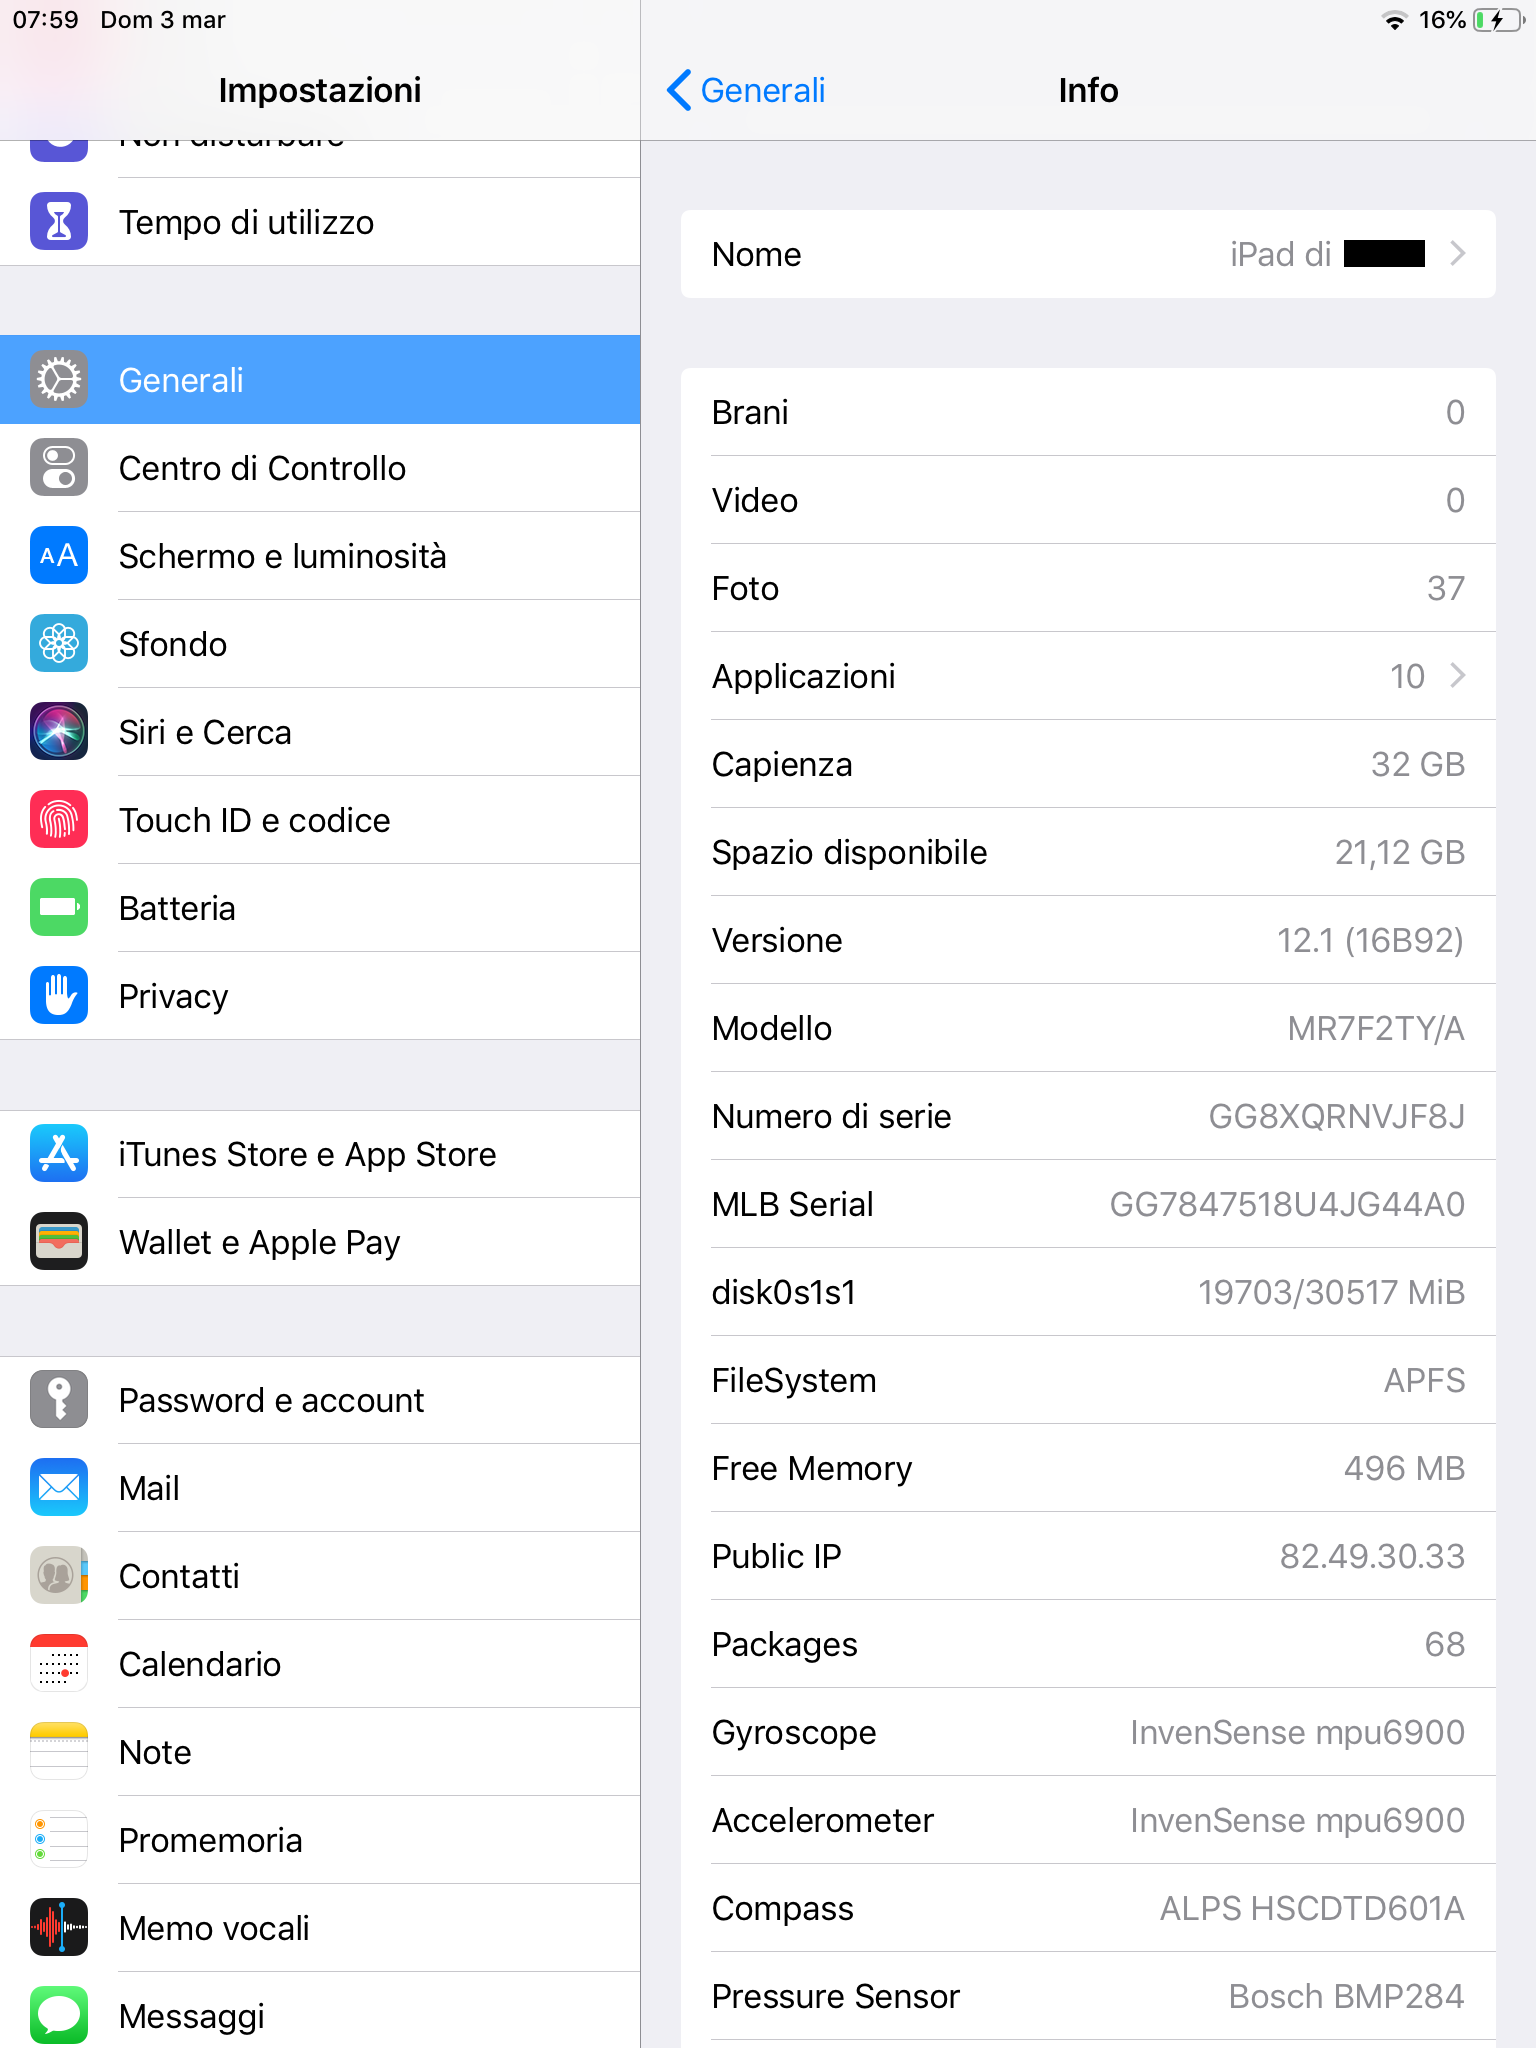
Come ho detto i tweak possono modificare vari aspetti di iOS, in questo caso puoi vedere le impostazioni di sistema prima e dopo l’installazione del tweak System Info.
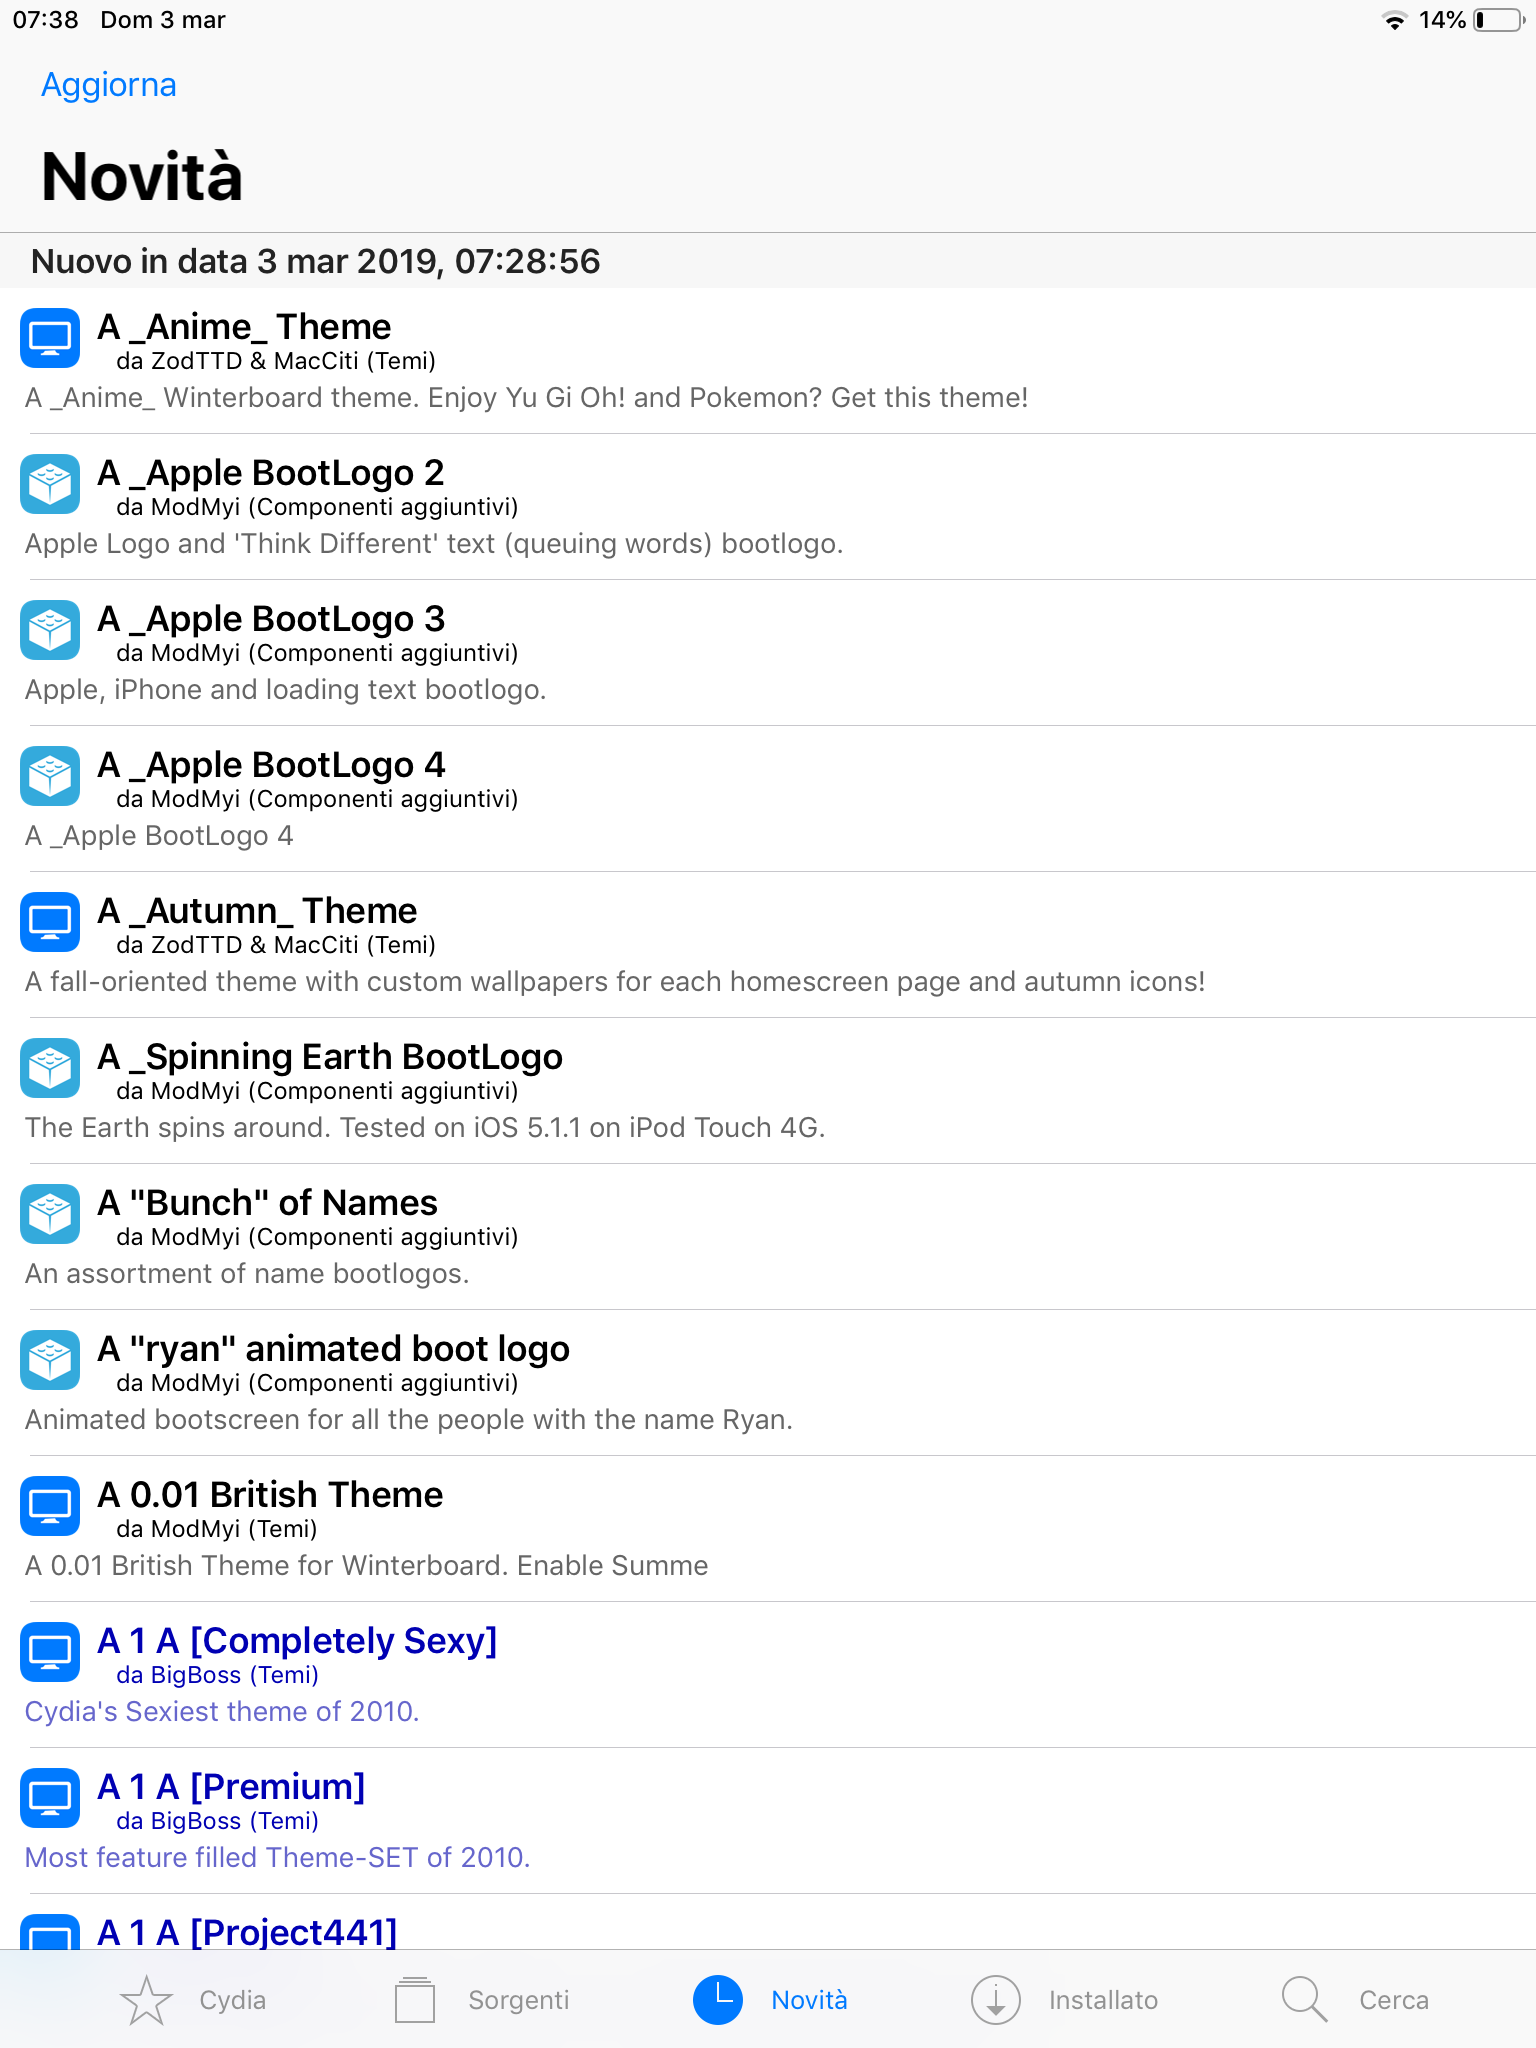
Infine, controlla periodicamente gli aggiornamenti aggiornando le sorgenti. Se ce ne saranno, verranno mostrati nella sezione Novità.
Fine
Adesso sei pronto a distruggere sperimentare con il tuo dispositivo.
Puoi trovare i miei social in fondo alla pagina, in caso tu voglia seguirmi o abbia bisogno di aiuto urgente. Se hai qualche domanda, ricorda che puoi sempre chiedere aiuto nel gruppo Jailbreak Italia.
Buon Jailbreak! Ivan
Introduction
Here it is a complete guide on how to Jailbreak from iOS 11 up to iOS 12.4. All the versions in between are jailbreakable, except for 12.3.x and some configurations. That because Ned Williamson’s exploit sock_puppet - previously patched by Apple on 12.3 and 12.3.1 - has been strangely unpatched without any explanation on 12.4. This guide is specific to just those iOS versions. All the version behind are jailbreakable, but the following versions still needs to be exploited. As for now, the Apple A12 devices (iPhone XS, XS Max, XR and iPad Pro 2018) are just partially exploitable due to some Apple hardening tehniques like PAC, or Pointer Autenthication. If you want to learn more, I’ll make a specific post in the future. But if you’re here for the mere guide, you’ll probably stick with that.
Requirements
In order to jailbreak you need very few but important requirements:
- An Apple iPhone (5S or later), iPad (Air/Mini 2 or successive) or iPod (6th gen or later)
- An iOS version higher than 11, but lower then 12.4 - it’s mandatory_ it’s not 12.3.x neither
- Internet access
- Time, patience and a bit of computer knowledge
Preparations
- First of all remeber that (even though it is already stable) this is a beta version, use it with caution or wait for the final version if you’re really unexpirienced
- Make sure that in Settings → General → iPhone Storage there are OTA updates (shown as iOS 12.x): in case there is one, delete it before starting with the jailbreaking process

- In orded to definitively block the OTA update install the tvOS profile clicking here. It will ask you for your passcode and to reboot. Once you reboot, the updates are gone until you remove the profile. If you go to the update section you will indeed see an error

- If you already used rootlessJB on iOS 12, uninstall it by pressing the “Uninstall” button within the tool
Download
There are two ways to install unc0ver. Installing that from your PC or just installing them via a 3rd party store. The easiest method is the second one, but I’ll show both.
Without PC
There are several 3rd party stores, but the most known are Ignition and TweakBox. I really prefer Ignition over TweakBox, so I’ll use it for this example. Visit the Ignition, choose between Web View or App Download. As for now, stick with Web View, you could download the app later. Go into the Jailbreak session and download the latest version of unc0ver jailbreak. It could be called unc0ver -new beta or just unc0ver. Download the latest one - as for the time I’m writing it’s -new beta.
Install it with the Get button, and click install at the popup that will open. Don’t open directly unc0ver, go to Settings → General → Profiles, click on the one under tvOS (it could have a different name from the screenshot) and then click Trust.

Now the app is verified and you can open it.
![]()
With PC
If you already downloaded unc0ver via Ignition, skip this step and go to the next one.
I’ll start saying that manually installing the IPA will imply that the app will have a 7 days verification, after that you have to resign it with your PC, except in case you own an Apple Developer account (which costs $99/year) or an AppBlade one. In that case the app will be signed to 365 days, but if you’re reading this guide I really doubt you are a developer.
By this way you will instead download the unsigned app and install it manually via a tool called Cydia Impactor, developed by saurik itself, the developer of Cydia. Download it from its website, choosing your OS build.
Also, download unc0ver from here. Pick the latest pre-release. It will show up in the assets section as an .ipa file (something like Undecimus-vX.X.X-bXX.ipa).
Once you’re done connect your iPhone to your PC/Mac via USB cable, open Impactor and grab the .ipa file into Impactor. It will ask you to put your Apple ID email and password. Don’t worry, those datas are sent just to Apple in order to sign the app with your Apple ID.
Once you’re done, go back to Settings → General → Profiles and Trust your own account. The app could now be run.
Jailbreaking
Whenever you open unc0ver go to the Settings tab and make sure that you have the default configurations. As for the time I’m writing, these are the default ones.

Ok, now go back to the home screen of unc0ver. You will see a giant button called Jailbreak. Once you’re ready, click it. Once you click it, you end up restarting or respringing: I’ll talk about it later.

Click it now. The device will run the exploit and if that’s successful it will reach the first stage, the “snapshot renaming”. Now, press OK and the device will restart.

It could happen that reached the step 2/38 the device could panic because the exploit fails and the device will automatically reboot. Don’t mind, that’s normal, you just have to retry.

Once again, open unc0ver and click the Jailbreak button once again. If everything goes well, you will reach the “bootstrap extraction” stage. Press OK and reboot again.

That should be the last time: press Jailbreak again. At a certain point the device will respring: the screen will go black and will dim, at the center of the screen there should be a rotating circle (as when the device shutdown). Wait for it to finish and you should finally see Cydia!
![]()
Now the jailbreak is activated, but remember that this is a semi-unthetered jailbreak. That means that whenever you turn off your device you will re-enter in jailed mode. But that’s not a big deal: open unc0ver, press the Jailbreak button and after a respring you will reactivate your jailbreak.
Remember to update even the unc0ver app itself from Ignition or download and resign the new IPA via Impactor in order to always have the most stable experience! Once updated, open the app and press the Re-Jailbreak button.

Setup Cydia
Now it’s time to set up Cydia. First of all open it up and you will see this welcome screen.

Go into the Sources tab on the bottom, and you will see this screen.

Those are the repositories, where all the tweaks are stored and distributed from. Most of the tweaks are free, but some are paid. DO NOT PIRATE THEM, for various reasons. First of all, because developers spend their time offering us these wonderful customizations which we would never have and supporting them paying some of their tweaks is the less we could do. Secondly, because pirated tweaks could lead to bootloops, forcing you to restoring your iDevice, losing both the jailbreak and all your data. Always download them from the official repo (usually they are BigBoss, Chariz or Dynastic). If you are not sure about the repo of the tweak you’re searching for, Google “name of your tweak here repo”. You’ll surely find it.
Whenever you Refresh the sources a red banner will appear. By doing that you’ll reload the index of every repo and if there are updates, they will show up. It’s usually better to update your tweaks in order to improve their stability. If any Essential update will show up, please perform a Complete update. Those packages are updated from the maintainer of your jailbreak and makes your jailbreak more stable.

But how to add a repo? That’s super easy. Most of the repos now have specific button in their website, prompting to add the repo, but it could also happen that you should manually add it. In that case press the Edit button on top-right, then Add and pasting the URL of the repo and finally Add source. In this case I’ll add http://tigisoftware.com/cydia, the repo of Filza. We’ll talk about it later.

If you want to delete a repo, simply press Edit and then remove it with the red button next to it.

Installing tweaks
Here comes the fun part: installing tweaks. Tweaks are packages which customize your system, by adding functionalities or even adding apps. In this example we’ll install a famous jailbroken app called Filza. It’s a file manager with root priviledges. If you are unexpirienced don’t use it, but it’s always good having it.
In Cydia, refresh the sources, then go to the Search tab and write your package name. There will be more than one result, in this case pick the 64bit version (since you are running unc0ver, you must be on 64bit hardware).

A popup window will show up. If you want to install something else Continue Queuing, otherwise just Confirm.

You’ll se a verbose output of what’s happening.

Once you’ll read Restart SpringBoard just press it. After a respring you’ll see your new tweaks or your new apps in action!

And now, indeed, you should see Filza installed.
![]()
If you want to remove a tweak you installed, go to the Installed tab, open the tweak you want to remove, click Edit and then Remove. Even in this case you can queue more actions.

As I said tweaks can also customize various aspects of iOS, in this case you can see the settings before and after installing the tweak System Info.


Lastly, periodically check for updates by refreshing the sources. If there are some updates, they will show up in the Changes section.

The End
You are now ready to mess play with your device.
You can find my socials in the footer of this web page, in case you want to follow me or need urgent help.
Happy Jailbreaking! Ivan